Drifting with WLtoys 284131 Mini RC-Car

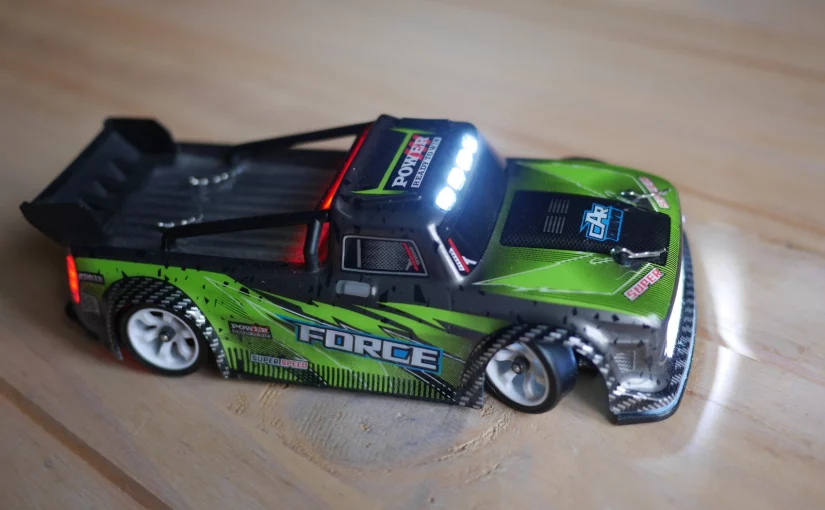
In this post I will discuss how to convert the WLToys 284131 (new K989) into a drift-car.

Table of Contents

Overview

This car is the latest iteration of the K989 (rally car) platform, of which there is also variant specifically for drifting, namely the K969 porsche.
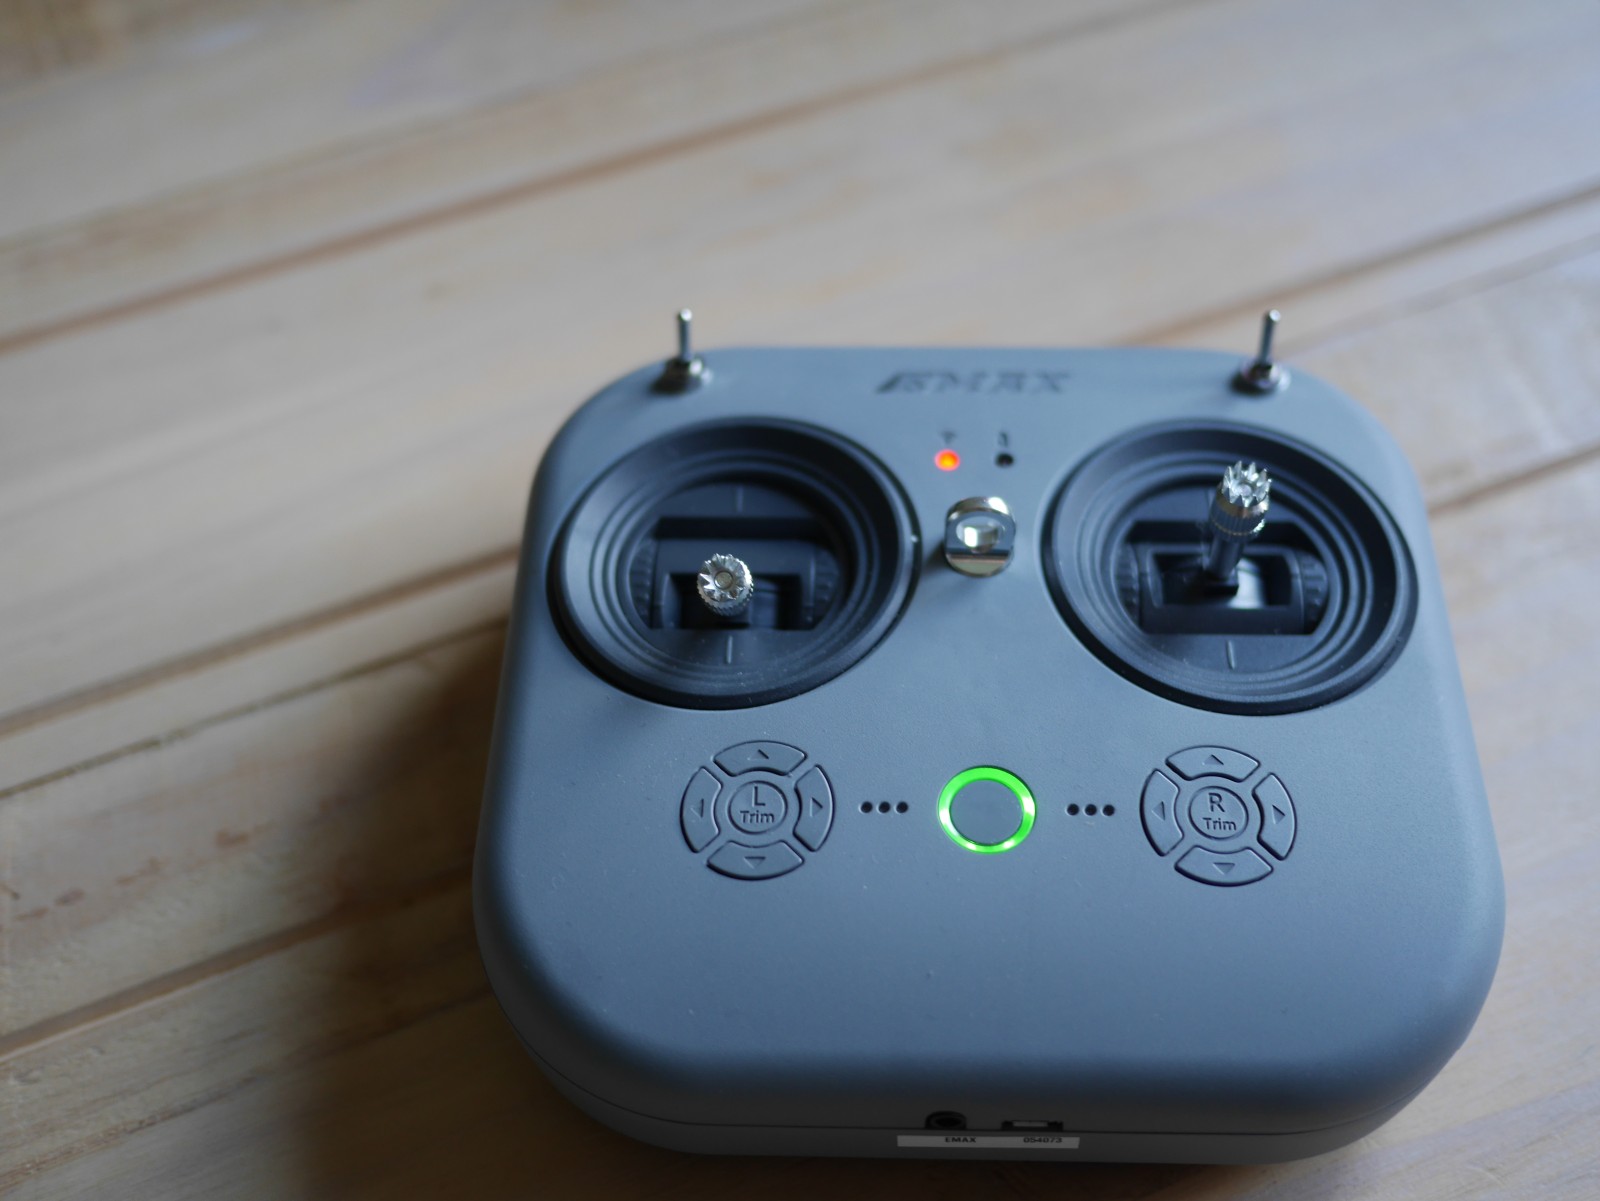
However you still should go with the more recent 284131 as it comes with an upgraded radio that has no dead-zone when compared to the previous one. This will give you better control of the car.
Additionally, the 284131 now has metal ball-heads on the shocks and on the servo horn which allow those parts to move more smoothly.
Then, it comes with a preinstalled light-kit, that helps guessing the direction of the car from far away.
Also, some adjustments were made compared to the K989, to cope with the heat generated by the motor; the transmitter module was rotated by 90° to move it away from the motor and the motor pinion is now all brass, making it more heat resistant.

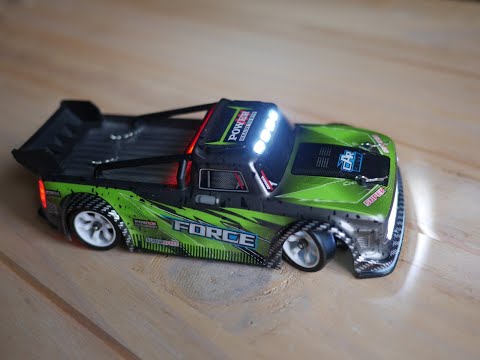
The only downside is really the ugly hoonitruck chassis, but at least this will be authentic after we do the drift-conversion.

The included battery lasts for about 20min and can be fully charged in about 25min, if your USB charger can deliver 2.5W. If you use an USB port older than 3.0 charging will take much longer.
Note, that even if you get a kit with multiple batteries you should take a break of about 10min between runs to allow the motor to cool down. Otherwise it will break much faster.

Drift conversion

Out of the box, the 284131 is tuned for fast acceleration and handling at high speed

  • The differentials are so stiff, that you can consider them locked. This gives you best acceleration
  • The turning-radius is limited which prevents flipping over at high speed
  • The stiff shocks reduce body-lean, additionally lowering the risk of flipping
  • Traction is mainly achieved by the grippy rubber-tires

For drifting however, we generally run at lower speed and need precise handling there. This basically means undoing all of the choices listed above.

Drifting with the changes suggested in this post

Some of the changes are easy to do, others are more involved

  • Replace the rubber-tires by some hard-plastic ones. We must get rid of some grip to be able to slide sideways. I suggest just going with the K969 tires, that only cost about 5€.
  • Remove the spacers from both front and back suspension to make it soft. This will increase forward grip while drifting.
  • Use the upper hole on the servo-horn to get a tighter turning-radius. Unfortunately the stock ball-head does not fit in the upper hole and you cannot get the old servo-horn any more. I suggest using the “MINI-Q 3.5mm ball-head” instead. It will set you off by about 3€.
  • Most crucially, we need locked differentials in the back and opened differentials in the front. The locked differential will cause the back to lose traction and drift. Contrary, the open differential will keep traction and allow us to control the drift.
    This is a difference to the K969, where both differentials are locked and the car merely slides (like on ice) instead of drifting.

The good news is that the stock diffs are so stiff that you can just keep them in the back and they will behave as if they were locked.

Making differentials work

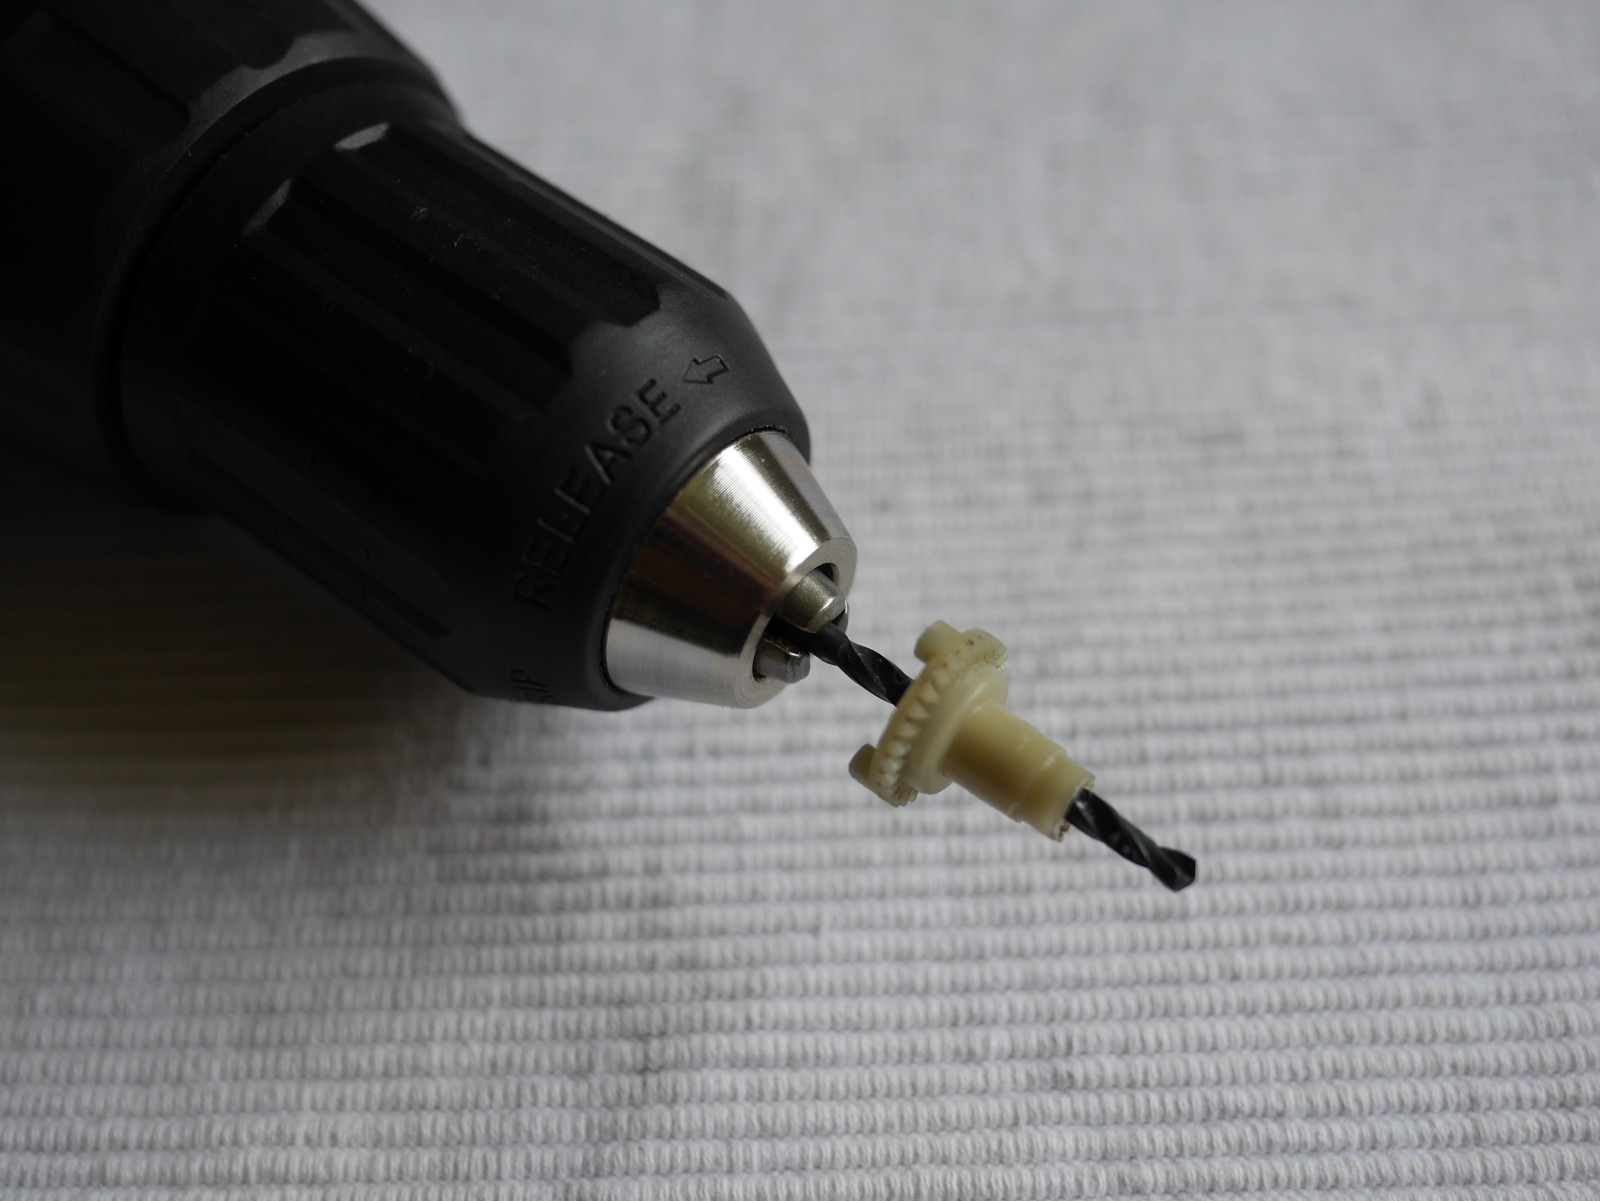
The bad news is that getting actually working (i.e. open) differentials is not that easy. The cheapest option is to dissemble the stock one and loose it up. For this, I recommend using a (3mm) drill to widen the diff housing. If you try to use sandpaper on the diff arms, you will probably not make it uniform enough to run smoothly.


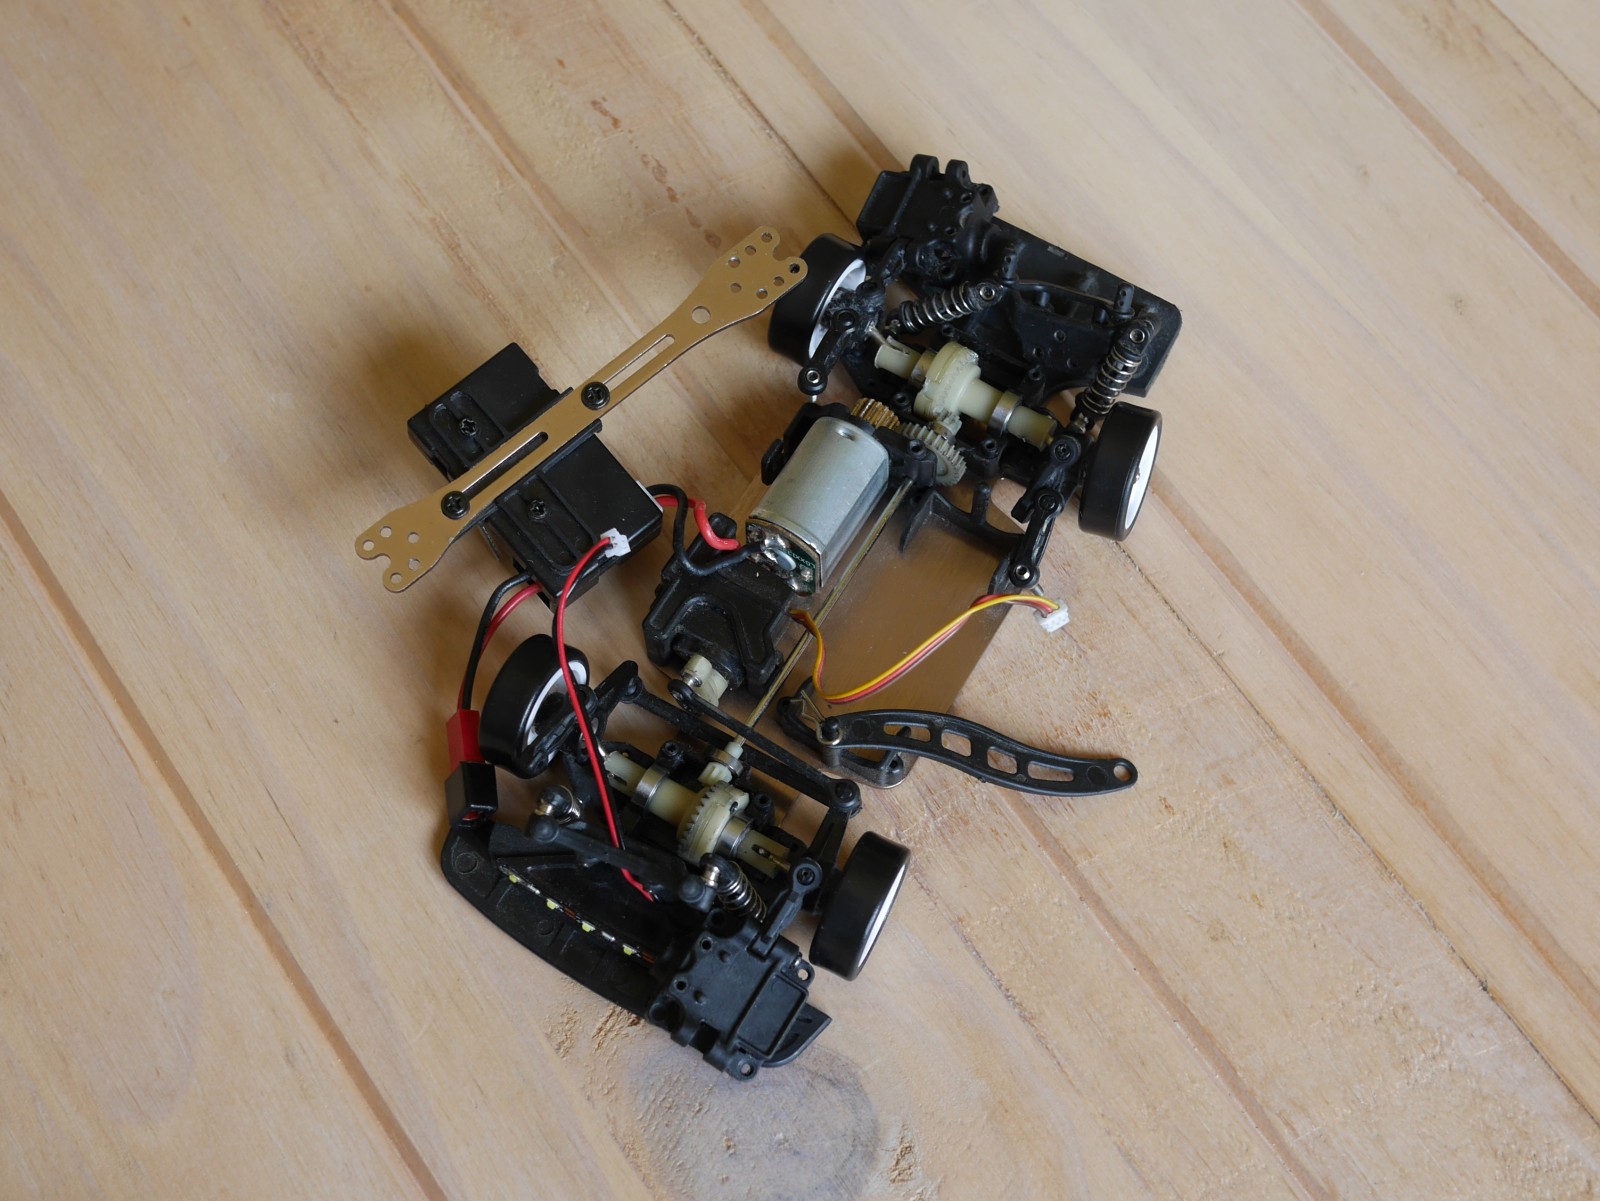
One thing to watch out when adjusting the diff is that both diff-arms have the same resistance. You can hold down the center and rotate each arm to test this by hand. Also, when assembled, the car should accelerate in a straight line.

If you dont want to go through the hassle, you can also just buy the Mini-Z MD005 diff (15€) and a pair of extended 11mm swing-shafts (10€) to compensate for the shorter diff arms.

If you want the best diff possible, you can go for the Mini-Z MDW018 ball diff or the MDW017 one way diff. Especially the latter gives you even better controls for drifting. However each of those costs as much as the whole 284131 RTR kit.

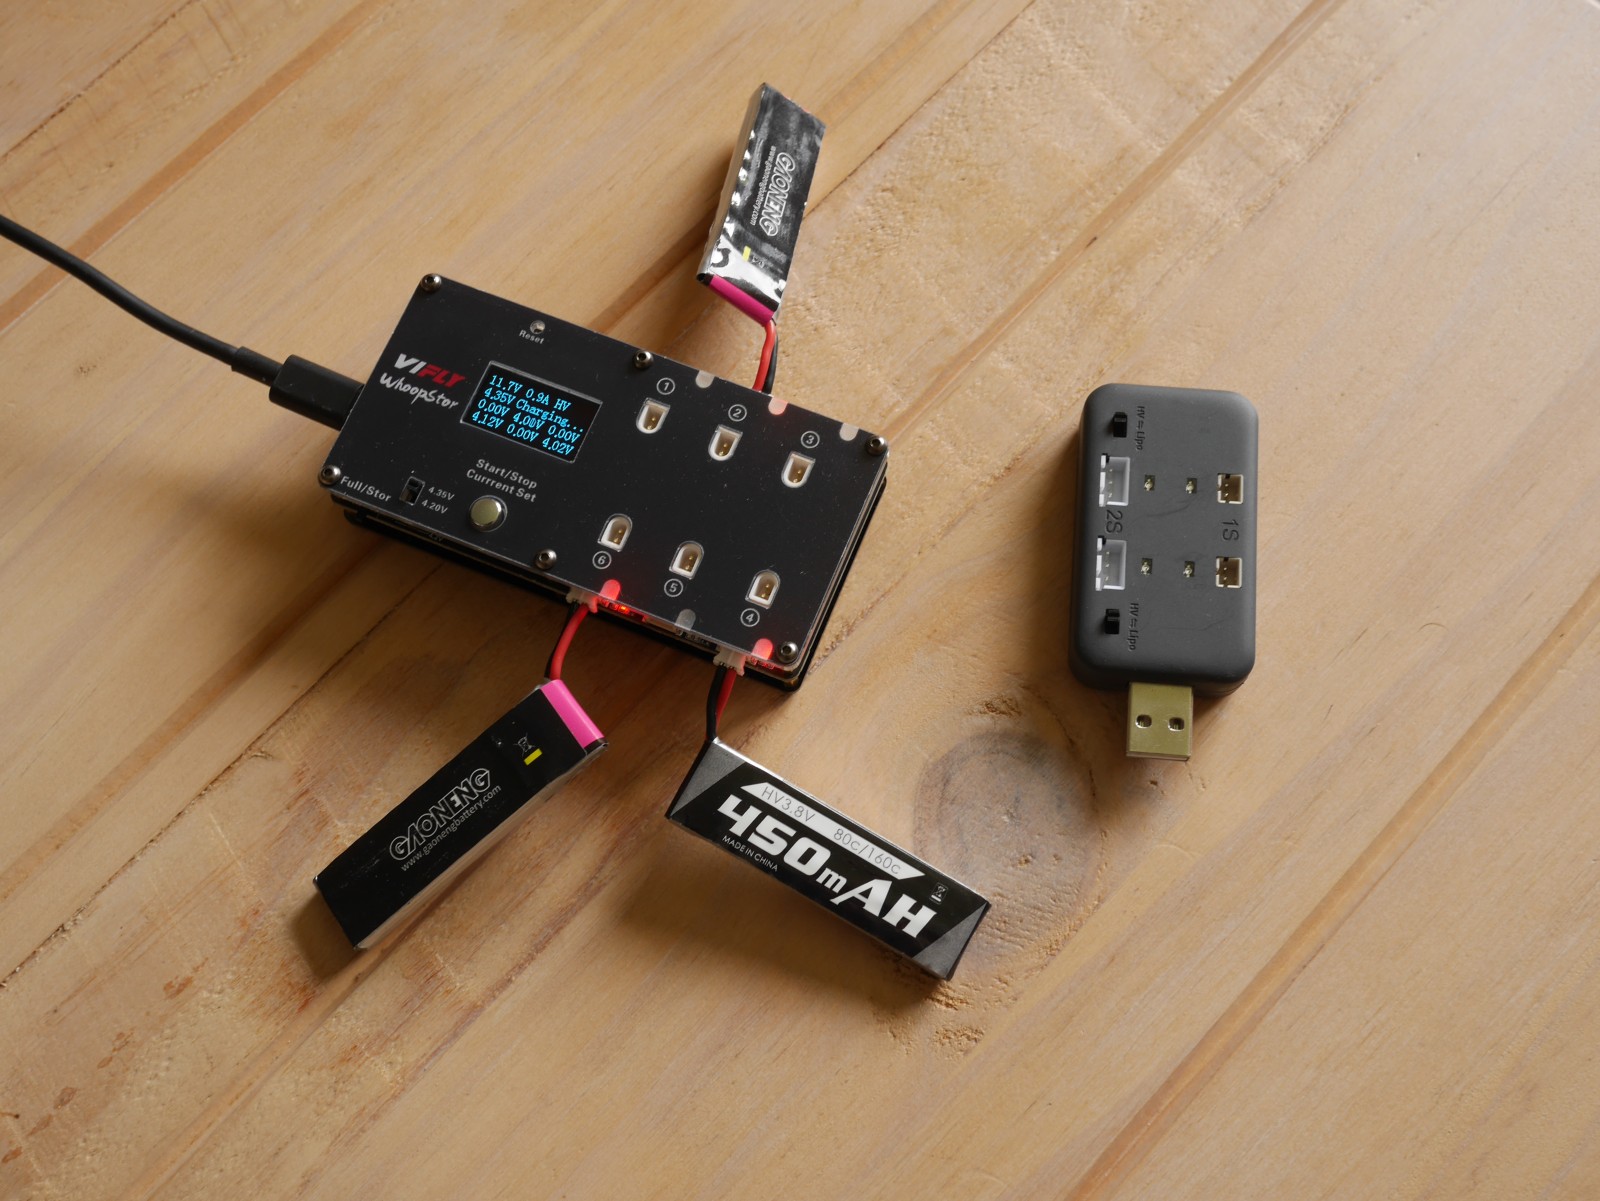
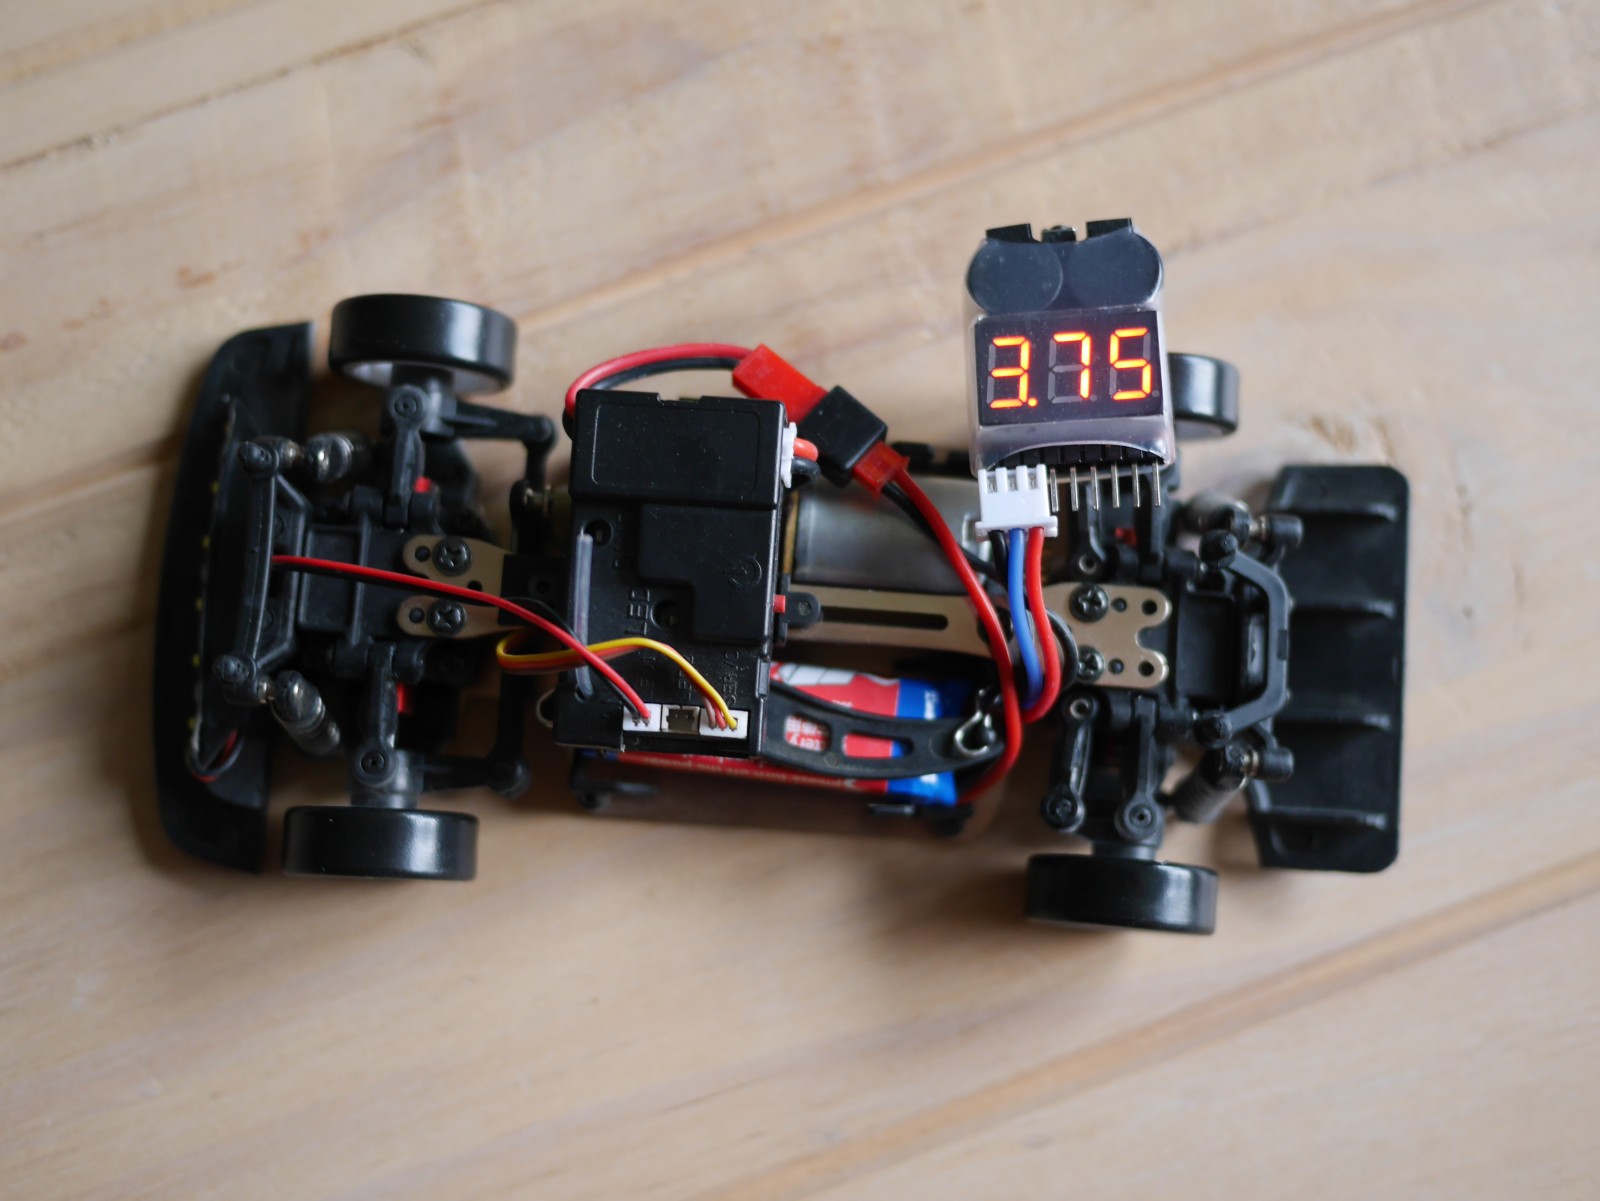
Lipo tester for storing the batteries

When ordering stuff anyway, make sure to also get a Lipo tester. Those cost about 2€ and allow monitoring the charge of the battery. This is useful when you want to take a break for a few days. In this case the battery should be at 3.8V per cell. Otherwise you risk permanently damaging the battery. To get there, you can keep the tester connected to the white-plug while driving and set the beeper to that voltage. If the beeper is too loud, you can dampen it by putting some cotton wool into the housing.

Bad upgrades

There are also some bad upgrades you can buy. Those either are wither unnecessary or actually worse than the stock parts. Particularly, this concerns the metal replacement parts. Metal parts are harder to manufacture at high precision, so you might actually degrade the performance by installing them. Also, they make the car heavier and thus decrease acceleration.

Generally, I would say that you do not need any of them for drifting. However, if you do touring and any of the plastic parts break, you might consider replacing those with a metal equivalent.

All metal ball differentials

Stock diff, good pinion – Metal diff, eaten pinion

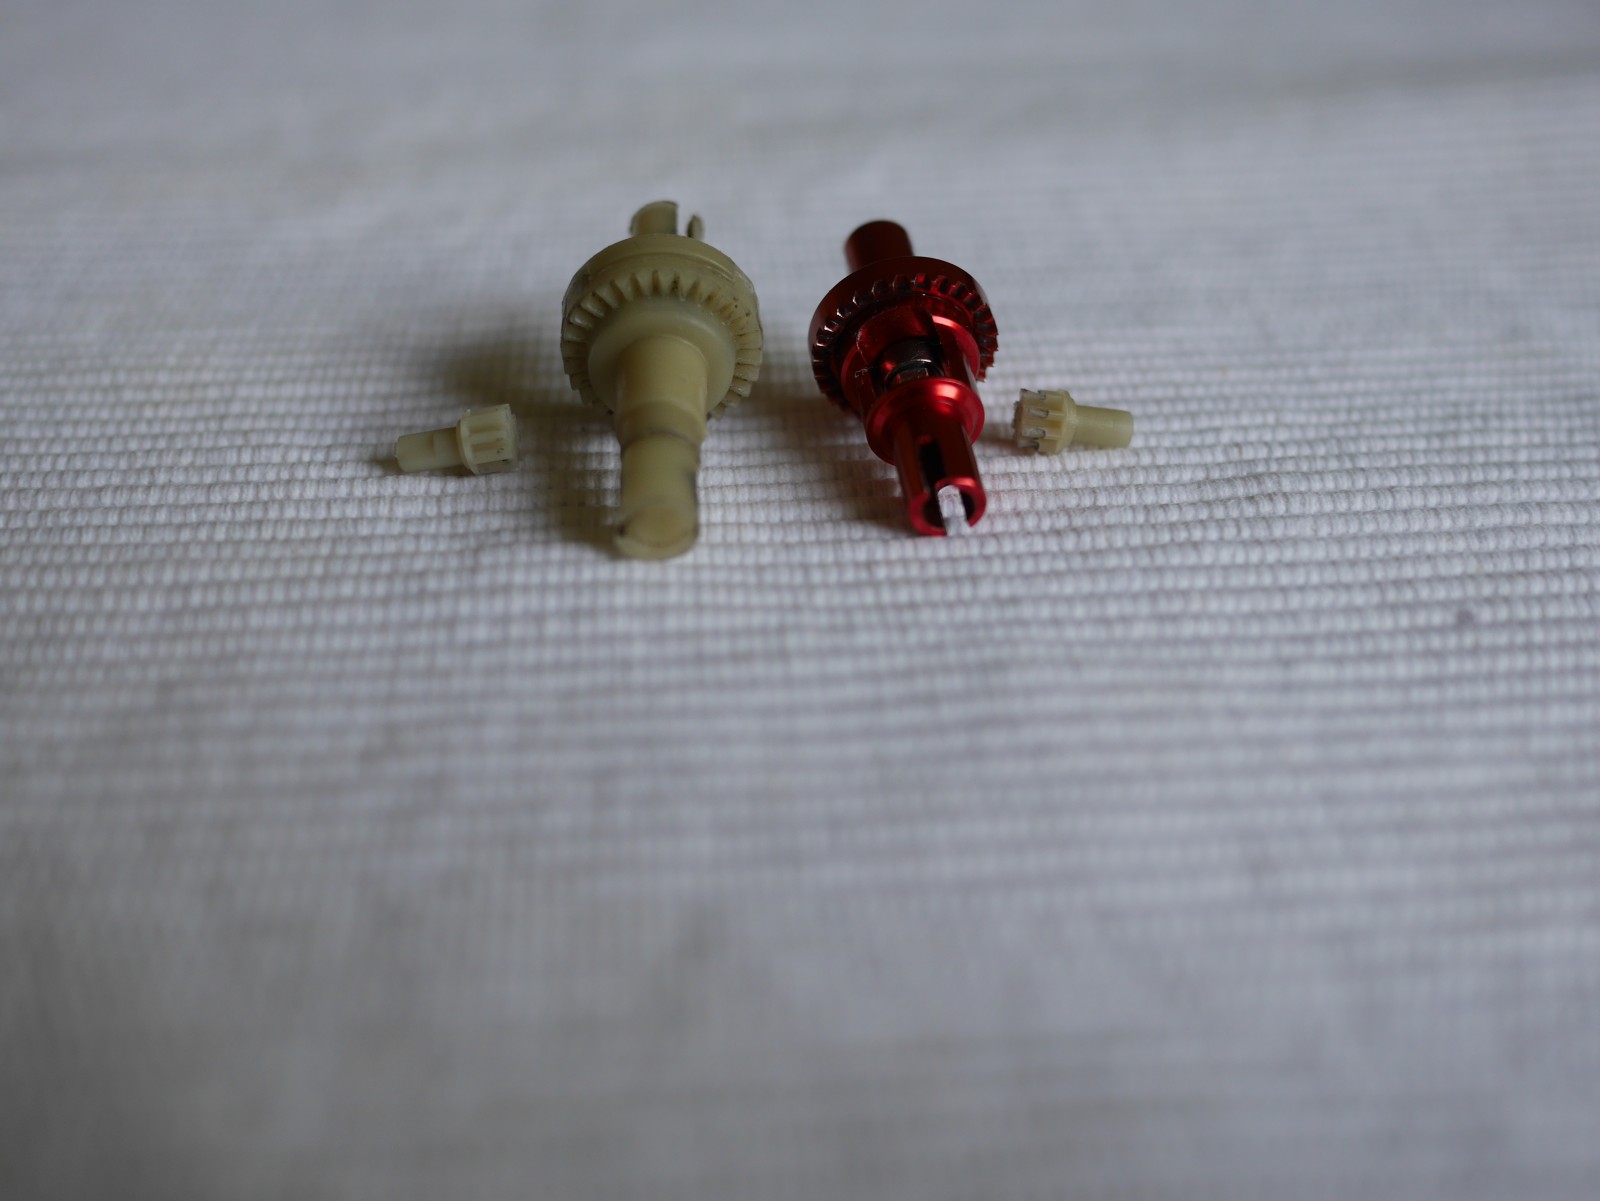
You can get a all-metal ball diff on Aliexpress for about 8€. After some run-in those work very well and are smoother than what you get by fixing the stock ones.
Unfortunately those all-metal cogs (which are also shorter then stock) will eat-up the plastic center-shaft pinion in no time as we have high traction on the front wheels when drifting.

RunCam Thumb on the Tinyhawk II Freestyle

In this post I will show you how you can shoot some cinematic footage with your TH II Freestyle by mounting a RunCam Thumb on top. This cam only weights 13g including the mount and thus does not impact the flight-time and performance much.
Also, it is easy to remove it again in case you want the full performance back.

The procedure is quite simple as you only need to solder two wires and can use the stock parts for the rest. You need the package that includes the 3D-printed mount though.

Note that there is a new “naked” RunCam Thumb variant now, which only weights 6.6g that you can use to further reduce the weight.

Mounting

First, we need to solder-on the power-connector. For this, remove the top plate so you get an easier access to the pins.

We will use the 5V connection coming from the controller-board, which also powers the VTX. The images below show the result and the board schematic for an overview.

To keep the power-cable away from the rotors, you should route it behind the VTX antenna.

The camera-mount itself, can be attached by using the screws that hold the top plate – they are long enough to keep both in place.
Note, that I shifted the mount to the left to keep the center of mass and the lens closer to the middle of the quad.

Gyroflow Results

There are some reports about issues when using Gyroflow with the RunCam Thumb recorded data.

Below are the results of the v2.1.0 firmware with Gyroflow v1.1. I disabled the zoom and increased the FOV to include the invalid regions so you can see the gyro compensation in action

You can see how Gyroflow removed the radial distortion and keeps the image-center steady by shifting the frame based on the gyro data. So the gyro based stabilization definitely works.

Getting into FPV with the Tinyhawk III RTF Kit

After being absent from the RC world for some time, I recently took another look at the advances FPV drones have made. The last time, I was mainly into RC helicopters as FPV flight seemed a fiddly and expensive thing to do.

But progress did not stop and nowadays there are multiple options to get a complete FPV kit for 200-300€. I picked the Tinyhawk III RTF kit and here are some impressions of using it and how it compares to alternatives.

Table of Contents

Drone: Tinyhawk III

Coming from RC helicopters it is amazing how durable the drone is. I literally learned flying using stock parts only and keep on flying them as of today.

When getting used to maneuver the drone, I found the default tune in the 3 flight modes Angle, Horizon and Air quite helpful.
In Angle Mode the drone tilt is limited to about 20° so you wont get too fast and you can focus on throttle and momentum control while flying inside.
Switching to Horizon mode is a nice intermediate step. The Angle is no longer limited so you can go fast. This requires you to actively break like in Air mode. However, as the drone still auto levels you can safely fly inside.
After flying Horizon mode inside, going outside and using Air mode was surprisingly easy for me.

In total it took me about 2 Weeks going from bumping into the ceiling and floor on Angle mode to confidently flying Air mode outside.

The only casualty is a small dent in the lower right prop, which I did not bother switching so far.

Goggles: Transporter 2

The part that made me choose this particular RTF Kit are the Googles as they are very well though out.


First, you can adjust the focal-length in 3 steps. This is useful if you are near-sighted or if you want to adjust the FOV from immersive to a tunnel view.

Then, the display resolution of 800×480 px is a good fit for analog FPV, where video is transmitted via NTSC (720×480 px). The internal DVR records precisely this resolution when set to D1 mode. There is also a HD mode, but you will not get anything out of it as the incoming image is the bottleneck.
Speaking of which; the RunCam Nano 4 on the Tinyhawk has a resolution of 800 TVL (800×600 px) which again fits in nicely.

Note that the DVR recording is quite bad as it saves white frames as soon as there is some noise in the image, but it gets the job done if you want to review your flight or need to find the drone.

Ultimately, the detachable display unit can be re-purposed once you decide to upgrade to better Goggles – even though I think one can stick with the Transporter 2 Goggles for a while.

One upgrade you can do straight away though, is replacing the linear antennas by a set of polarized ones. This will reduce interference due to reflected signals in closed spaces. A possible choice here are a pair of Foxeer Lollipops that you can get for about 18€.

Battery and Charger

The weakest part is probably the battery & charger. For starters it only comes with one battery which the bundled charger takes about 90 min to charge (likely at 0.3A). Also, you can only charge two batteries at a time.

Fortunately the required 450mAh HV batteries are quite cheap. If you order a pack of 5 from China you can get them for about 4.5€ per piece. You should do that.

As for upgrading to a better charger, the VIFLY WhoopStor for about 33€ is an affordable option. It can charge up to 6 batteries at up to 0.9A. This allows charging the 450mAh batteries at 2C speeding up charging by 3x compared to the bundled charger. On top, it supports checking the battery voltage as well as storage-charging for when you need some days off from flying.
The only thing it lacks compared to a “big” charger is resistance measurement of the batteries.

WhoopStor (left) and bundled charger (right)

Alternatively, you can get a serious charger, like the ISDT 608AC straight away. But that alone is about 65€ and needs an a serial, balanced charging cable that is about 5€ on top. With this setup you will have to always charge exactly 4 batteries at a time.
Having that charger makes moving to actual 4S in the long run easy though.

Remote: E8 Transmitter

The Transmitter only supports the FrSky D8 and D16 protocols – although there is really no reason to switch it to D16 as there are only 8 channels on the remote and telemetry is shown in your video signal anyway.

More importantly, it is usable as Joystick when connected to the PC, where each channel is reported as a separate axis – so it will work fine with all FPV Simulators.

Also notable: the radio uses a standard 18650 battery that is compatible with other radios and is worth about 10€.

It would have been nice to have a module bay to be able to attach a ELRS module – however none of the comparable RTF kits in the price range offer this. There cost needs to be cut somewhere I guess.

Speaking of ELRS; you are not really missing out on that with a tinywhoop. D8 still allows you to go for about 1km. The limiting factor will be more likely the tiny RX antenna on the drone and the VTX power. Also, even if you could manage to get that far with the Tinyhawk, retrieving it if it something goes wrong will be a PITA. ELRS really only starts making sense with GPS powered drones, where you got return to home as a failsafe.

I keep hearing that one should go ELRS from the start or you will end up swapping your RX modules on the drones if you only decide to go ELRS later. This is BS as you can just continue using the old remote for the old drones or get a remote that supports both ELRS and D8, like e.g. the Commando 8.

Alternatives

The following alternative Kits that are in a similar price-range and are all brushless, as brushed motors are really not worth the money you save.

EMAX EZ Pilot Pro

This saves you 60$, while you get the same Radio and almost the same Goggles and Drone.
The Goggles have no DVR though and you will not get the nice carrying case.

BETAFPV Cetus Pro

This is also about 60$ cheaper than the Tinyhawk 3. However, the Goggles are way worse: no DVR, fixed focal-length and fixed screen.

What you get here is an easier Angle mode, with altitude-hold and hover-stabilization. The flipside of it is that it is not compatible with the betaflight configurator which is the standard when it comes to tuning the drone – in case you wanted to e.g. configure the OSD content.

Additionally, the drone uses the more modern BT2.0 connector/ batteries. However, the 1S setup does not draw enough Amps for this to make an actual difference. Also, as it is only used on BETAFPV Drones there is less choice of batteries and they are currently more expensive. Then there is the even more modern GNB27 connector at the horizon..
If you prefer Apple products, the above will probably not bother you though.

GEPRC TinyGo

This is a 2S drone, so you get more power, which makes it better outdoors but worse indoors.
Much worse radio; requires 4xAA batteries, has worse gimbals and most importantly does not work as a Joystick when connected to a PC.
Worse Goggles; there is a DVR, but the focal-length is fixed as is the screen.

The deal-breaker is the used FHSS (Futaba) protocol though. This is virtually not used by any other Drone on the market, so you cannot just get another BNF drone to fly with the same radio. And if you upgrade the Radio you will have to go for a multi-protocol version to still be able to fly the drone instead of being able to get the cheaper D8/ D16 only variant.

Where to go next

The following BNF drones are compatible with the Radio and also run on the 450mAh PH2 batteries that you likely piled up while flying.

Happymodel Mobula 7 1S HD

The drone is very similar to the Tinyhawk III, however it comes with the RunCam Split 3 lite. On top of FPV streaming, it can simultaneously record the video as 1080p @ 60fps to a microSD card. The drone provides gyro logging too, so you can further stabilize the results with gyroflow at the PC.
So if you want to produce nicer videos, this is a good upgrade.

Notably, the drone comes with a serial, balanced charging board as discussed in the charger section above.

EMAX Tinyhawk II Freestyle

This is the drone to upgrade to if you prefer to fly outdoors. It is larger and heavier than the Tinyhawk III. Also it is more powerful as it flies on 2S. The latter is realized using the battery connector, so you still can use the 1S batteries.

If you like tinkering, you can also get nicer videos out of it by packing a RunCam Thumb on top. The drone is powerful enough to carry to extra ~12g of weight.
Note, that this requires soldering-on a power connector for the camera to the flight-controller as the cam has no internal power-supply.

Usage with Ubuntu

If you want to use the betaflight-configurator on Ubuntu, make sure that you have permissions to access the USB serial device by being in the dialout group as:

sudo usermod -a -G dialout $USER

The Remote is just plug-and-play (as a USB HID Gamepad) and is correctly recognized by e.g. FPV.SkyDive, which itself nicely runs on Linux through Steam/ Proton.

BlueJay ESC firmware

People online ™ are telling that one can get increased flight-time by replacing the ESC Firmware by BlueJay and enabling the bidirectional DShot protocol.

However, the TH III already comes with the JESC 2.3 48Khz ESC firmware, where the 48Khz part is what matters for flight-time. Therefore, you will not get any benefit here.

Actually, my flight-time decreased by 15% (from 4:44 min to 4:02 min) when switching to bluejay & bidirectional DSHOT300.

Youtube Channels to follow

Unfortunately there are a lot of youtube channels with a wide reach that have no clue what they are talking about. Dudes sitting in a basement that get a commission when something is sold is not a good combination. Here are some channels that are actually good

Flying RC helicopters in 3D

In case you are wondering what is so fascinating about flying RC helicopters – maybe you just got bored flying your own 4 channel helicopter – it is 3D flight. One might say that basically all helicopters are flying in 3D (up/ down, left/ right, forward/ backward), but 3D in this context means flying 3D pirouettes like loops and rolls which is not possible with an ordinary coaxial helicopter. See the following video to get an idea of what I am talking about

Continue reading Flying RC helicopters in 3D

Devention Theme for Deviation

In case you got confused by the title. This post is about a theme for the open source firmware Deviation to make it look like the original Walkera Devention Firmware.

Although the default theme of Deviation is more readable, you might have got used to the Devention icons, so this theme eases the transition.

Open issues:

  • the standard TX signal icons uses 8 bars, but the Devention one only displays 6. So you lose some information if you use the included “txpower.bmp”
  • The Devention icons are not quite as telling as the original ones, and Deviation unfortunately does not display any labels below the icons.

Note that this theme is based on the artwork included in the Walkera Devo 12S Firmware package. I assume the usage of this firmware is not restricted by Walkera copyright as not stated otherwise on their webpage. But obviously the CC-license of my website does not apply to this work.

Flying the Nine Eagles Solo Pro 125

If you are considering getting into 3D flybarless helicopters, one of your choices is Nine Eagles (NE) Solo Pro 125 (SP125) helicopter. As Nine Eagles is a quite prominent brand and the price of about 150€ RTF is affordable, this once is certainly worth considering. Unfortunately there is very little information on the Internet regarding reviews and flying experiences. So this is what the following text intends to change.

Continue reading Flying the Nine Eagles Solo Pro 125

Getting into RC Helicopters

Everything started when I got myself a coaxial RC helicopter for Christmas. I was playing with the idea for quite some time, and the moment seemed perfect to waste some money. Since then I have learned quite a lot about how helicopters work an by now I have moved on to a more capable helicopter. Unfortunately it is also more expensive to fly.. This post shall explain some general topics about RC helicopters which are useful if you are also considering getting a RC helicopter yourself. One can already get a small indoor RC helicopter for about 30€, but most likely you will get bored flying it after a few days. If you want to have something that lasts longer, there are some things you should consider, which we will discuss next.

Continue reading Getting into RC Helicopters