The specs are pretty common for a mouse you get today, so lets start with the special features:
There are side buttons, which I find pretty handy for navigating front/ back in the browser or a file manager
It can be paired with up to 3 devices at the same time, which makes it easy to use with your PC, Laptop and Tablet
It supports both Bluetooth LE and the Logitech Wireless Receiver
It is powered by a single, replaceable AA battery
Especially the last two points make this seem to be future-proof product that you can use for a long time.
Logitech is currently replacing their Wireless Receiver dongles by Logitech Bolt, so in the near future the Wireless Receivers will go away. But thanks to the Bluetooth support you will still be able to use the mouse without having to occupy a USB port just for using it.
Then, using standard AA batteries means that you just use some nice rechargeable ones. This means that you will never have to wait for the mouse to charge and that the mouse can out-live the battery. As you are probably aware from using your phone, rechargeable batteries wear-out over time until the device cannot be properly used any more.
So we finally got a mouse for the years to come? Well..
Built-in obsolescence
Unfortunately, Logitech made some design decision that drastically shorten the life-span of the device, even though they must have known better.
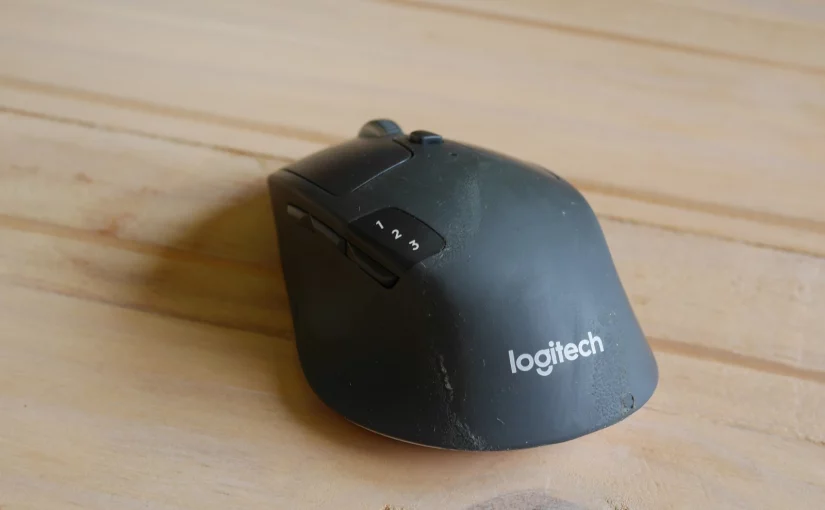
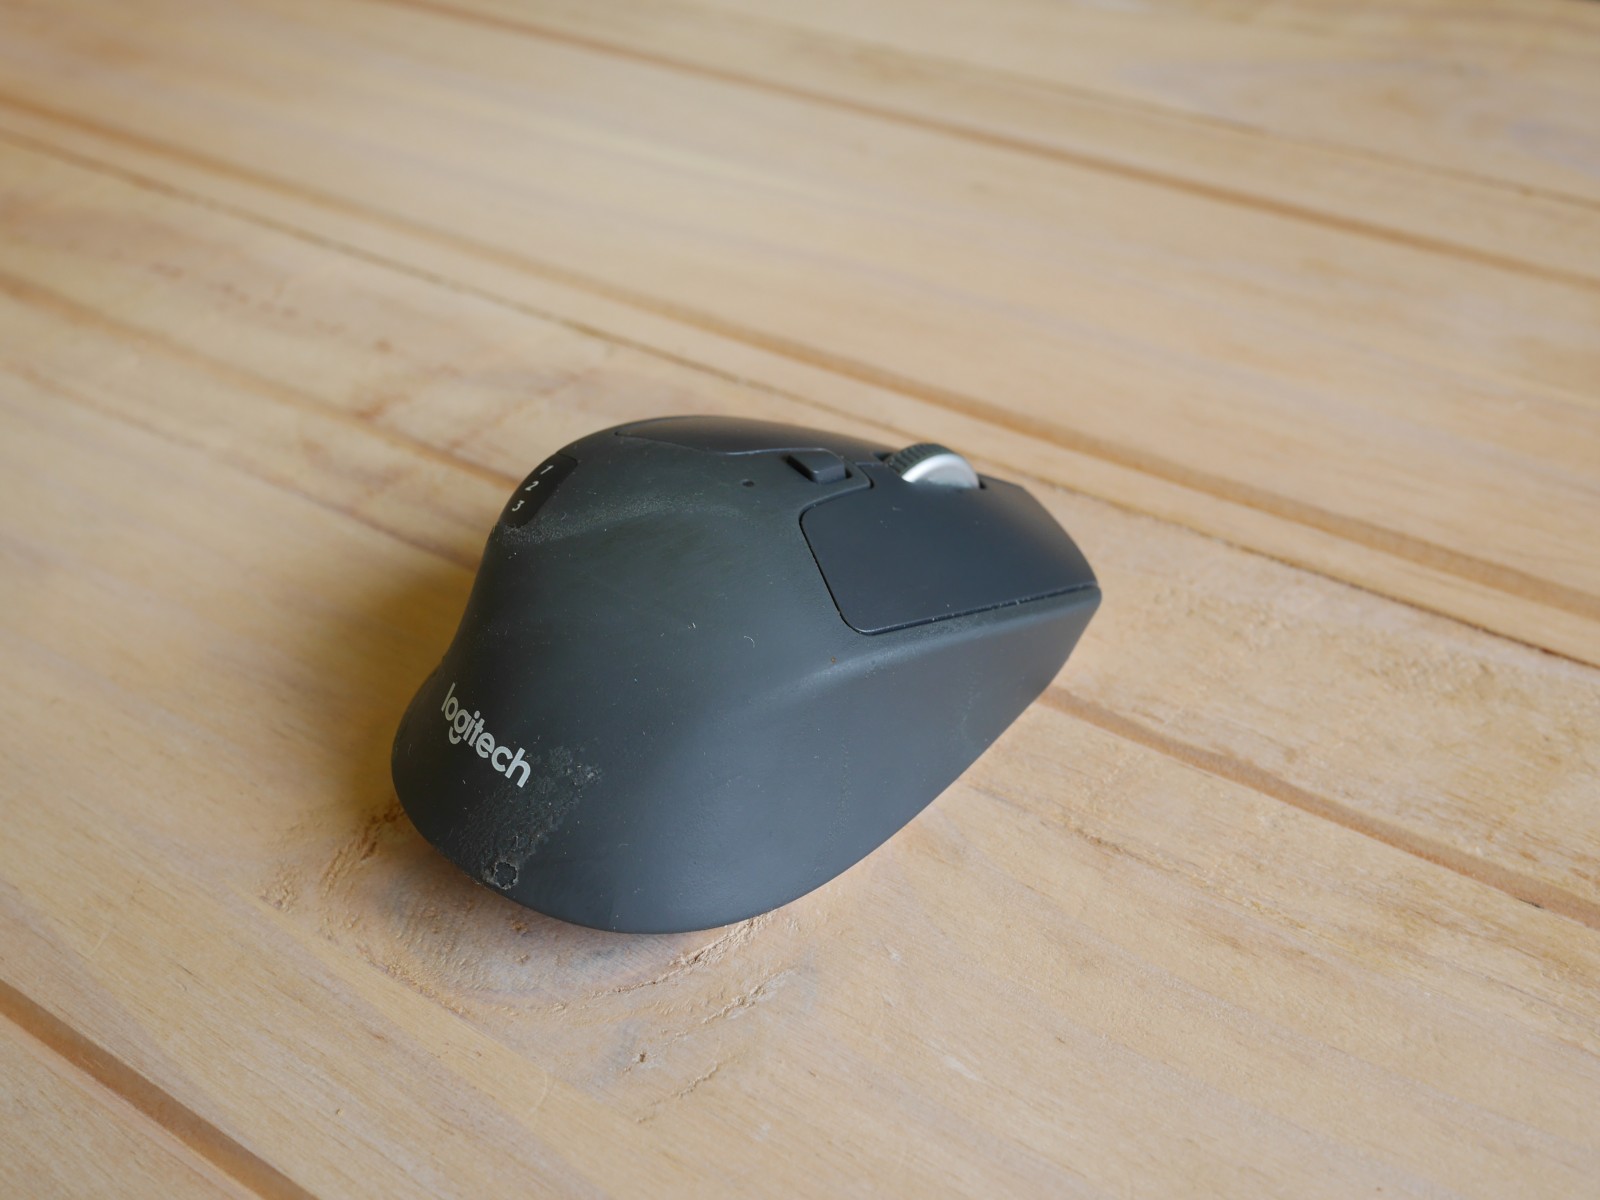
Rubber coating
The most obvious one is likely the rubber coating of the mouse.
Note how the plastic buttons look still perfectly fine in comparison
I took the images for this post after cleaning the mouse. So the dirt you see there is not the skin from my greasy hands, but rather said rubber coating disintegrating. This is caused by your sweat which is slightly acidic and thus takes hold of the rubber. There is a reason that Gamepads do not have such coating, even though having good grip is even more important there. Also, the way the coating is used here, all it does is making the mouse look greasy after some time.
Bad switches
The less obvious issue are the used switches i.e. the things that perform the clicks. Did you ever notice that after some time your mouse does incorrect double clicks or releases the click while drag and dropping on its own? Well, that means the switch starts wearing out.
The mouse uses OMRON D2FC-F-7N micro-switches in a cheap variant that is only rated for 10 million clicks (10M). While this sounds a lot, it yields to 6850 clicks/ per day for 4 years, which is not all that much if you think about playing a shooter or using photoshop. The crazy part is that going for the 20M rated variant (2x the durability) only costs 50 ct more (pack of 5 on amazon). This would make the mouse merely 1€ more expensive – probably way less even as Logitech can negotiate bulk discounts on these things. Given that the mouse is priced at 50€, I do not think we can pass this off as cost optimization. As a comparison; the similarly priced Keychron M2 Mouse uses 80M switches.
Note, that even more expensive Logitech Mice, like the MX Master have the rubber coating issue and use the same cheap 10M rated switches.
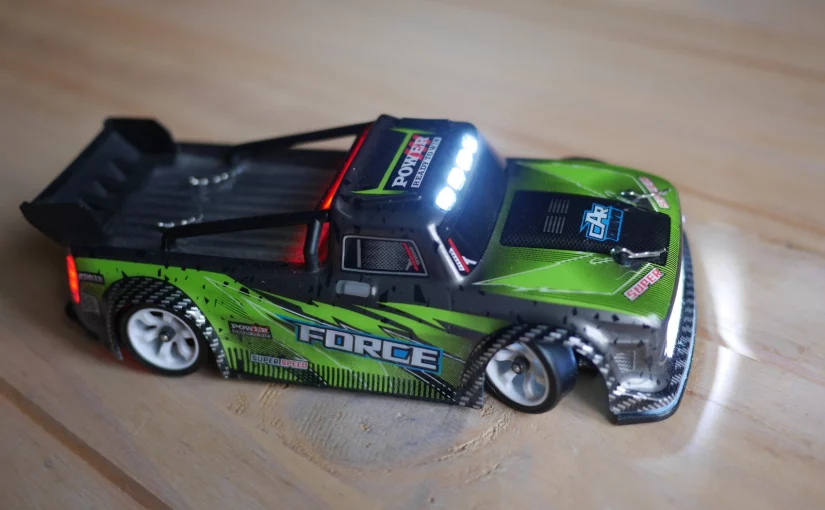
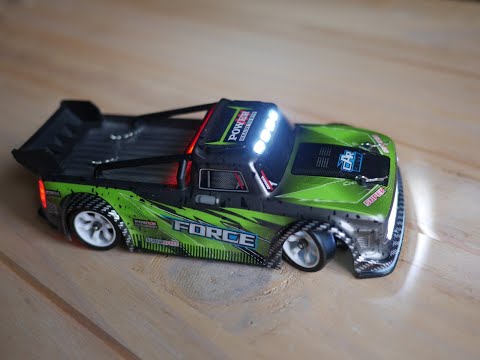
This car is the latest iteration of the K989 (rally car) platform, of which there is also variant specifically for drifting, namely the K969 porsche. However you still should go with the more recent 284131 as it comes with an upgraded radio that has no dead-zone when compared to the previous one. This will give you better control of the car. Additionally, the 284131 now has metal ball-heads on the shocks and on the servo horn which allow those parts to move more smoothly. Then, it comes with a preinstalled light-kit, that helps guessing the direction of the car from far away. Also, some adjustments were made compared to the K989, to cope with the heat generated by the motor; the transmitter module was rotated by 90° to move it away from the motor and the motor pinion is now all brass, making it more heat resistant.
The only downside is really the ugly hoonitruck chassis, but at least this will be authentic after we do the drift-conversion.
The included battery lasts for about 20min and can be fully charged in about 25min, if your USB charger can deliver 2.5W. If you use an USB port older than 3.0 charging will take much longer. Note, that even if you get a kit with multiple batteries you should take a break of about 10min between runs to allow the motor to cool down. Otherwise it will break much faster.
Drift conversion
Out of the box, the 284131 is tuned for fast acceleration and handling at high speed
The differentials are so stiff, that you can consider them locked. This gives you best acceleration
The turning-radius is limited which prevents flipping over at high speed
The stiff shocks reduce body-lean, additionally lowering the risk of flipping
Traction is mainly achieved by the grippy rubber-tires
For drifting however, we generally run at lower speed and need precise handling there. This basically means undoing all of the choices listed above.
Drifting with the changes suggested in this post
Some of the changes are easy to do, others are more involved
Replace the rubber-tires by some hard-plastic ones. We must get rid of some grip to be able to slide sideways. I suggest just going with the K969 tires, that only cost about 5€.
Remove the spacers from both front and back suspension to make it soft. This will increase forward grip while drifting.
Use the upper hole on the servo-horn to get a tighter turning-radius. Unfortunately the stock ball-head does not fit in the upper hole and you cannot get the old servo-horn any more. I suggest using the “MINI-Q 3.5mm ball-head” instead. It will set you off by about 3€.
Most crucially, we need locked differentials in the back and opened differentials in the front. The locked differential will cause the back to lose traction and drift. Contrary, the open differential will keep traction and allow us to control the drift. This is a difference to the K969, where both differentials are locked and the car merely slides (like on ice) instead of drifting.
The good news is that the stock diffs are so stiff that you can just keep them in the back and they will behave as if they were locked.
Making differentials work
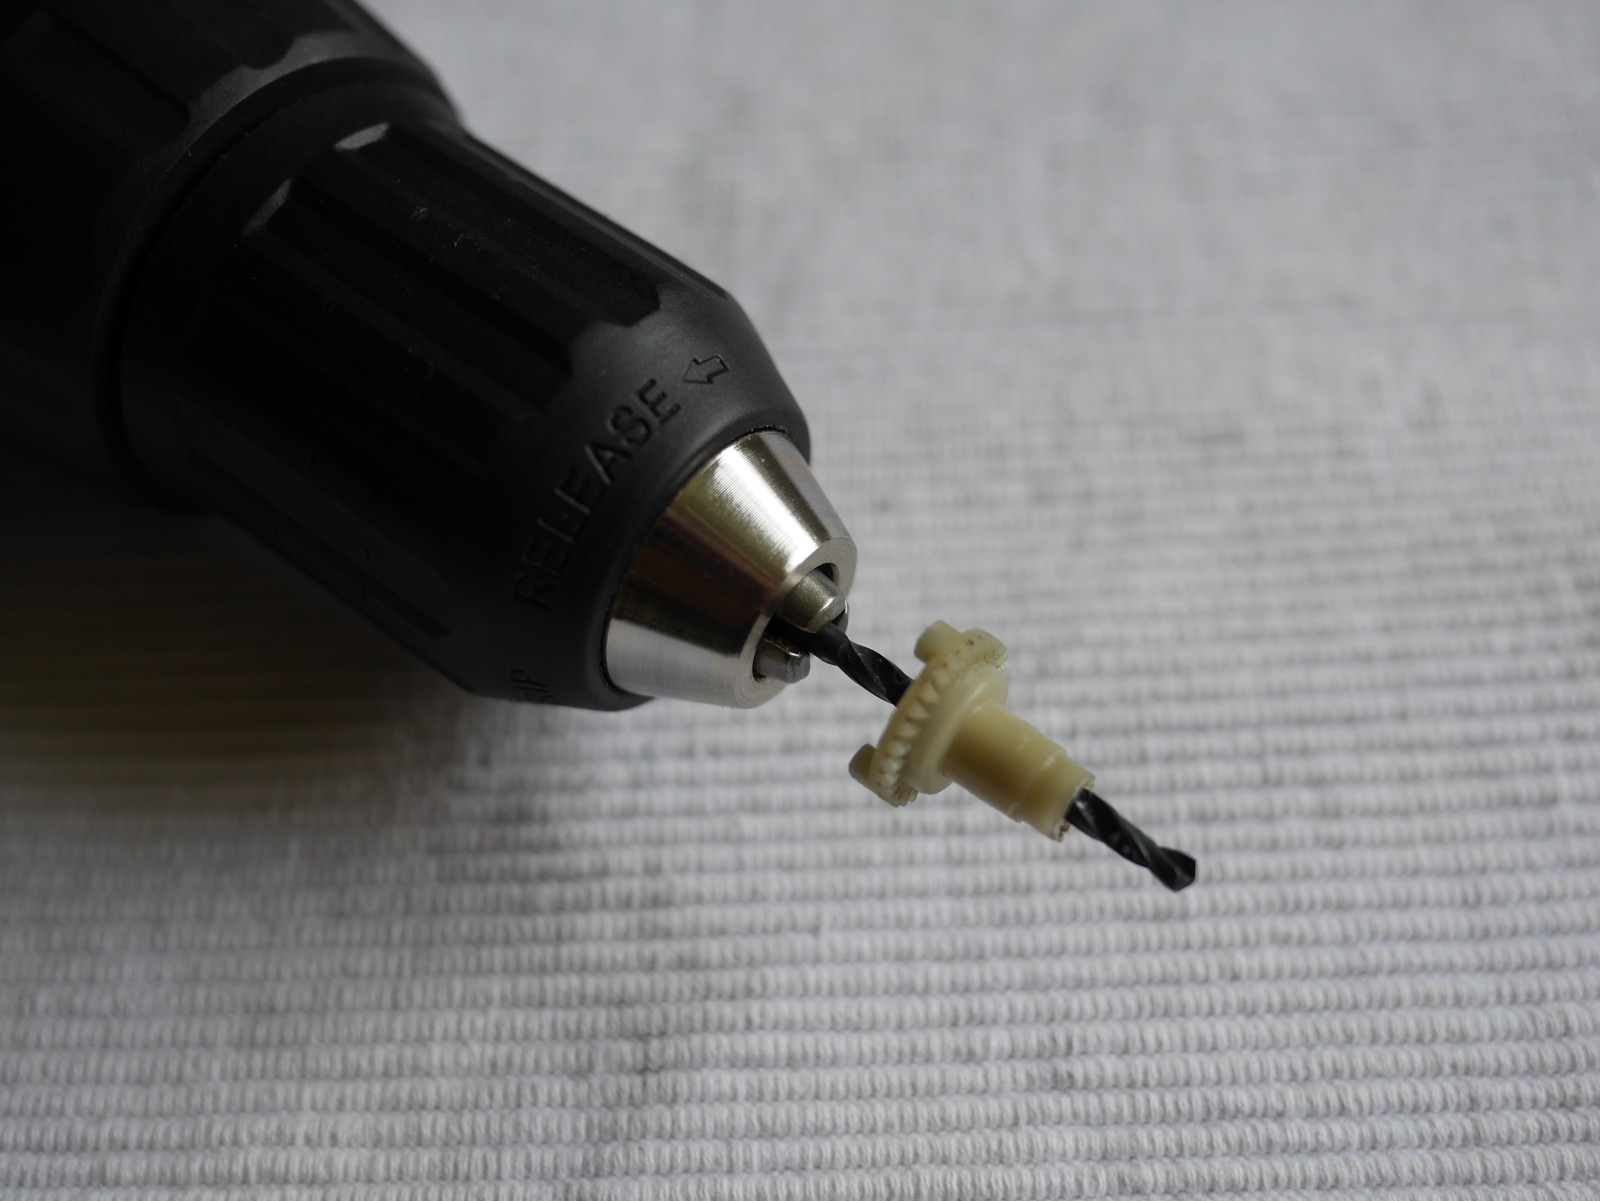
The bad news is that getting actually working (i.e. open) differentials is not that easy. The cheapest option is to dissemble the stock one and loose it up. For this, I recommend using a (3mm) drill to widen the diff housing. If you try to use sandpaper on the diff arms, you will probably not make it uniform enough to run smoothly.
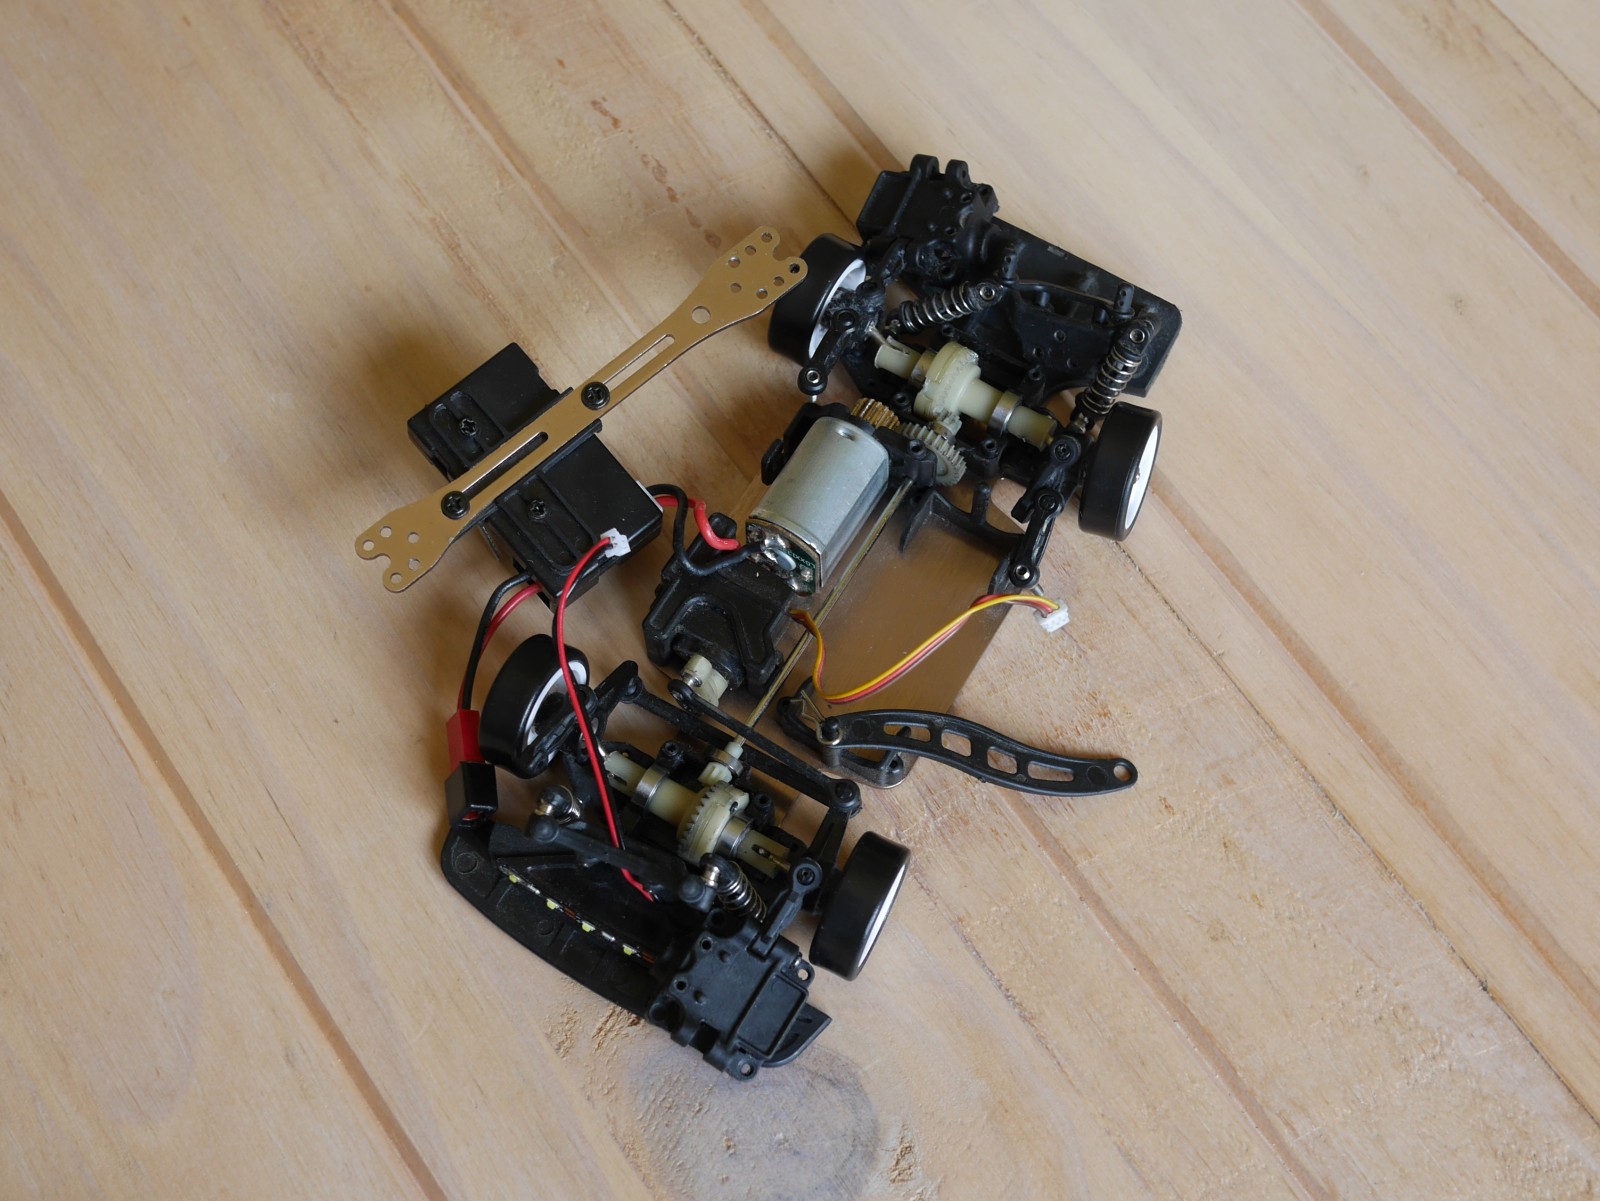
Loosening the diffDiff orientation for referenceLiPo tester
One thing to watch out when adjusting the diff is that both diff-arms have the same resistance. You can hold down the center and rotate each arm to test this by hand. Also, when assembled, the car should accelerate in a straight line.
If you dont want to go through the hassle, you can also just buy the Mini-Z MD005 diff (15€) and a pair of extended 11mm swing-shafts (10€) to compensate for the shorter diff arms.
If you want the best diff possible, you can go for the Mini-Z MDW018 ball diff or the MDW017 one way diff. Especially the latter gives you even better controls for drifting. However each of those costs as much as the whole 284131 RTR kit.
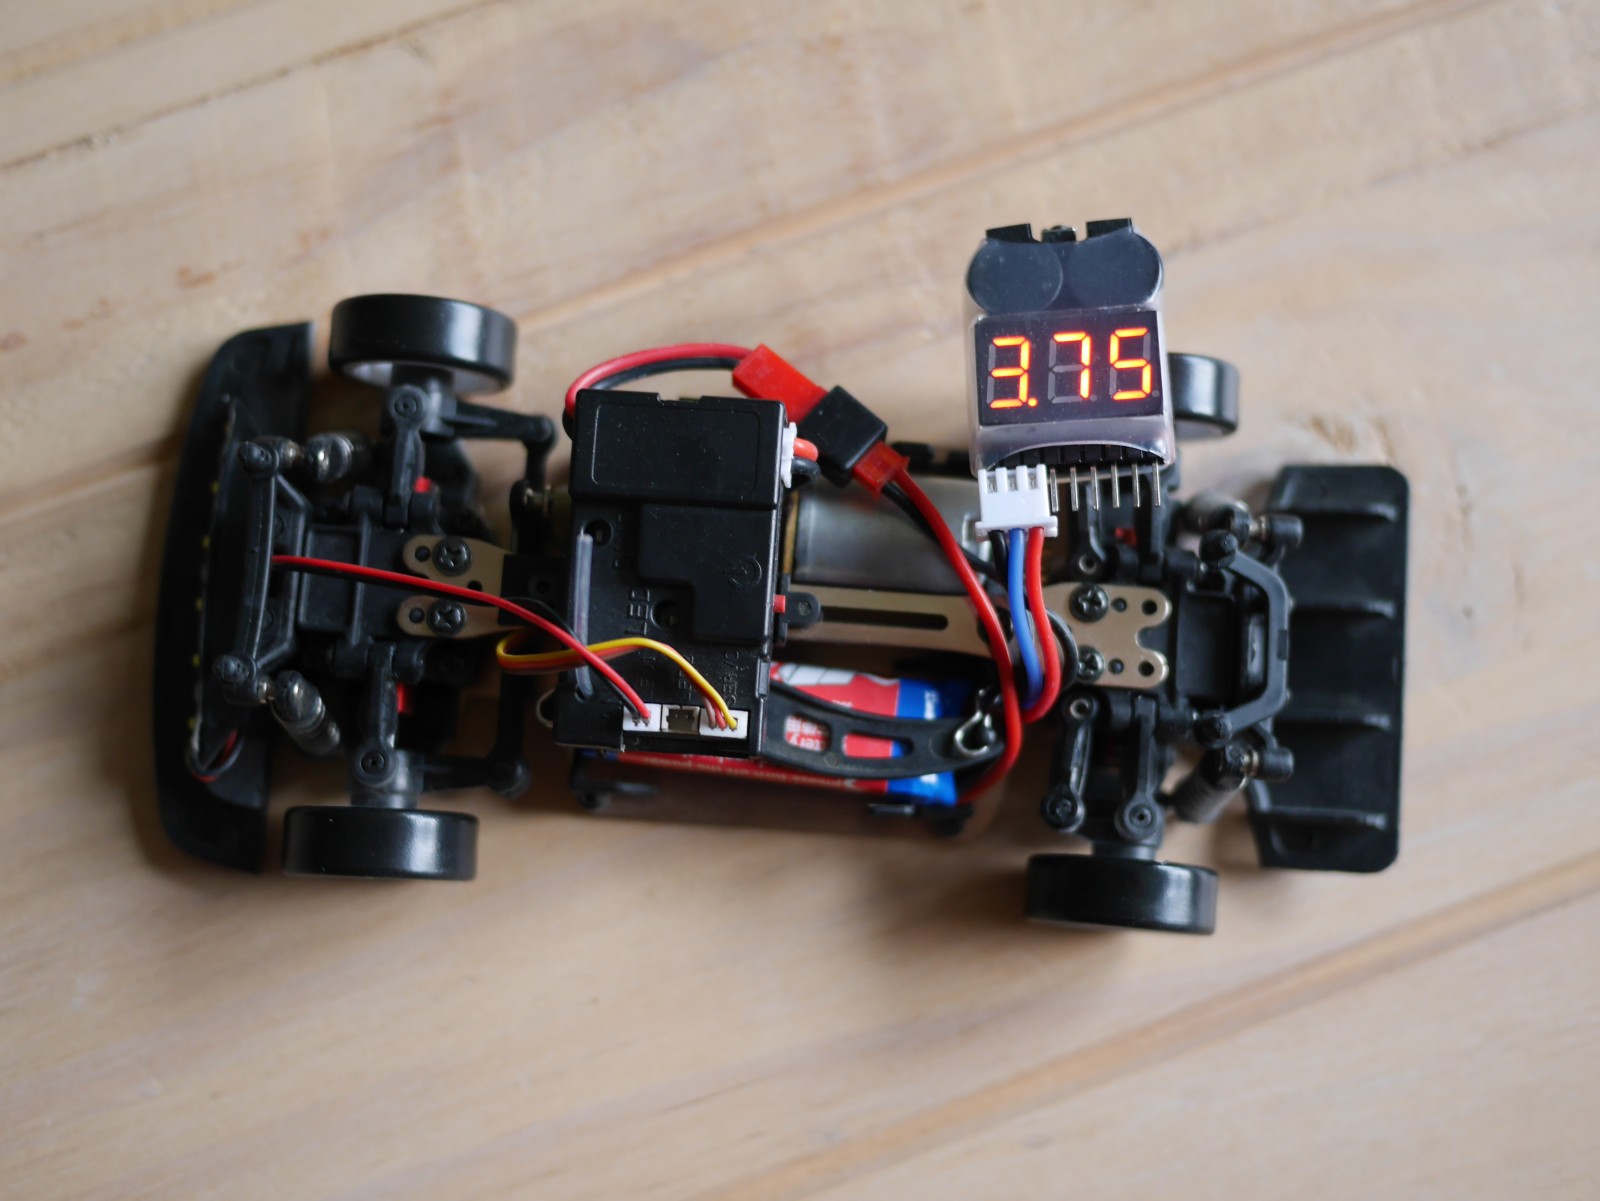
Lipo tester for storing the batteries
When ordering stuff anyway, make sure to also get a Lipo tester. Those cost about 2€ and allow monitoring the charge of the battery. This is useful when you want to take a break for a few days. In this case the battery should be at 3.8V per cell. Otherwise you risk permanently damaging the battery. To get there, you can keep the tester connected to the white-plug while driving and set the beeper to that voltage. If the beeper is too loud, you can dampen it by putting some cotton wool into the housing.
Bad upgrades
There are also some bad upgrades you can buy. Those either are wither unnecessary or actually worse than the stock parts. Particularly, this concerns the metal replacement parts. Metal parts are harder to manufacture at high precision, so you might actually degrade the performance by installing them. Also, they make the car heavier and thus decrease acceleration.
Generally, I would say that you do not need any of them for drifting. However, if you do touring and any of the plastic parts break, you might consider replacing those with a metal equivalent.
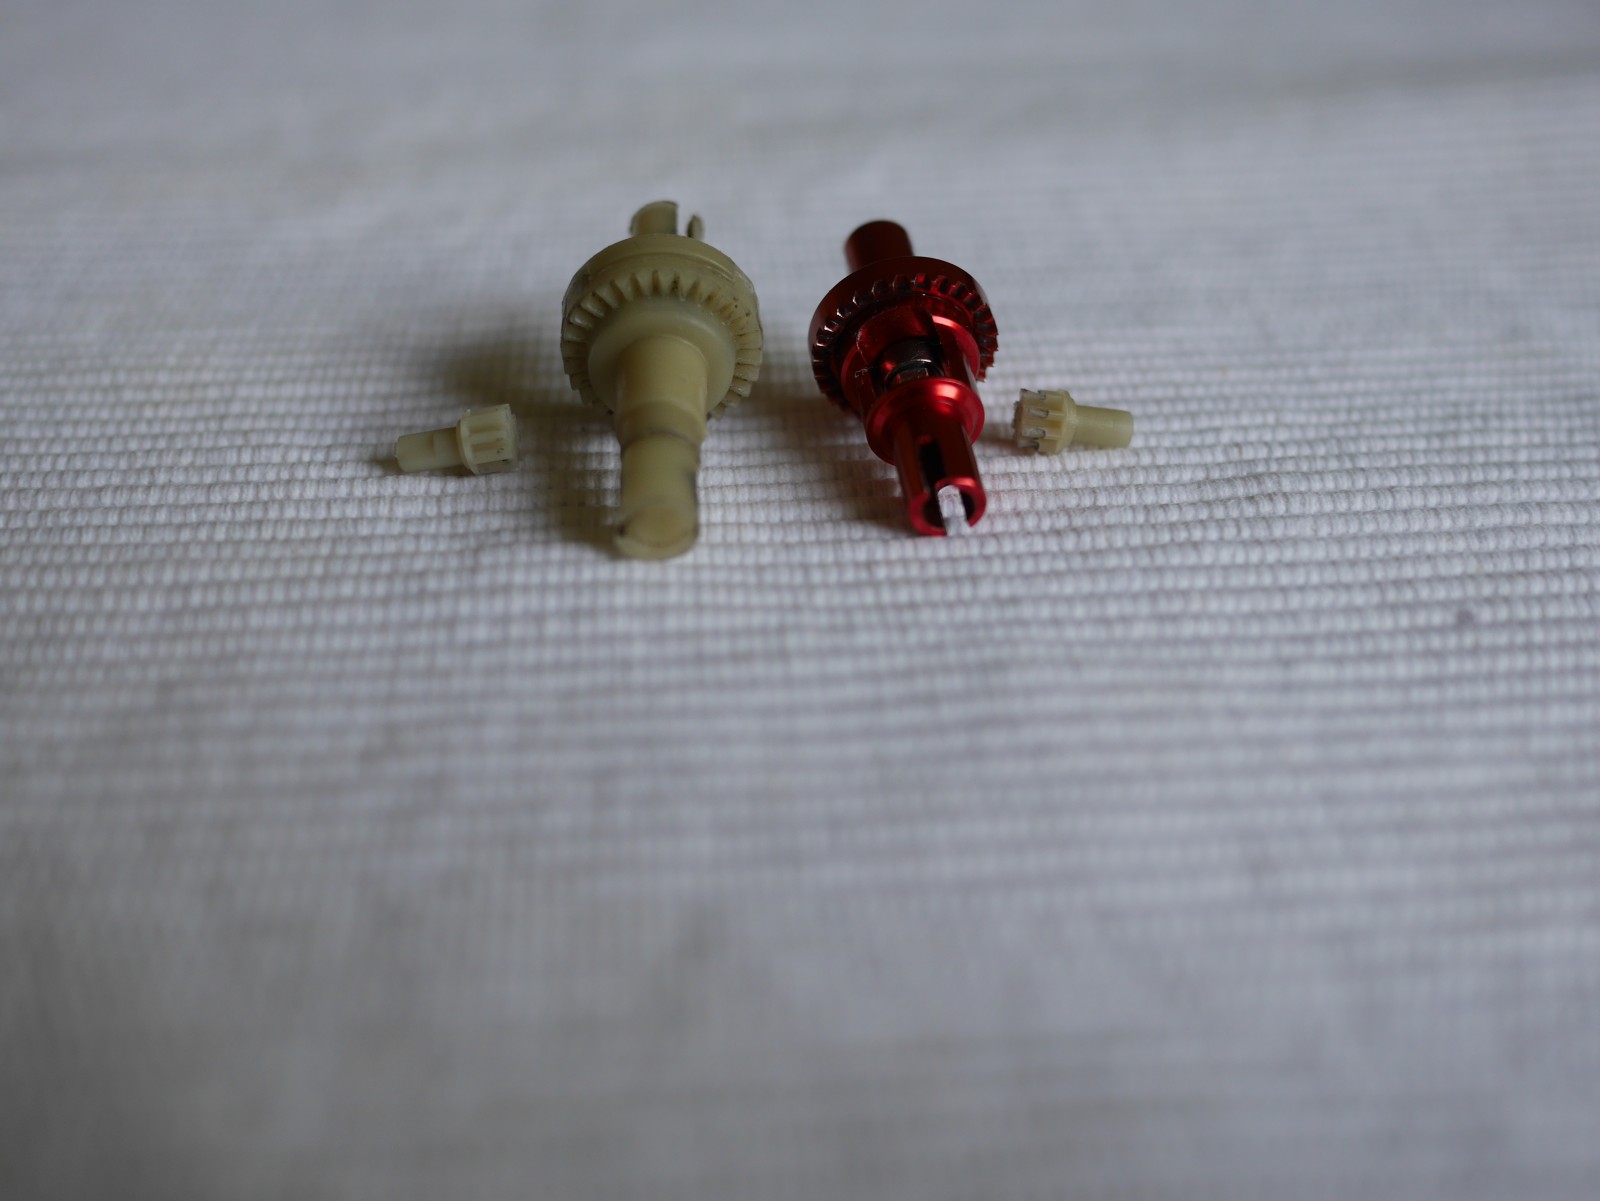
All metal ball differentials
Stock diff, good pinion – Metal diff, eaten pinion
You can get a all-metal ball diff on Aliexpress for about 8€. After some run-in those work very well and are smoother than what you get by fixing the stock ones. Unfortunately those all-metal cogs (which are also shorter then stock) will eat-up the plastic center-shaft pinion in no time as we have high traction on the front wheels when drifting.
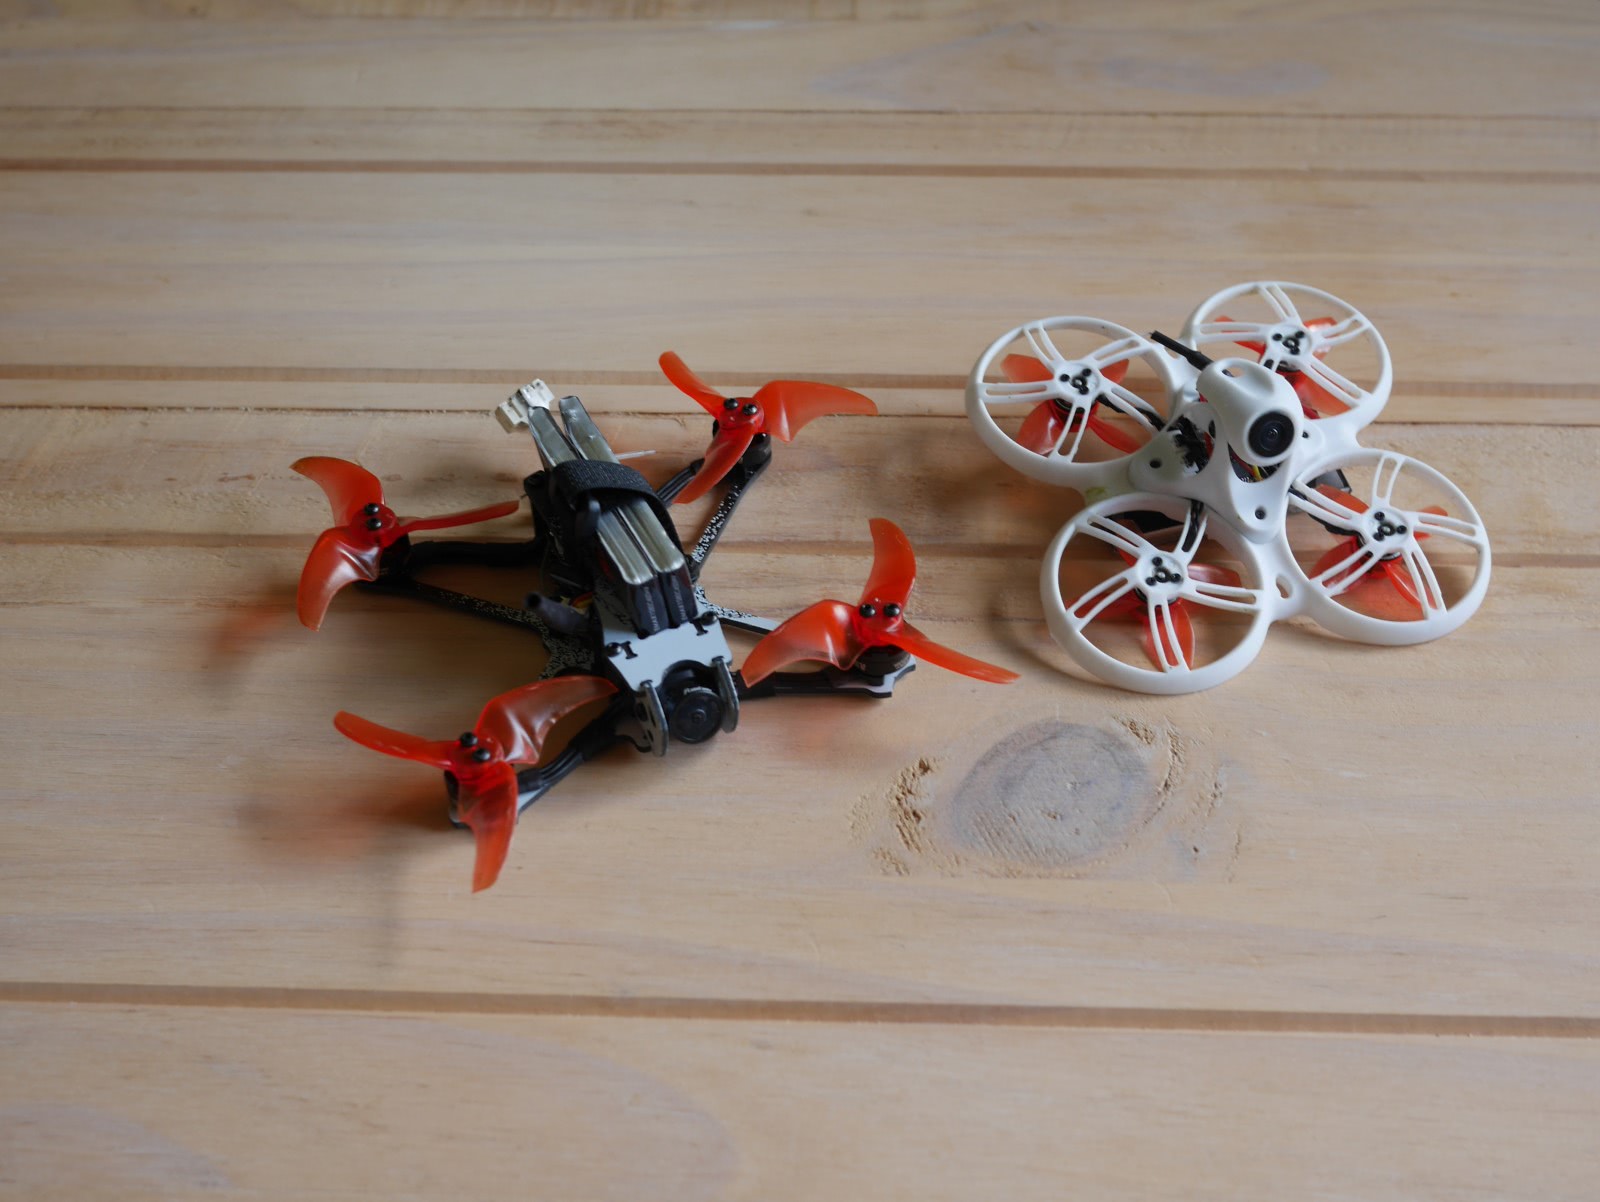
After being absent from the RC world for some time, I recently took another look at the advances FPV drones have made. The last time, I was mainly into RC helicopters as FPV flight seemed a fiddly and expensive thing to do.
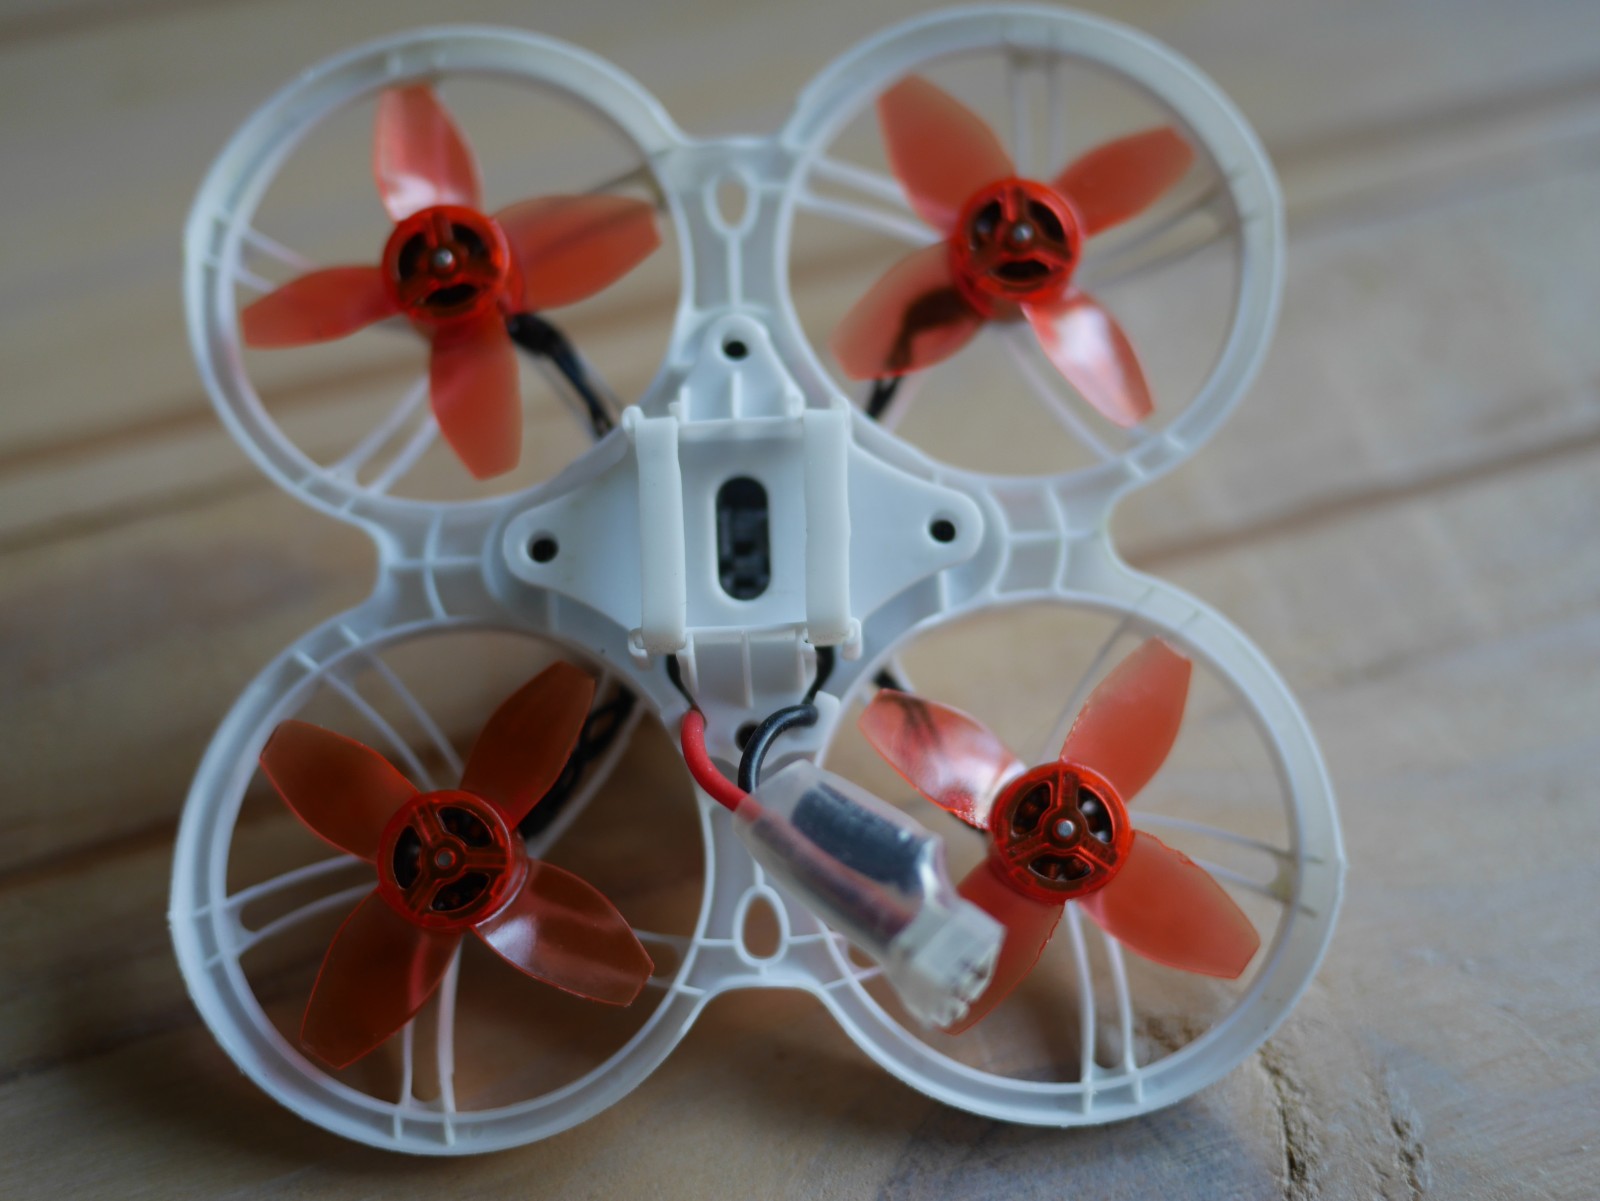
But progress did not stop and nowadays there are multiple options to get a complete FPV kit for 200-300€. I picked the Tinyhawk III RTF kit and here are some impressions of using it and how it compares to alternatives.
Coming from RC helicopters it is amazing how durable the drone is. I literally learned flying using stock parts only and keep on flying them as of today.
When getting used to maneuver the drone, I found the default tune in the 3 flight modes Angle, Horizon and Air quite helpful. In Angle Mode the drone tilt is limited to about 20° so you wont get too fast and you can focus on throttle and momentum control while flying inside. Switching to Horizon mode is a nice intermediate step. The Angle is no longer limited so you can go fast. This requires you to actively break like in Air mode. However, as the drone still auto levels you can safely fly inside. After flying Horizon mode inside, going outside and using Air mode was surprisingly easy for me.
In total it took me about 2 Weeks going from bumping into the ceiling and floor on Angle mode to confidently flying Air mode outside.
The only casualty is a small dent in the lower right prop, which I did not bother switching so far.
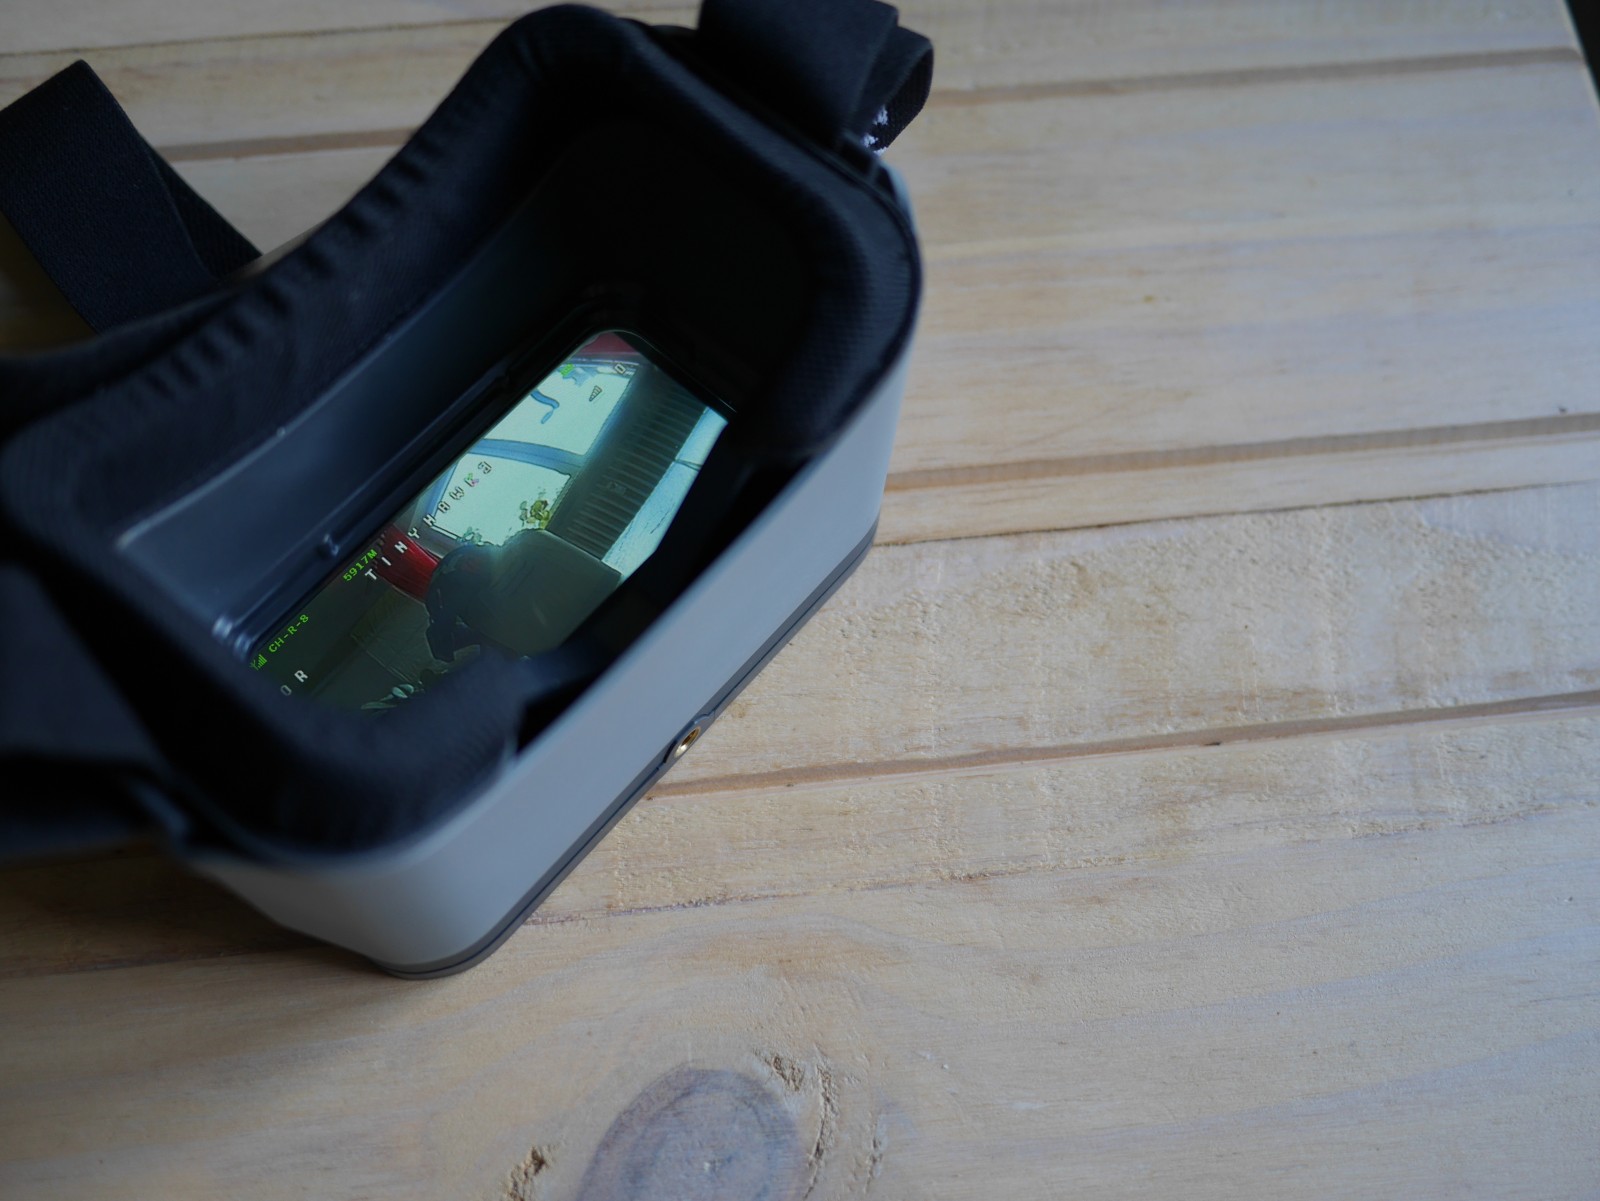
Goggles: Transporter 2
The part that made me choose this particular RTF Kit are the Googles as they are very well though out.
First, you can adjust the focal-length in 3 steps. This is useful if you are near-sighted or if you want to adjust the FOV from immersive to a tunnel view.
Then, the display resolution of 800×480 px is a good fit for analog FPV, where video is transmitted via NTSC (720×480 px). The internal DVR records precisely this resolution when set to D1 mode. There is also a HD mode, but you will not get anything out of it as the incoming image is the bottleneck. Speaking of which; the RunCam Nano 4 on the Tinyhawk has a resolution of 800 TVL (800×600 px) which again fits in nicely.
Note that the DVR recording is quite bad as it saves white frames as soon as there is some noise in the image, but it gets the job done if you want to review your flight or need to find the drone.
Ultimately, the detachable display unit can be re-purposed once you decide to upgrade to better Goggles – even though I think one can stick with the Transporter 2 Goggles for a while.
One upgrade you can do straight away though, is replacing the linear antennas by a set of polarized ones. This will reduce interference due to reflected signals in closed spaces. A possible choice here are a pair of Foxeer Lollipops that you can get for about 18€.
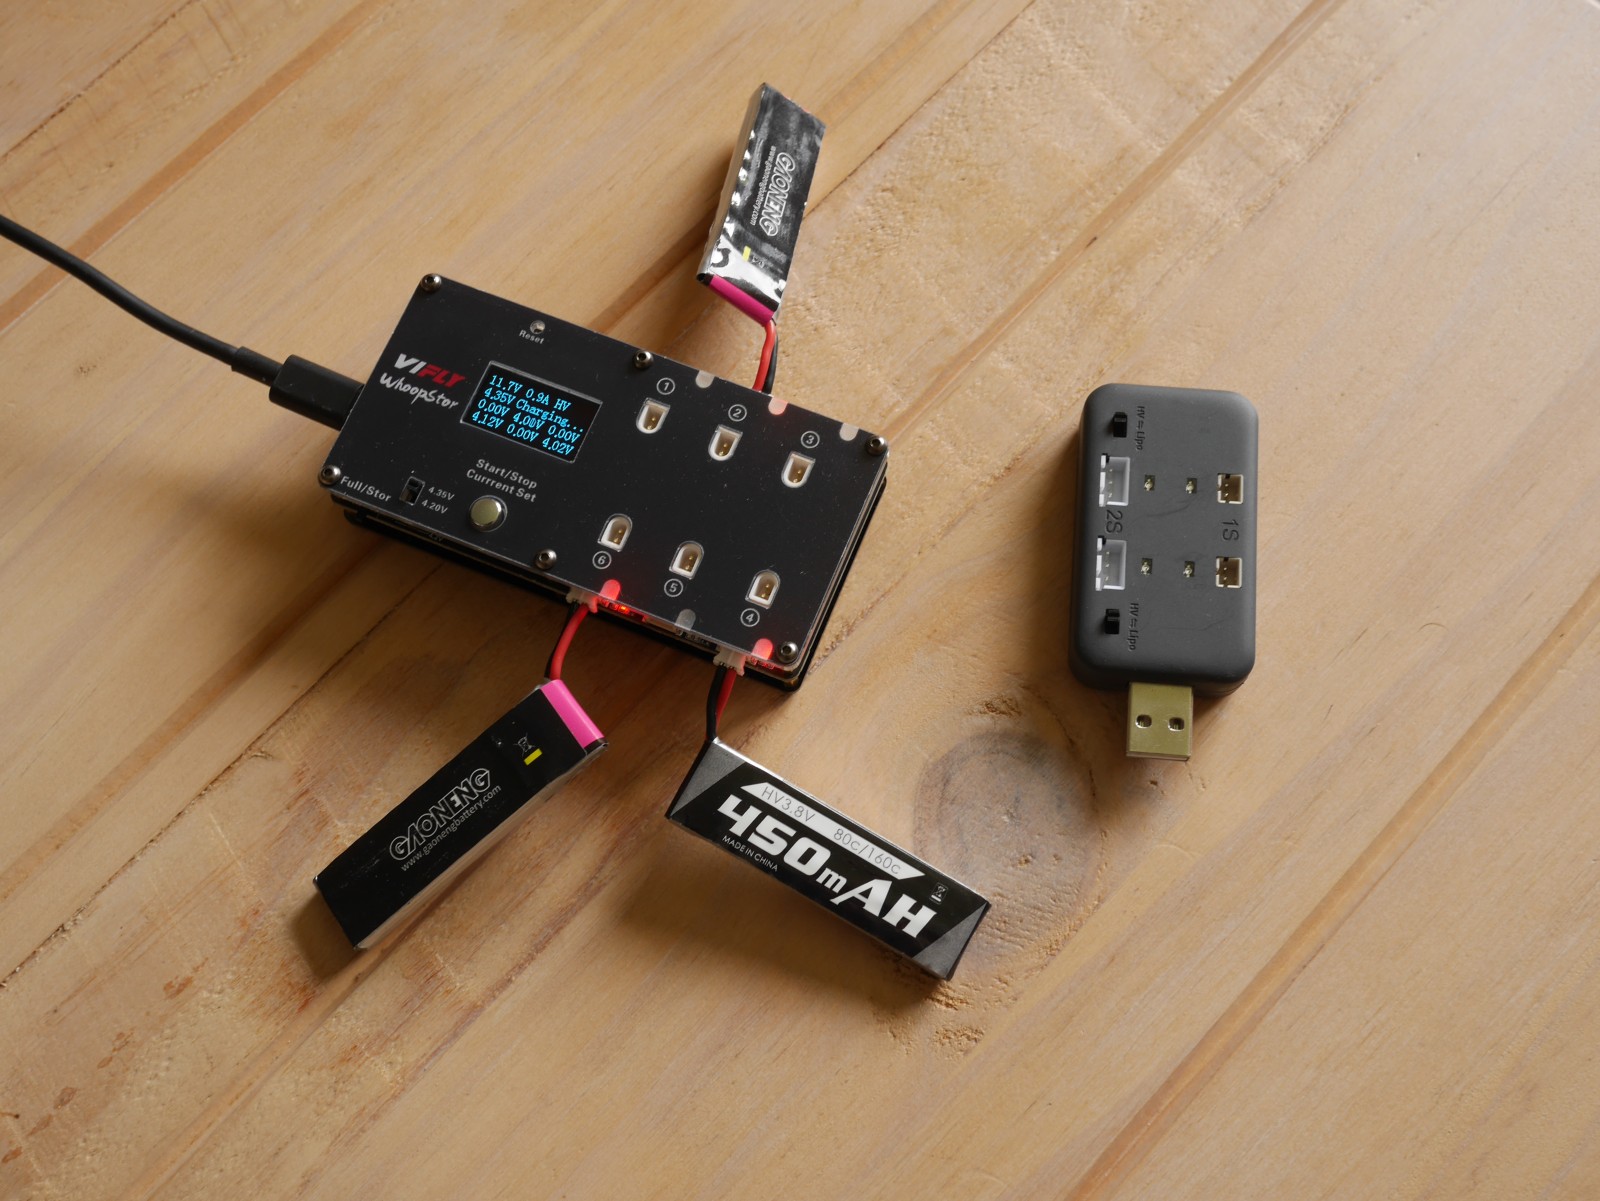
Battery and Charger
The weakest part is probably the battery & charger. For starters it only comes with one battery which the bundled charger takes about 90 min to charge (likely at 0.3A). Also, you can only charge two batteries at a time.
Fortunately the required 450mAh HV batteries are quite cheap. If you order a pack of 5 from China you can get them for about 4.5€ per piece. You should do that.
As for upgrading to a better charger, the VIFLY WhoopStor for about 33€ is an affordable option. It can charge up to 6 batteries at up to 0.9A. This allows charging the 450mAh batteries at 2C speeding up charging by 3x compared to the bundled charger. On top, it supports checking the battery voltage as well as storage-charging for when you need some days off from flying. The only thing it lacks compared to a “big” charger is resistance measurement of the batteries.
WhoopStor (left) and bundled charger (right)
Alternatively, you can get a serious charger, like the ISDT 608AC straight away. But that alone is about 65€ and needs an a serial, balanced charging cable that is about 5€ on top. With this setup you will have to always charge exactly 4 batteries at a time. Having that charger makes moving to actual 4S in the long run easy though.
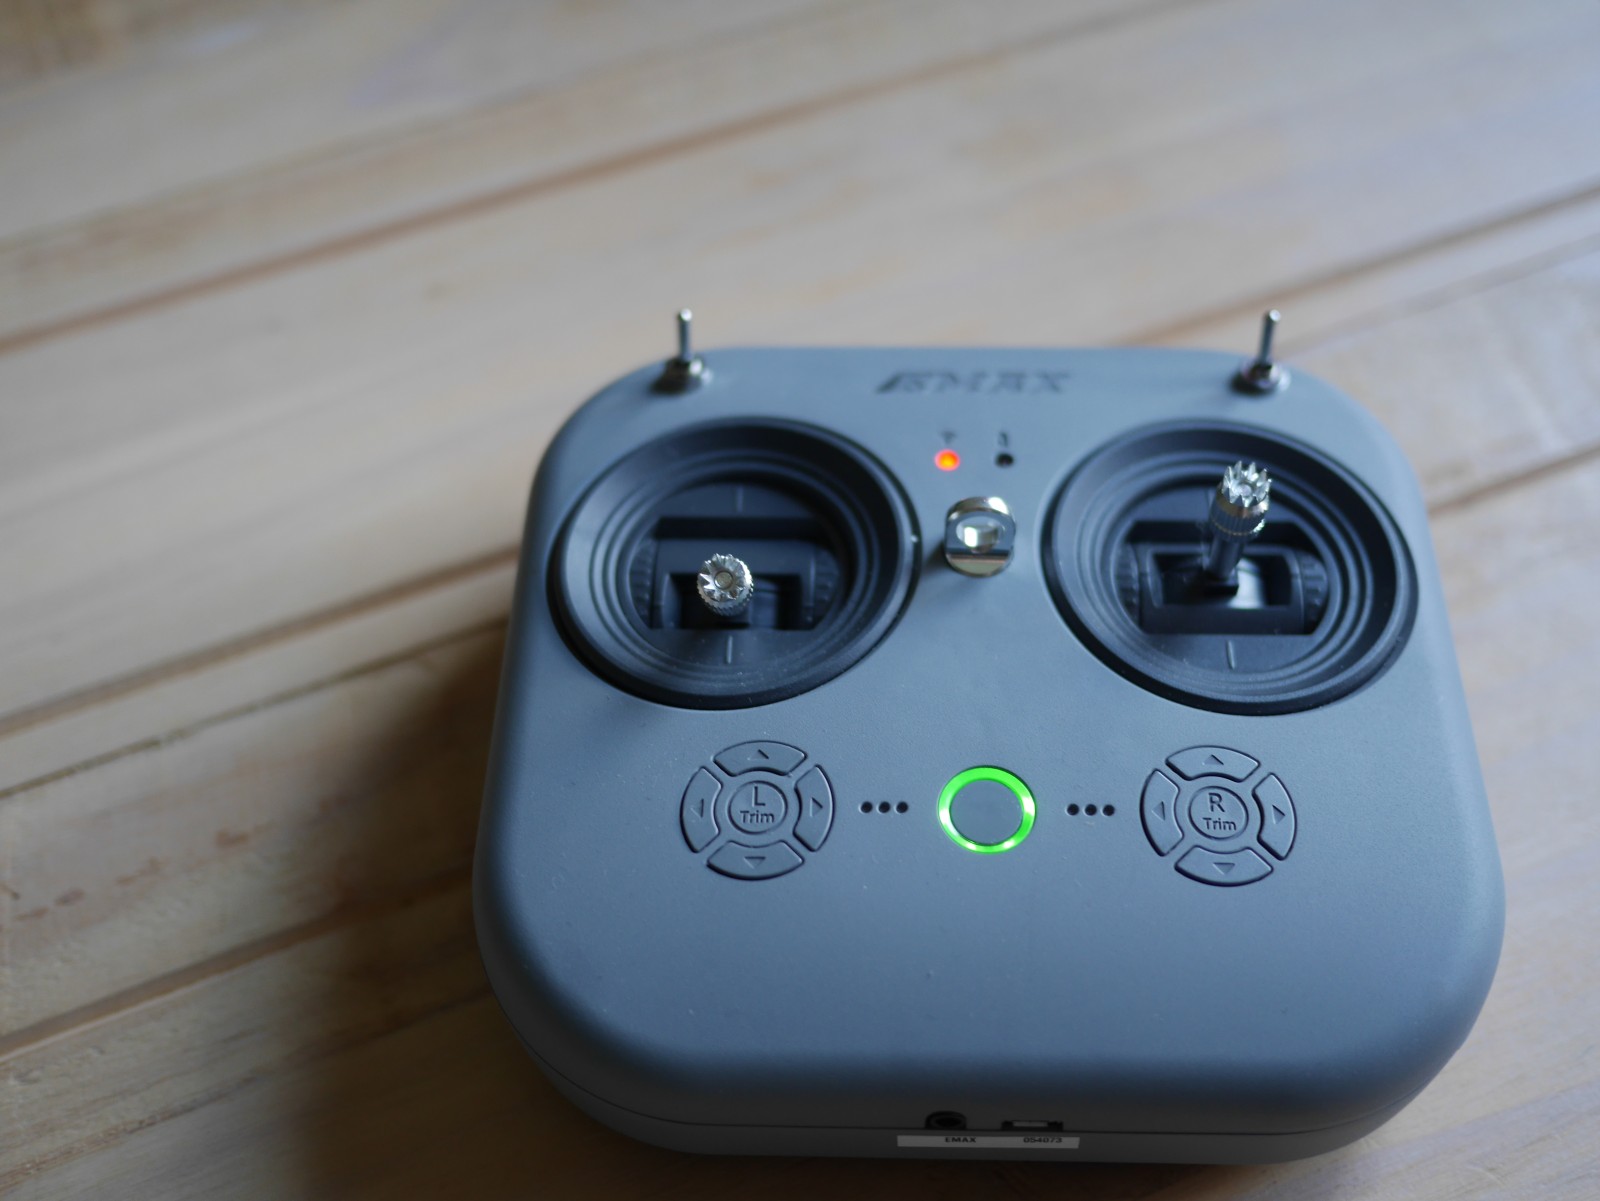
Remote: E8 Transmitter
The Transmitter only supports the FrSky D8 and D16 protocols – although there is really no reason to switch it to D16 as there are only 8 channels on the remote and telemetry is shown in your video signal anyway.
More importantly, it is usable as Joystick when connected to the PC, where each channel is reported as a separate axis – so it will work fine with all FPV Simulators.
Also notable: the radio uses a standard 18650 battery that is compatible with other radios and is worth about 10€.
It would have been nice to have a module bay to be able to attach a ELRS module – however none of the comparable RTF kits in the price range offer this. There cost needs to be cut somewhere I guess.
Speaking of ELRS; you are not really missing out on that with a tinywhoop. D8 still allows you to go for about 1km. The limiting factor will be more likely the tiny RX antenna on the drone and the VTX power. Also, even if you could manage to get that far with the Tinyhawk, retrieving it if it something goes wrong will be a PITA. ELRS really only starts making sense with GPS powered drones, where you got return to home as a failsafe.
I keep hearing that one should go ELRS from the start or you will end up swapping your RX modules on the drones if you only decide to go ELRS later. This is BS as you can just continue using the old remote for the old drones or get a remote that supports both ELRS and D8, like e.g. the Commando 8.
Alternatives
The following alternative Kits that are in a similar price-range and are all brushless, as brushed motors are really not worth the money you save.
EMAX EZ Pilot Pro
This saves you 60$, while you get the same Radio and almost the same Goggles and Drone. The Goggles have no DVR though and you will not get the nice carrying case.
BETAFPV Cetus Pro
This is also about 60$ cheaper than the Tinyhawk 3. However, the Goggles are way worse: no DVR, fixed focal-length and fixed screen.
What you get here is an easier Angle mode, with altitude-hold and hover-stabilization. The flipside of it is that it is not compatible with the betaflight configurator which is the standard when it comes to tuning the drone – in case you wanted to e.g. configure the OSD content.
Additionally, the drone uses the more modern BT2.0 connector/ batteries. However, the 1S setup does not draw enough Amps for this to make an actual difference. Also, as it is only used on BETAFPV Drones there is less choice of batteries and they are currently more expensive. Then there is the even more modern GNB27 connector at the horizon.. If you prefer Apple products, the above will probably not bother you though.
GEPRC TinyGo
This is a 2S drone, so you get more power, which makes it better outdoors but worse indoors. Much worse radio; requires 4xAA batteries, has worse gimbals and most importantly does not work as a Joystick when connected to a PC. Worse Goggles; there is a DVR, but the focal-length is fixed as is the screen.
The deal-breaker is the used FHSS (Futaba) protocol though. This is virtually not used by any other Drone on the market, so you cannot just get another BNF drone to fly with the same radio. And if you upgrade the Radio you will have to go for a multi-protocol version to still be able to fly the drone instead of being able to get the cheaper D8/ D16 only variant.
Where to go next
The following BNF drones are compatible with the Radio and also run on the 450mAh PH2 batteries that you likely piled up while flying.
Happymodel Mobula 7 1S HD
The drone is very similar to the Tinyhawk III, however it comes with the RunCam Split 3 lite. On top of FPV streaming, it can simultaneously record the video as 1080p @ 60fps to a microSD card. The drone provides gyro logging too, so you can further stabilize the results with gyroflow at the PC. So if you want to produce nicer videos, this is a good upgrade.
Notably, the drone comes with a serial, balanced charging board as discussed in the charger section above.
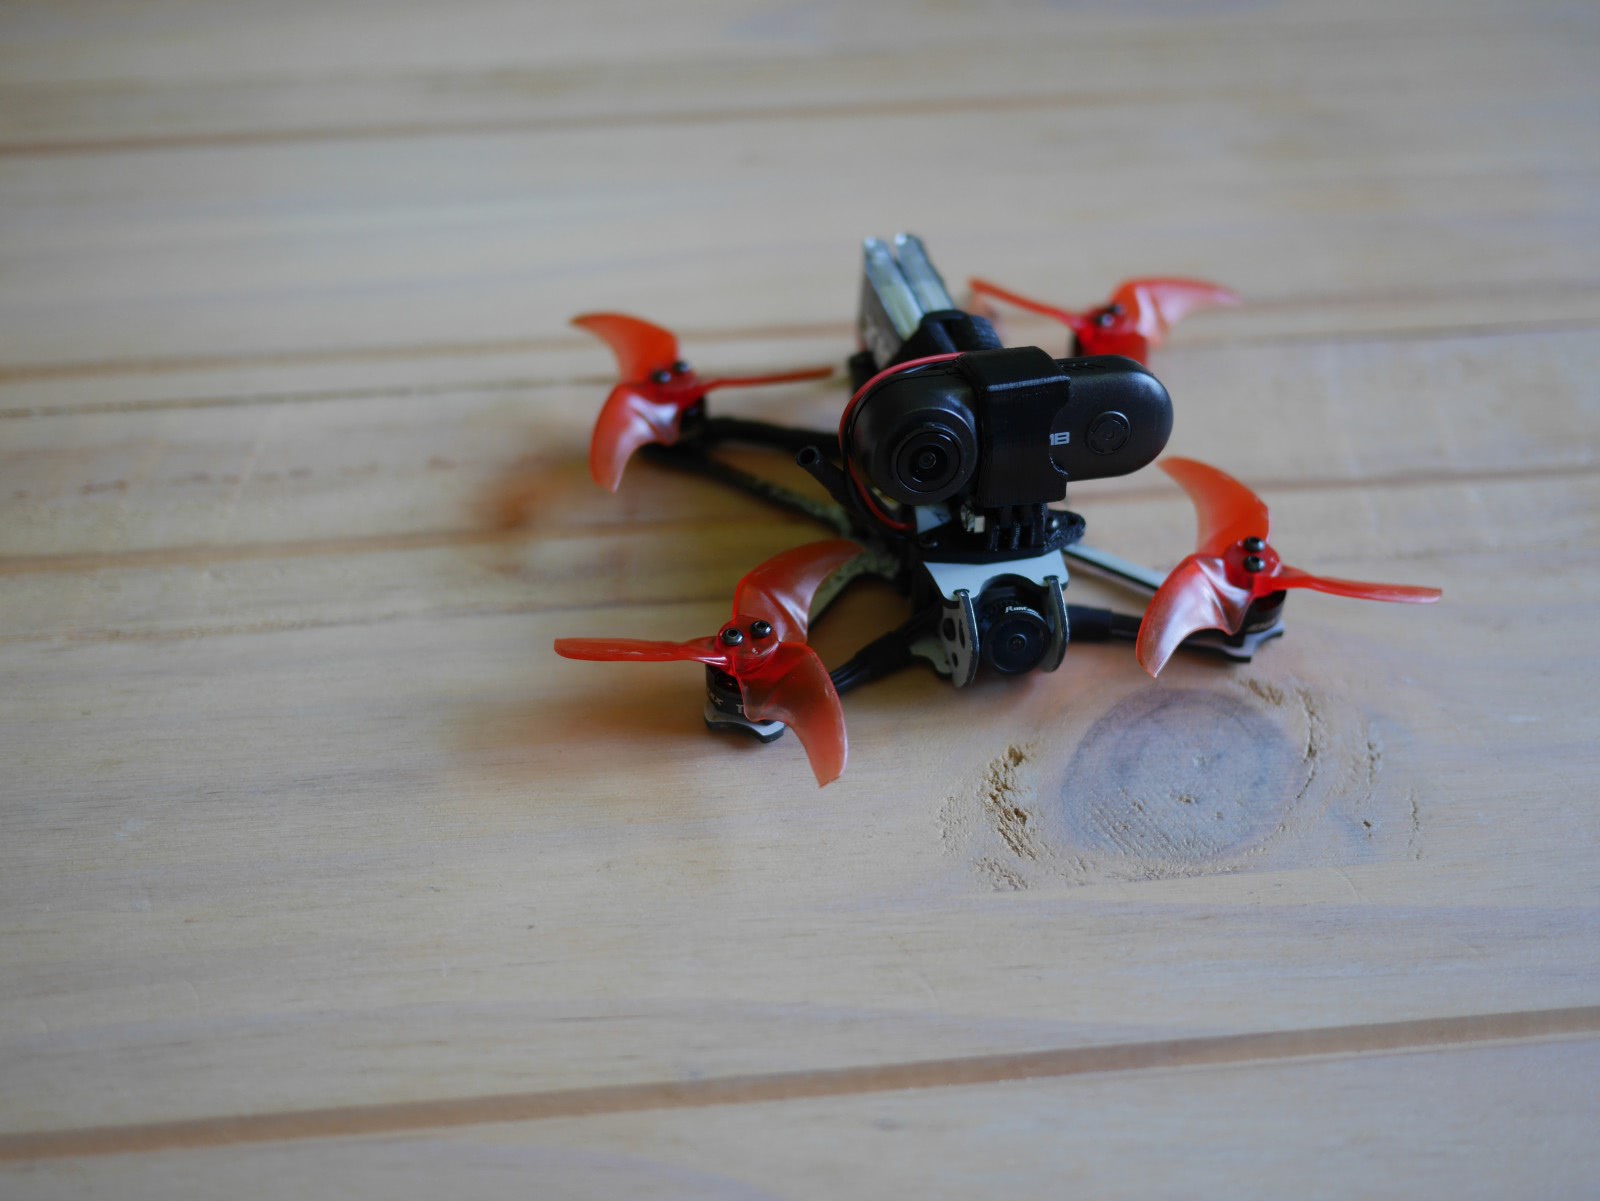
EMAX Tinyhawk II Freestyle
This is the drone to upgrade to if you prefer to fly outdoors. It is larger and heavier than the Tinyhawk III. Also it is more powerful as it flies on 2S. The latter is realized using the battery connector, so you still can use the 1S batteries.
TH II Freestyle – TH IIITH II Freestyle with the RunCam Thumb
If you like tinkering, you can also get nicer videos out of it by packing a RunCam Thumb on top. The drone is powerful enough to carry to extra ~12g of weight. Note, that this requires soldering-on a power connector for the camera to the flight-controller as the cam has no internal power-supply.
Usage with Ubuntu
If you want to use the betaflight-configurator on Ubuntu, make sure that you have permissions to access the USB serial device by being in the dialout group as:
sudo usermod -a -G dialout $USER
The Remote is just plug-and-play (as a USB HID Gamepad) and is correctly recognized by e.g. FPV.SkyDive, which itself nicely runs on Linux through Steam/ Proton.
BlueJay ESC firmware
People online ™ are telling that one can get increased flight-time by replacing the ESC Firmware by BlueJay and enabling the bidirectional DShot protocol.
Actually, my flight-time decreased by 15% (from 4:44 min to 4:02 min) when switching to bluejay & bidirectional DSHOT300.
Youtube Channels to follow
Unfortunately there are a lot of youtube channels with a wide reach that have no clue what they are talking about. Dudes sitting in a basement that get a commission when something is sold is not a good combination. Here are some channels that are actually good
The Lego 42043 “Arocs” is regarded as the best technic set to date by many. It has motorized functions controlled via a gearbox, features a pneumatic arm and also uses an actuator. Furthermore, all axles have a suspension and it features two-axle steering. So no matter what functionality you are interested in, this set probably has it.
Showcase of the functions
Unfortunately, the set went out of production in 2017. So if you want to experience the build today, you have to search for a used set in good conditions. As the model is quite popular, chances are high that you will have to pay more than the original cost.
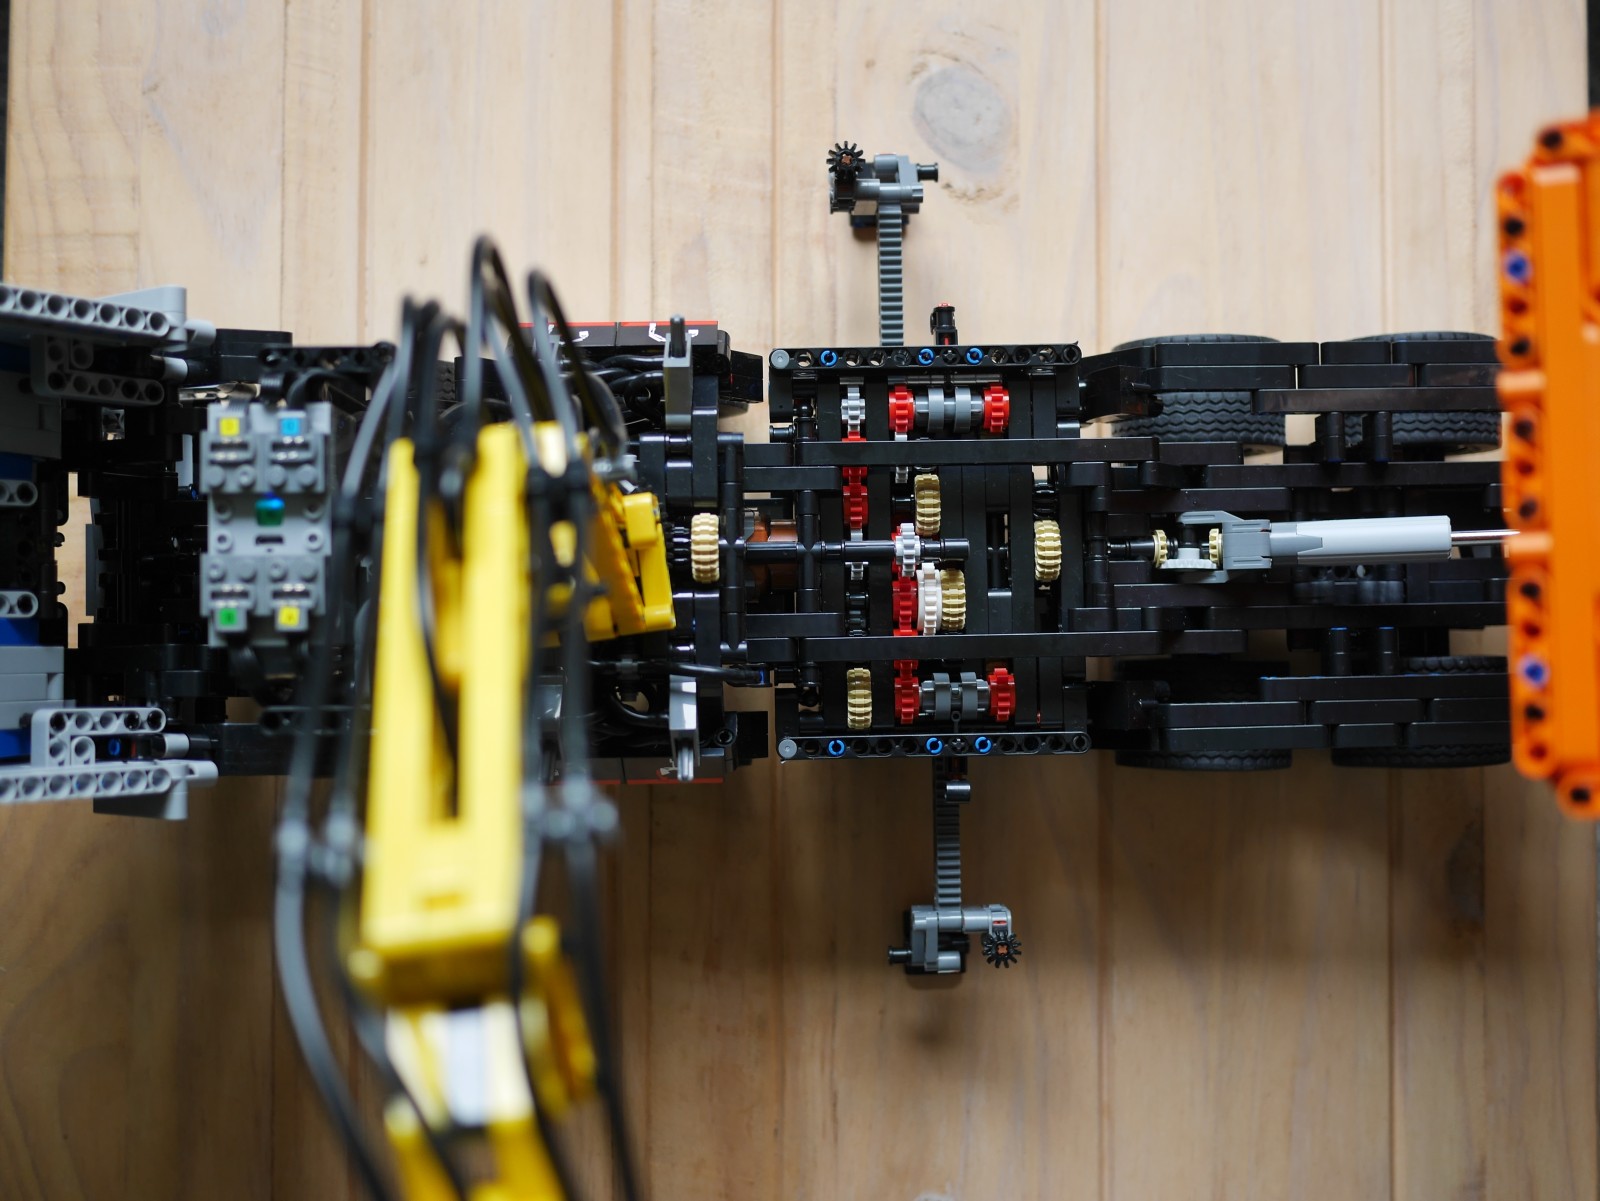
the gearbox in full glory
Fortunately, Mould King released its own version of the “Arocs” which keeps the set alive today. Instead of being a verbatim copy of the set like the Models by Lepin/ King (which are also hard to come by nowadays), Mould King did modify the set in several ways, which we will look at in the following.
Note, that the set is still a copy of the 42043 set, which was designed by Markus Kossmann (see the original license plate). But if you want to literally pay him tribute by buying one of his sets, you will have to get the Liebherr 42100, which is the only one still available today.
Color Scheme
The most obvious change that Mould King did is using a different color scheme. While it feels strange at first if you are used to the original Arocs looks, it is actually quite accurate.
The gray cabin is indeed more common than the white one. It makes sense as this is an off-road vehicle traveling over dust and dirt. But also the orange loading area exists in reality – even though one still can argue that it looks off there as well.
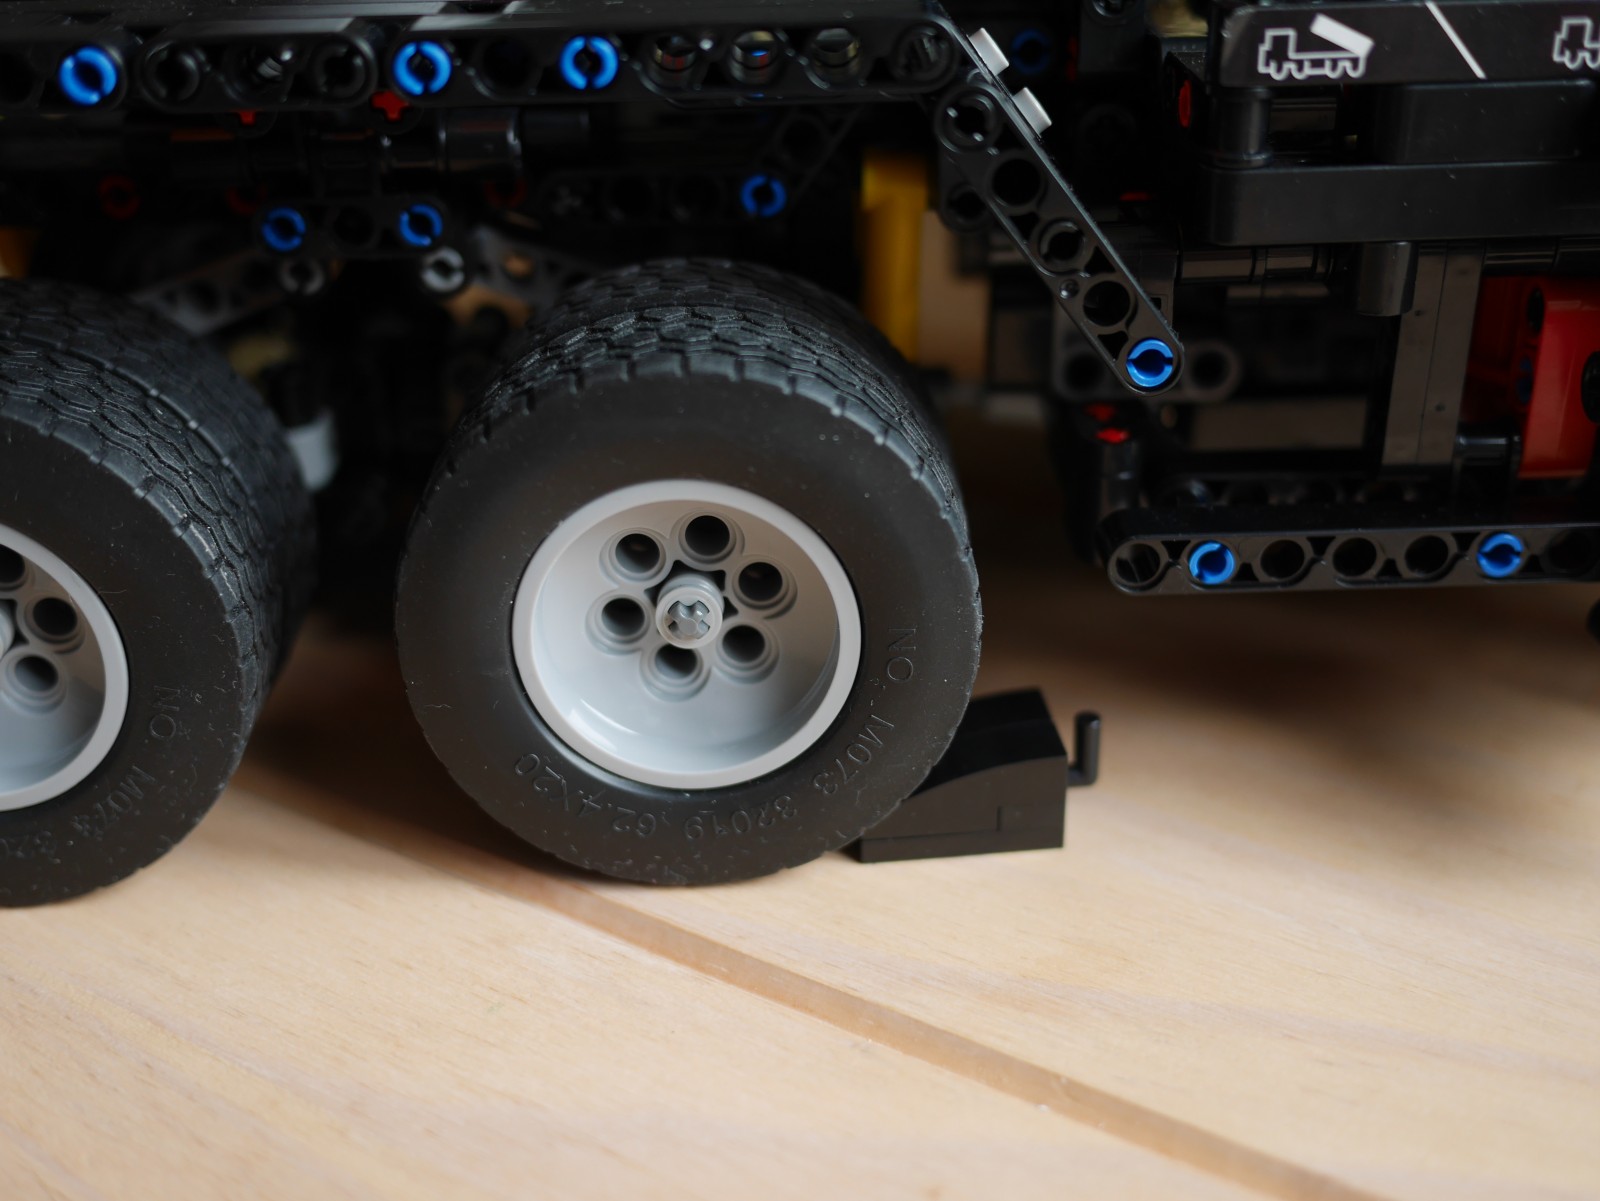
When we get over this difference, we can turn to some details that are strictly improvements. The first thing to note here is the all yellow-black pneumatic arm. Mould King uses a yellow gear-rack here, which makes the pneumatic elements neatly blend-in. Furthermore, all pneumatic hoses are black. Although this requires more attention while building, the result looks much better than the red-gray-yellow soup of the original. Next, the bottom part is now mostly black. The useless yellow bricks are gone and we get black axle-pin connectors instead of original red ones. They overdid it a little here though, by making the wheel-stoppers black as well.
Full remote control
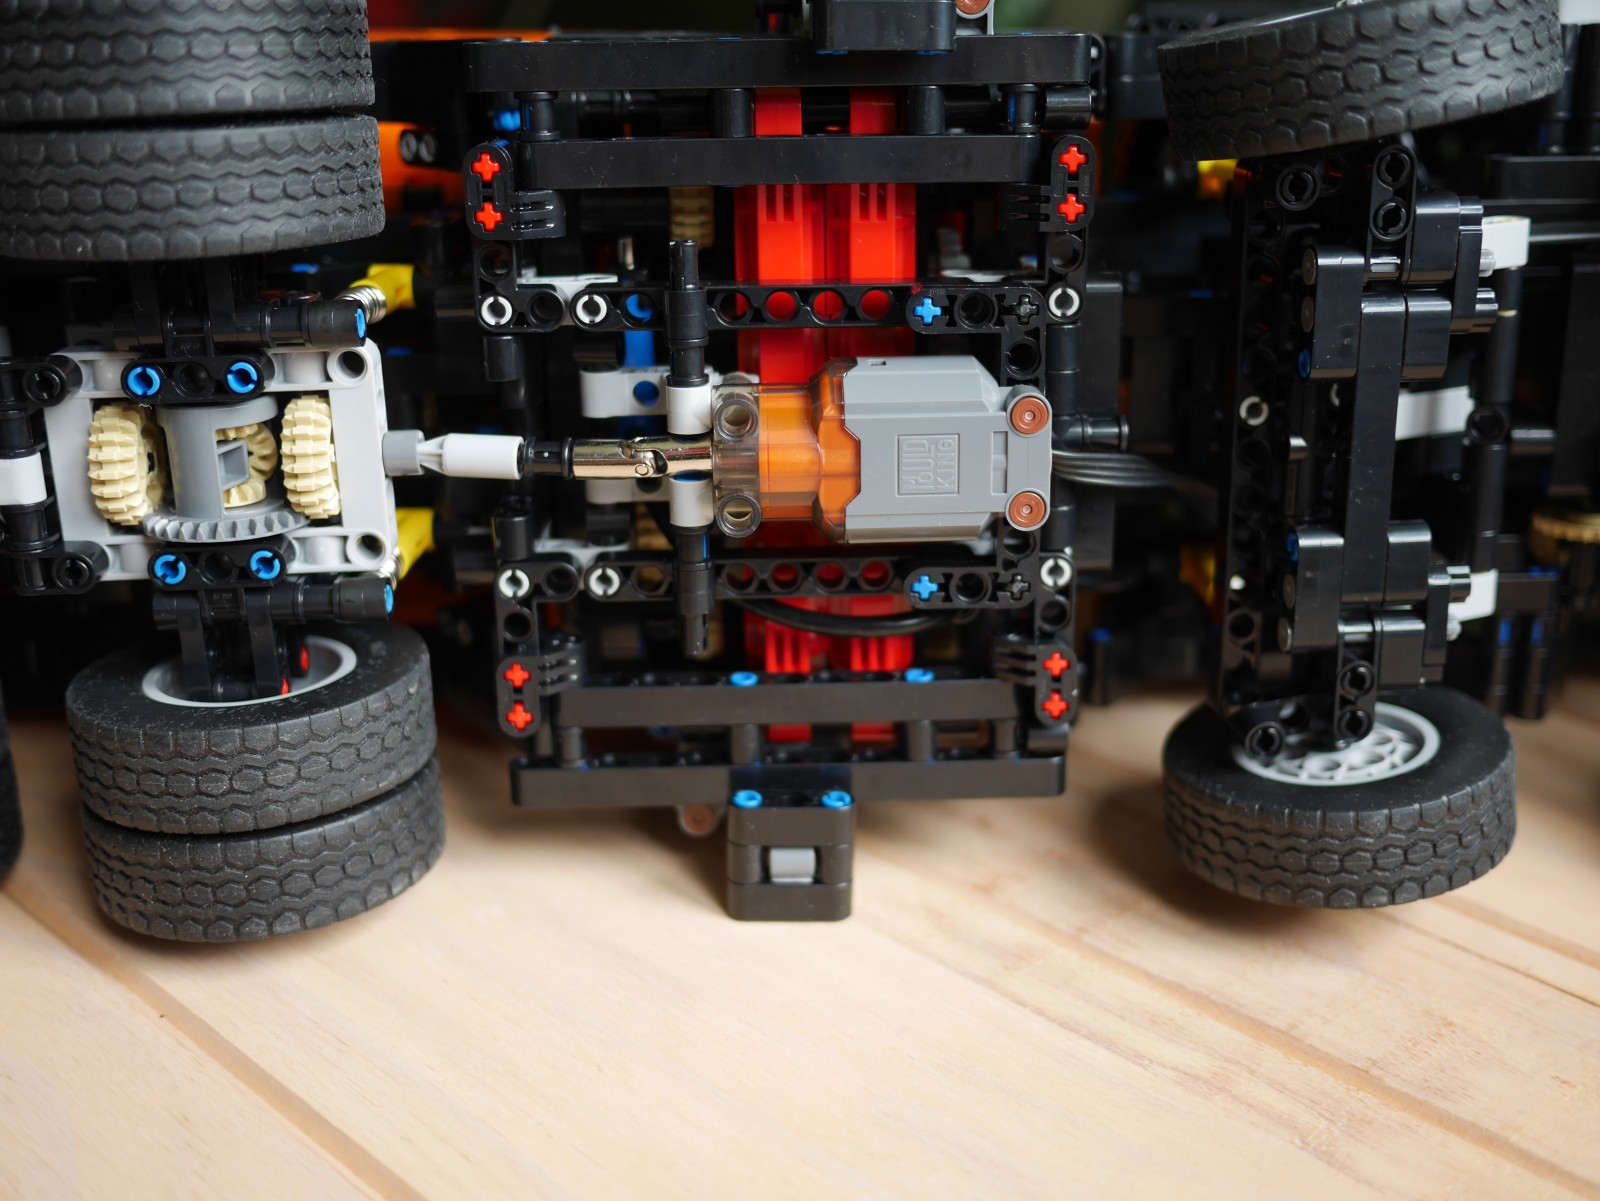
In contrast to the original model, the Mould King version also adds motorized driving to the set. The drive is handled by a single L-Motor, while the steering is handled by a servo motor.
Both motors included in the set support proportional controls, but unfortunately the included battery-box does not handle proportional steering. I used one spare battery box from the excavator instead.
even the wheel-stoppers are blackmetal universal-joint for the drive-tainonly 4 cylinders, but motorized
As a nice touch they include a metal universal-joint for the drive-train. This is needed to handle the torque if you decide to hit reverse while the 2.4 kg heavy set is moving forward. The rest of the parts will still ache in pain though.
Due to motorization, the wheels no longer drive the pistons below the cabin. Here, Mould King went totally over the top and included a separate M-Motor to do that. To make room for it, they had to reduce the pistons from 6 in the original to 4. Note, that you can just skip the motor at Step 170 and use it elsewhere as it is not needed otherwise.
Remaining differences
As this is not a licensed set, there are no Mercedes brandings anywhere. If you are in dire need for some, you can get the shield with the printed logo off the new Zetros set for about 5€.
Furthermore there are no small panels in the front of the cabin – for whatever reasons.
Interested in getting the set? Support this Site by using the following affiliate Link:
Due to the larger depth of the battery box compared to the original, you cannot fully close the cabin. The beams that hold the seats will get in the way. This results in a increased gap at the front radiator region.
Fortunately, this is fairly easy to fix at Step 228: Only use the Axle-Pin connectors for the L-shaped battery holder to give it some play and place the pin in the middle on the other side. This will move the battery-box by one stud and allows the cabin to fully close.
The set is based on the MOC-68495 by JurgenKrooshoop, but unfortunately there is no cooperation this time. Therefore, the thing is yellow instead of the red-white scheme used by the MOC, which I would have preferred.
The MOC creator even rage-quit Rebrickable, when he found out about this set. But don’t worry, he is doing fine and has returned meanwhile. In my opinion he overreacted, as everybody is standing on the shoulders of a giant, namely Lego 8043 as we will discuss below.
A quick function test with the new 6-Channel Remote
Unfortunately MouldKing did not replace the blue technic pins as they did with the Forklift. However, they did include 2 carbon axles. Those are used to connect the actuator pair that lifts the arm. Technically they are not needed though, as the arm is not that heavy.
While having a similar part count to the Forklift, the Excavator is easier to build. Part of this is that 84 of the parts are used for the tracks, but another part is that this is:
The final form of Lego 8043
This is actually the 4th iteration of a (at the time of writing) 10 year old Lego set:
It was born in 2010 as the Lego 8043, which is likely modeled after the real-life JCB JS330. The original model used 1123 parts.
The MOC creator JurgenKrooshoop, then created the “Ultimate 8043” version, which notably already featured a more powerful XL-Motor, an improved drive-train and simultaneous control of all power functions. This bumped the part count to about 1300.
In 2015 he then released another update as MOC-68495. This morphed the appearance into a Link Belt 250X3, replacing the yellow parts with the native red-white color scheme. Here, he generally added casing to the model and slightly increased its size which raised the part count to 1929.
Mould King then copied the MOC in 2020, but felt like returning to the original yellow color scheme. They also removed the LED lights and ported the model their own power-functions. This reduced the part count to 1830.
With the last changes, some even think that the Mould King version is a clone of the original Lego set. We can probably conclude here, that all excavators look the same if you take away the color.
But still, when building the Mould King Model, one can tell its Lego 8043 origins – the construction of the tracks and drivetrain and the way the motors are placed will give it away.
So if you skipped the 8043 back then and want to get the building experience today, I would say you get it here – and some nice improvements on top too.
This brings us back to the missing cooperation between the MOC creator and MouldKing. As I see it, Lego did the heavy lifting with this particular model. However, both JurgenKrooshoop and MouldKing have their fair share in that we can enjoy this great model today. So if you want to support the MOC creator as well, you can pay him for his instructions.
Manual Errata
Step 292: The Light should face front
Interested in getting the set? Support this Site by using the following affiliate Link:
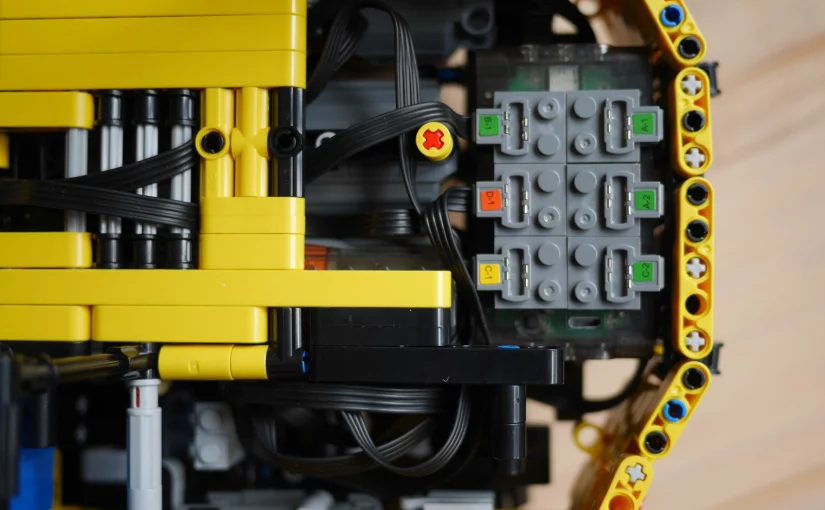
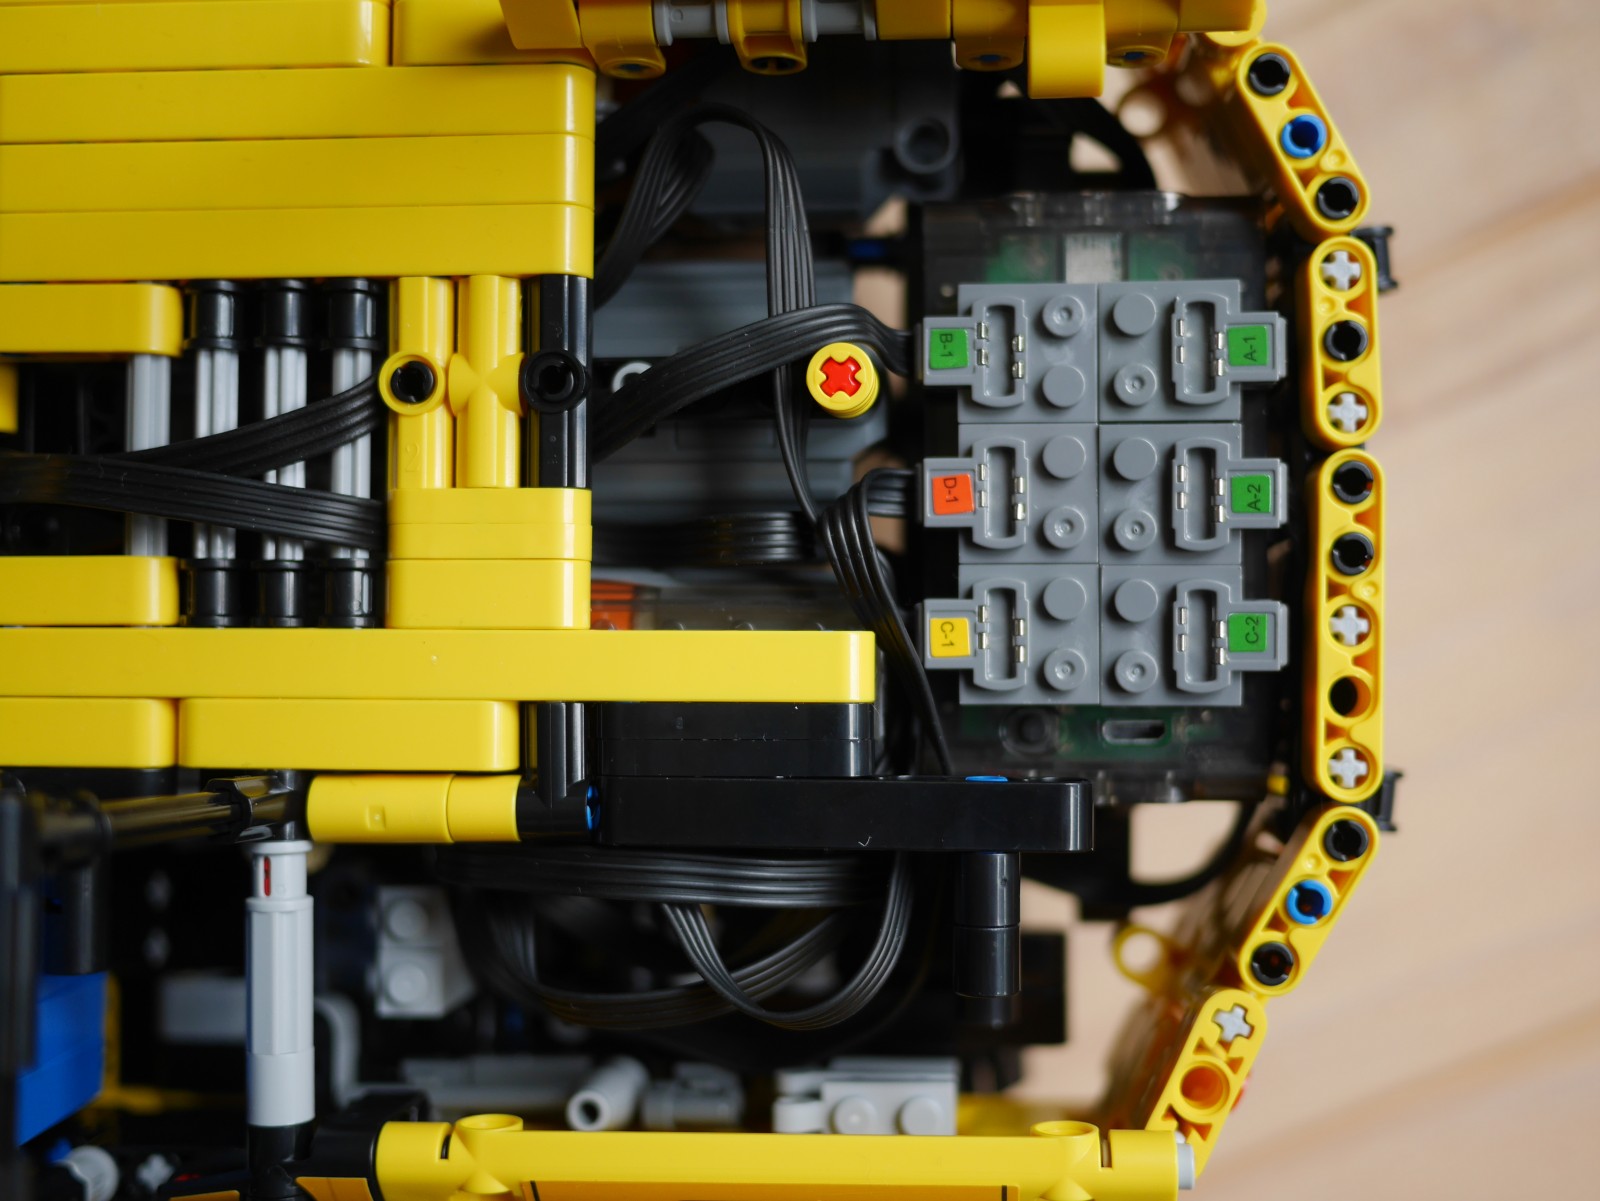
With the 17013 Crane, MouldKing officially released their new 6 channel power module and new joystick controller. Especially the latter is notable as it allows smooth and precise controls instead of the binary 0% or 100% throttle with the standard remote or the fiddly touch-pad of your phone.
As the excavator comes with exactly 6 Motors, I additionally got the new power module and used that instead of the two 4-Channels modules that come by default. This allows you to control all functions simultaneously with a single remote with joysticks. Take your time to appreciate this.
Unfortunately, there is no nice set that bundles the new power module. It is currently only included with the crane mentioned above, which is pricy and has mixed reviews. So meanwhile, you will have to get the power module separately for about 20€, because it is totally worth it.
Changes for 6-Channel Battery Box
These are the minor changes you have to do to fit the slightly larger power module inside the excavator.
Modified rear assemblyMy Power Module configuration
Steps 393 – 399: Skip
Step 404: Use the 4 spare 3×1 beams instead
Step 405: Only use two Axle-Double-Pin connectors here and make them face outwards. If you have some spare 2×1 technic beams you should use those of course.
I got myself the MouldKing 13106 Forklift, which is based on the MOC 3681 by KevinMoo and wanted to share my impressions with you.
First of all, MouldKing actually improved the set by exclusively using back technic pins instead of the blue ones like in the MOC. Also they are officially cooperating with the MOC designer – so he is likely getting some share of the sales.
The set comes with “New PowerModule 4.0″, which means it supports proportional output. If you use the new joystick controller (like I do in the video) or use the app, you can have smooth controls of the motors and not just binary 0% or 100% throttle as with the standard remote.
As you can see, I actually put on some of the stickers. Some purists never do anything like this, because they argue that after some time the stickers start peeling off and look used. This is certainly a good point if you are building a sports-car – with a Forklift however, I would argue broken stickers add to the looks.
Compared to the original MOC, Mould King removed the lights, but added a pallet similar to the one found in the Lego 42079 Forklift.
Interested in getting the set? Support this Site by using the following affiliate Link:
Generally, I prefer the Mould King manual to the original by Kevin Moo as I like renderings more than photographs. However, its nice to have the original at hand if something looks fishy. While building, I noticed the following:
Step 34: Cable-management is almost completely skipped in the manual. I laid all cables through the opening behind the threads. This keeps them out of the way later. The fiddle through the cables of the motors, that you add at steps 52 & 55.
Step 100: The battery-box position is wrong. It will collide with the bar you added at step 96. To make it fit, just rotate the battery-box by 180°.
Also, the direction of motor A has to be reversed. Press and hold left-shoulder, up and down for 3 seconds for this.
Step 111: The arms that you added in steps 89/ 90 should be oriented upwards to hold the footstep.
Step 143: Use a black bush instead of the 2-pin-axle beam, so things look symmetrical. This is a leftover from the original MOC, which squashed the IR receiver in there.
Step 156: Attach the levers to the front console at step 173 instead of attaching them to the seat here. After all they are supposed to control the fork and not the backrest.
Step 214: I suggest using gray 2-axles at step 230 instead of the suggested whites. This way the front facing axes will be all gray. For this just use white 2-axles here. Those wont be visible at all anyway.
Step 277: When adding the fork to the lift-arm, make sure that it has as much play as possible. Otherwise the fork will get stuck when moved all the way up.
Interior with fixes at step 143 & step 156
Step 278: Do not fix the threads yet. Wait until the end so you can correctly measure the lowest position of the fork (which gives you the length of the threads).
Step 286: Make sure that the 3-pin pops out towards the 8-axle. This will make joining things at step 288 much easier.
Xiaomi has recently released the new Mi Band 5. Since I have owned the each band starting with the Mi Band 2, I think it is time to look back and see where the Mi Band has gone in the recent years.
Actually, the Mi Band story started ahead of the Apple Watch in 2014 with the Mi Band 1, which was a pure fitness-tracking device without a display and even without a heart-beat sensor. This made the device not very appealing to me – even thought it already offered sleep monitoring.
It also already had that interchangeable wrist-bands that allow you to customize the look to your liking. The Mi Band 2 you see in the images uses a custom steel wrist-band as the original one broke after some years of usage.
Below you see a comparison of the Mi Bands, regarding the features that are most significant from my perspective
Mi Band 2
Released 2016
Clock
Heartbeat
Notifications
Mi Band 3
Released 2018
Clock
Heartbeat
Notifications
Timer
Weather
Workouts
Mi Band 4
Released 2019
Clock
Heartbeat
Notifications
Timer
Weather
Workouts
Music control
Mi Band 5
Released 2020
Clock
Heartbeat
Notifications
Timer
Weather
Workouts
Music control
Cam shutter
The first thing to note is probably that Xiaomi accelerated the release cycle from 2 years between the Bands 1, 2 and 3 to 1 year between Band 4 and 5. We will come back to this when talking about the Mi Band 5.
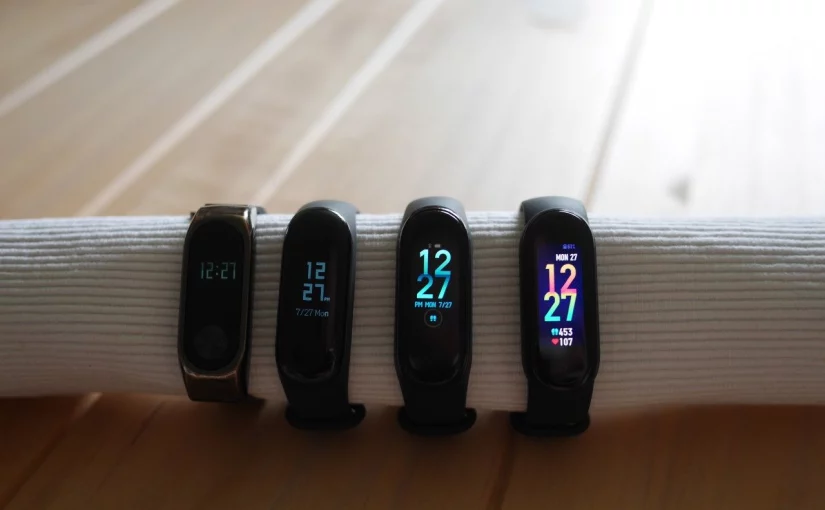
Screen legibility comparison
Lets start the comparison with the screen, which is the most obvious part and the one you will probably interact with the most.
Here, the most significant property is neither size nor resolution, but rather legibility in sunlight. For comparison, I set up a little benchmark as follows:
set the Bands to maximal brightness (as applicable)
legibility in direct sunlight on a bright sunny day as a worst-case
legibility in shade/ with overcast condition as a more common scenario
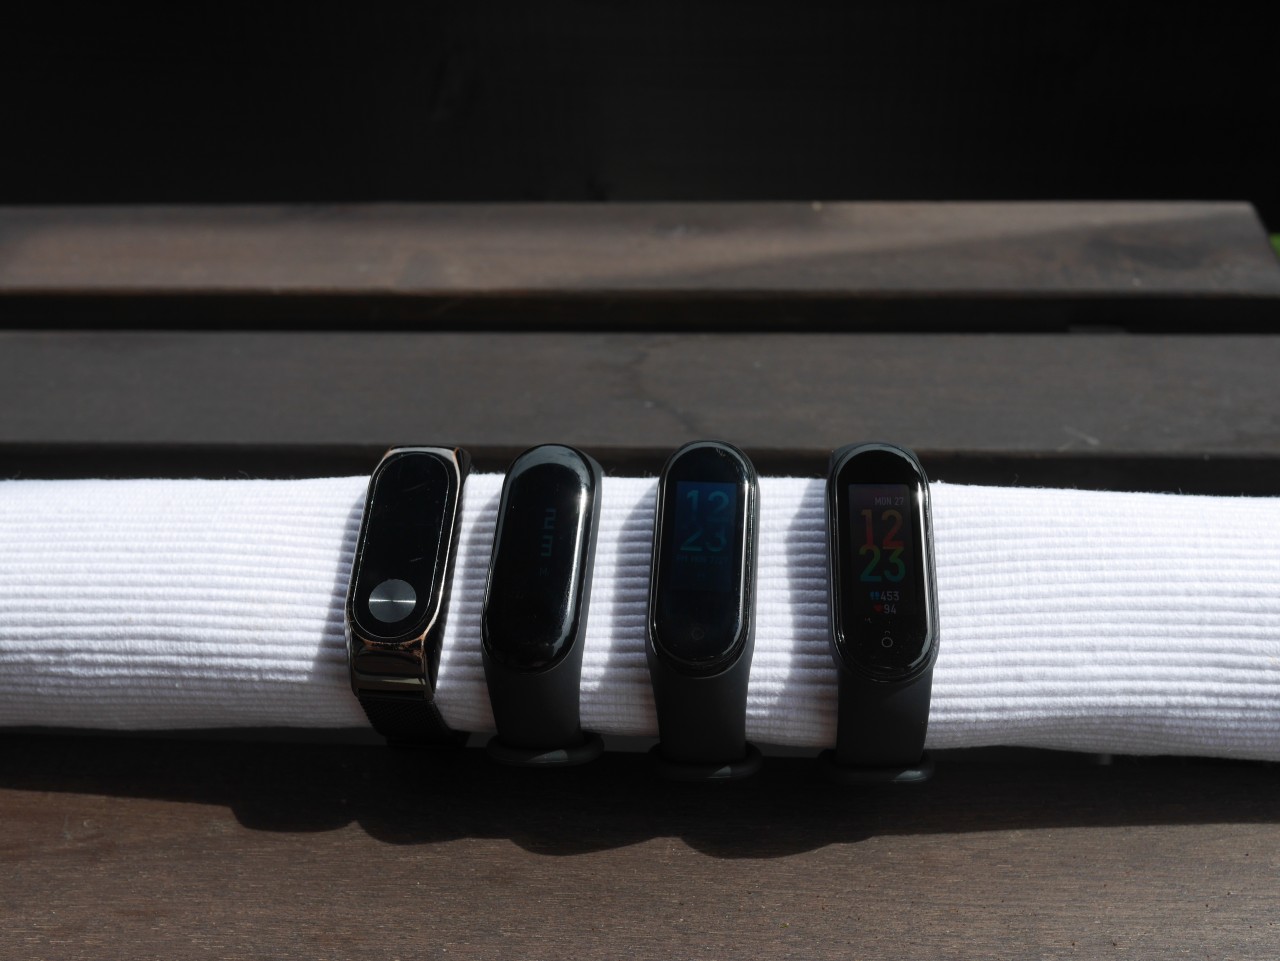
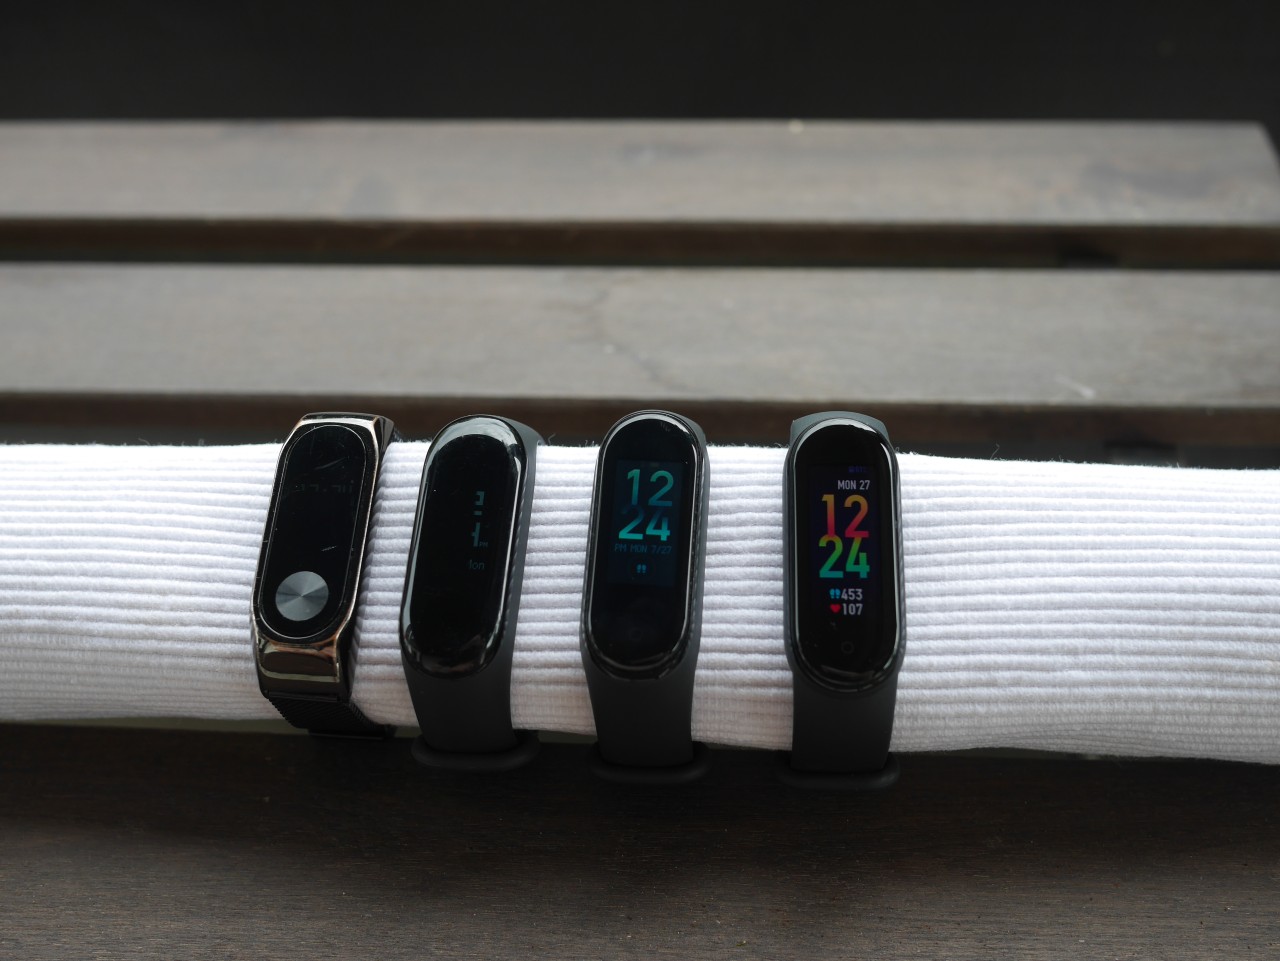
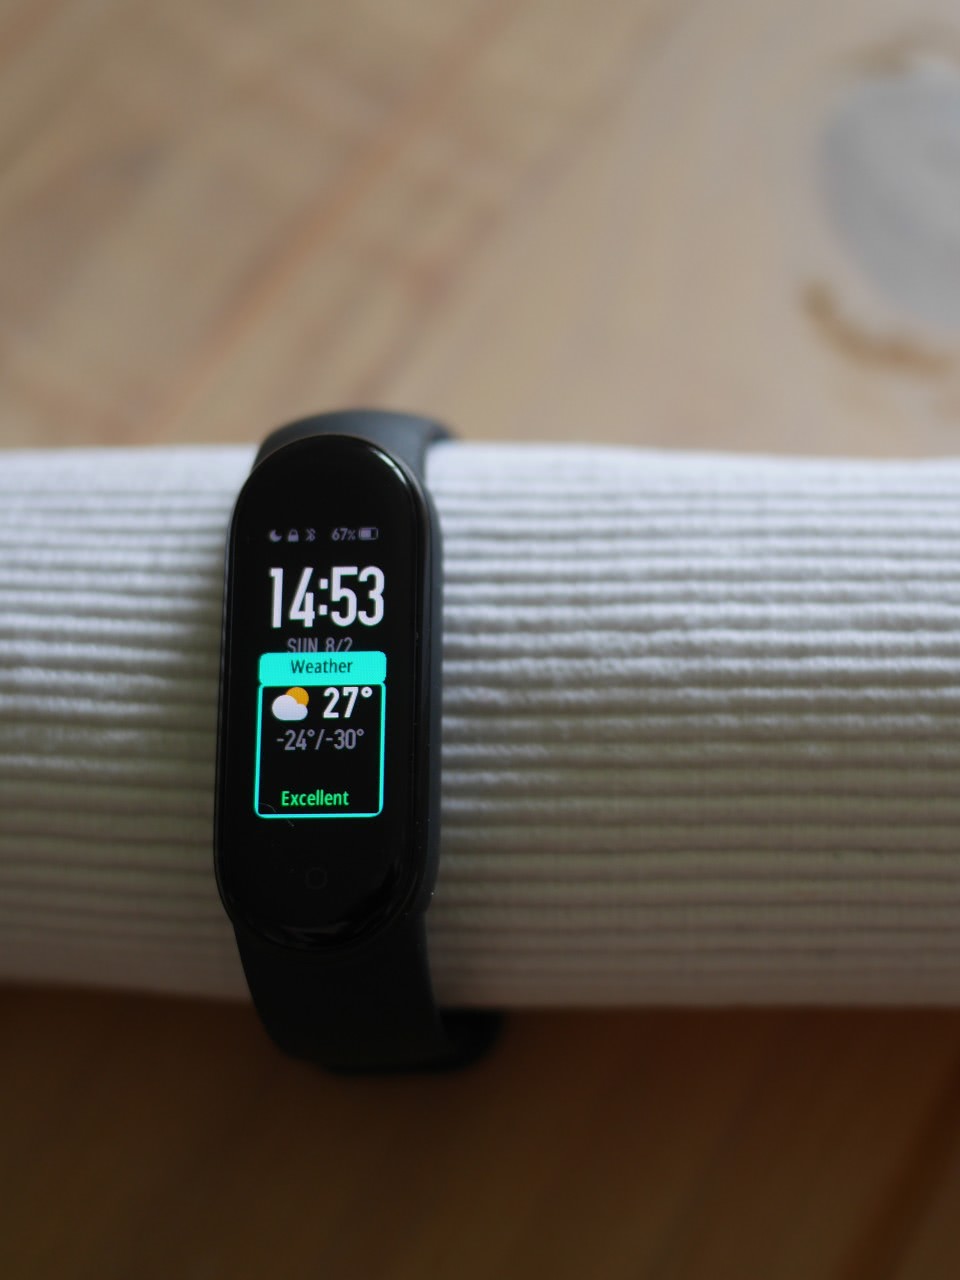
You can find the results below. Also see the banner image for how the screens look indoors.
bright sunlightshade/ overcast
First I should note that the camera does not do justice to the Mi Band 2 & 3 as their displays are scanline-based and the fast shutter can not capture the whole screen being lit at once. Therefore you only see the top part of the Mi Band 2 and the right part of the Mi Band 3 on the overcast picture.
Nevertheless, one actually cannot read the Mi Band 2 in direct sunlight and only can barely read it in the shade. The other Bands are well readable in the shade. However, I would say that only the MiBand 5 is well readable in direct sunlight.
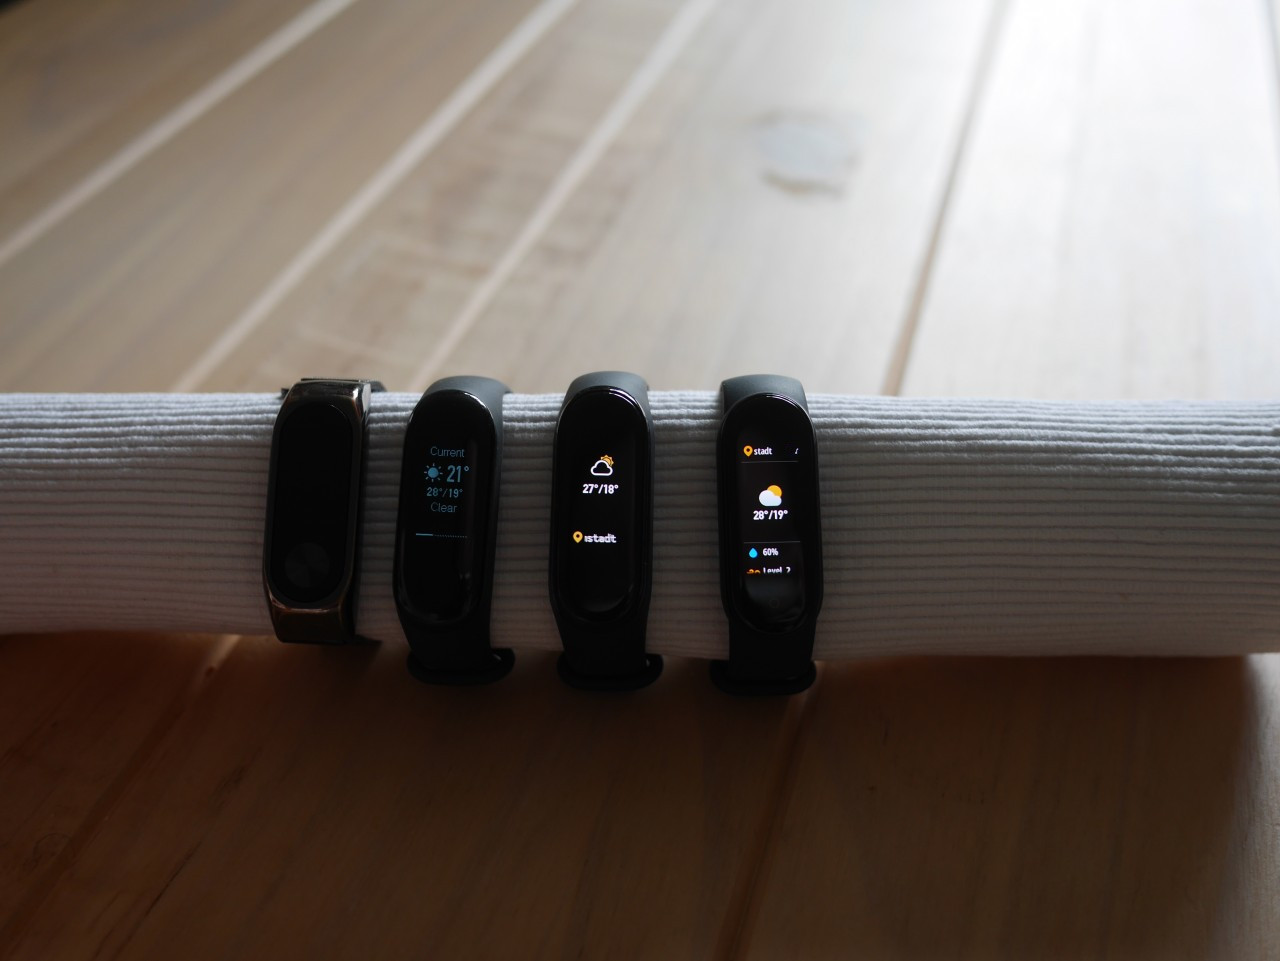
Next, we will look at how the information is presented. The screen size continuously increased from 0.78″ on the Mi Band 3 to 0.95″ on the Mi Band 4 (+22%) to 1.1″ on the Mi Band 5 (+16%). As you can read the time on all of them, we will look at an app to find out whether it makes any difference in practice. Here, I picked the weather app as it is probably useful to the majority of the readers.
The info displayed on the weather screen
Looking at the Mi Band 4, it did not really take advantage of the larger screen-estate and shows virtually the same information as the Mi Band 3 – only adding the location info. The Mi Band 5 on the other hand uses the extra space to show the rain probability. It generally displays more info like the wind strength and the current UV level – however you have scroll down for them. The Mi Band 2 does not support weather and is thus turned off.
Apps/ on band Screens
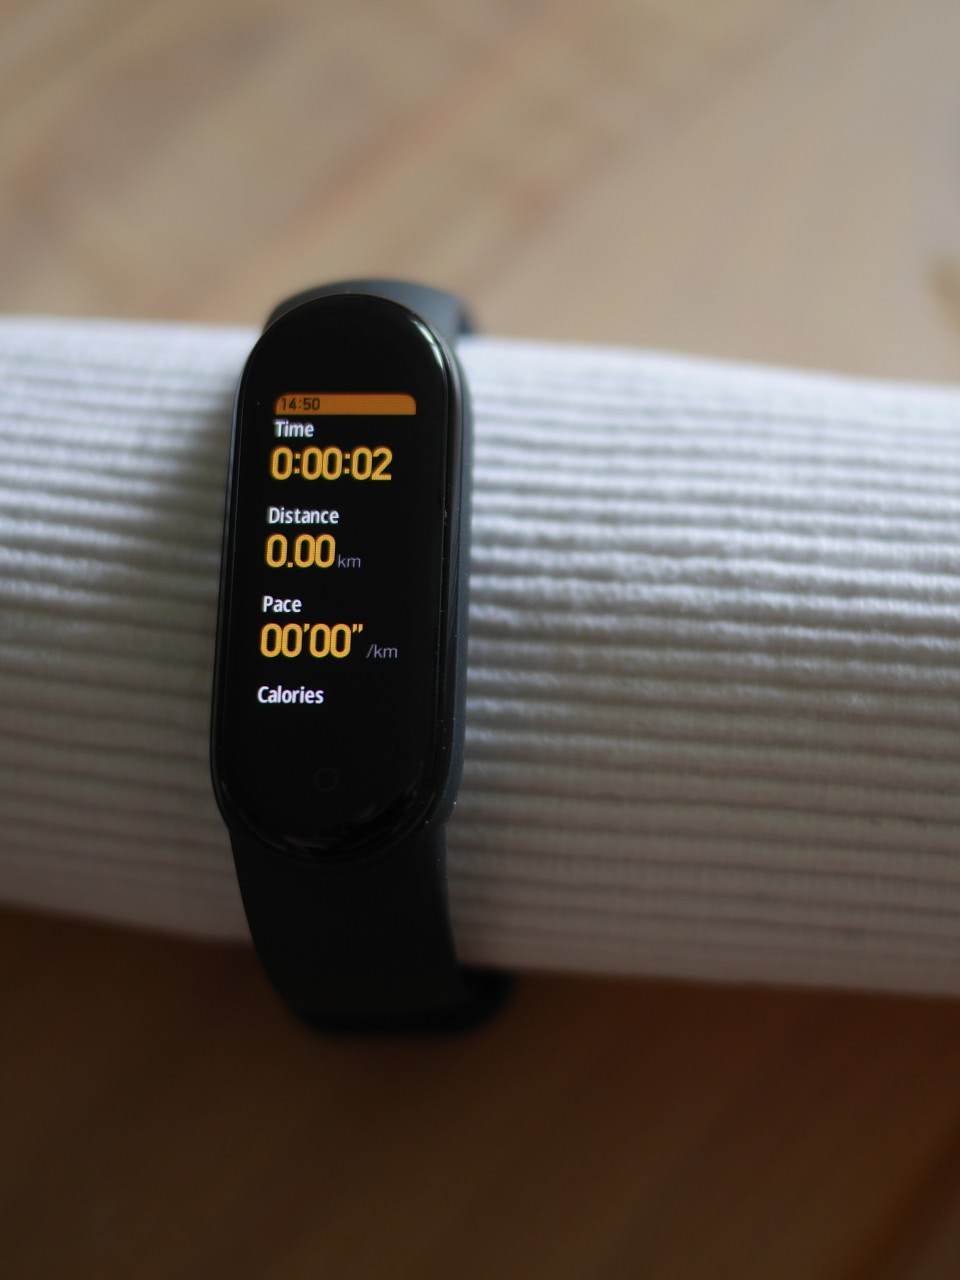
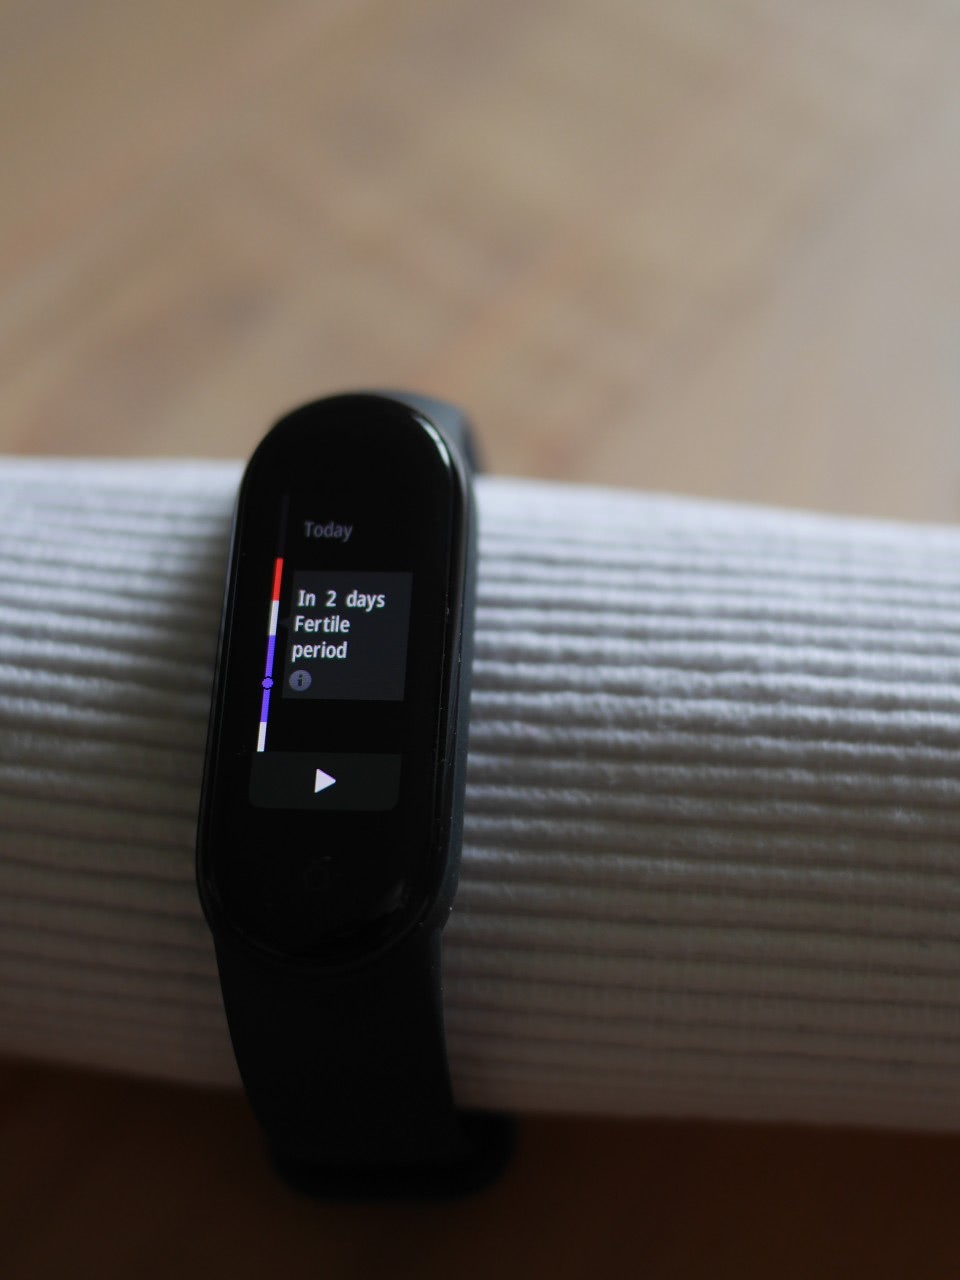
Lets also briefly look at the other apps. The images were captured on the Mi Band 5 – however unless otherwise stated the look exactly the same on the Mi Band 4.
The music control appOutdoor running workout appConfigurable watch face (Mi Band 5 only)Cycles app (Mi Band 5 only)
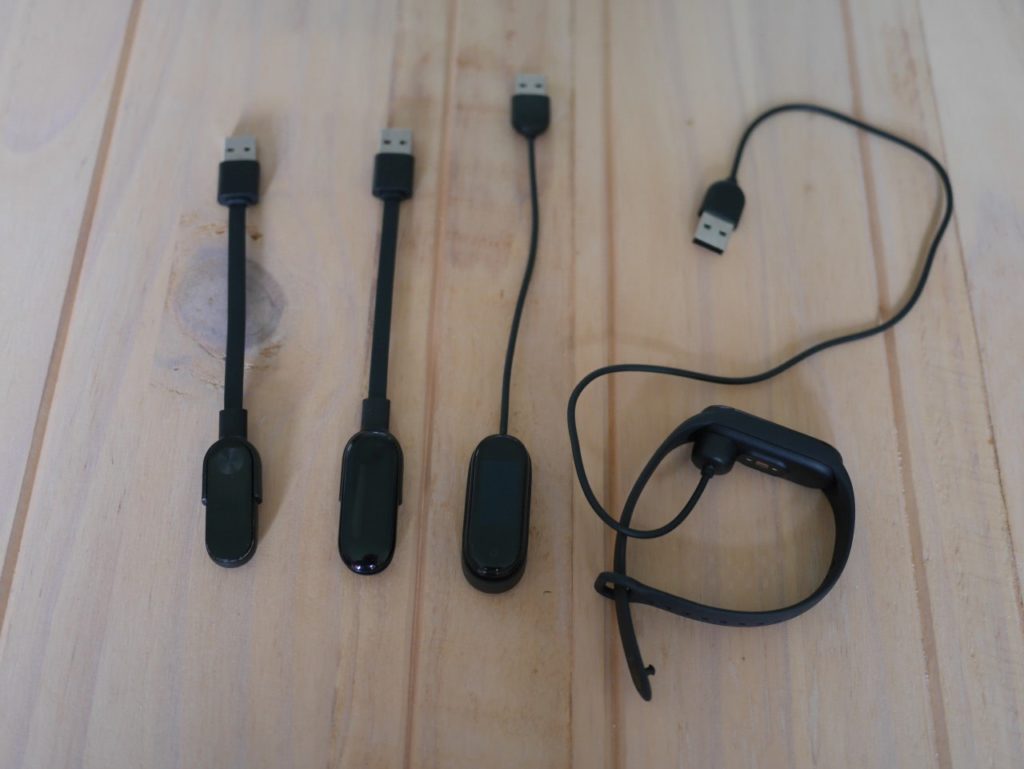
Charging
The Mi Band 5 is the first band, with a magnetically attachable charger – hence you do not have to take the band out for charging. This convenience comes at the price of a reduced battery-life from about 20 days with the Mi Band 4 to only 14 days with the Mi Band 5.
As for compatibility, you can charge the Mi Band 2 with the Mi Band 3 charger – the other way round is not possible as the Mi Band 3 is too large for the older charger.
Even though, the Mi Band 4 & 5 have their charging pins at the same location, the chargers are not compatible as the Mi Band 4 lacks the magnetic hold and the Mi Band 5 is too large for the old charger.
The Mi-Fit app
For the Mi Band the accompanying app is quite important as it is the only way to view your sleep data and to monitor your weekly/ monthly stats.
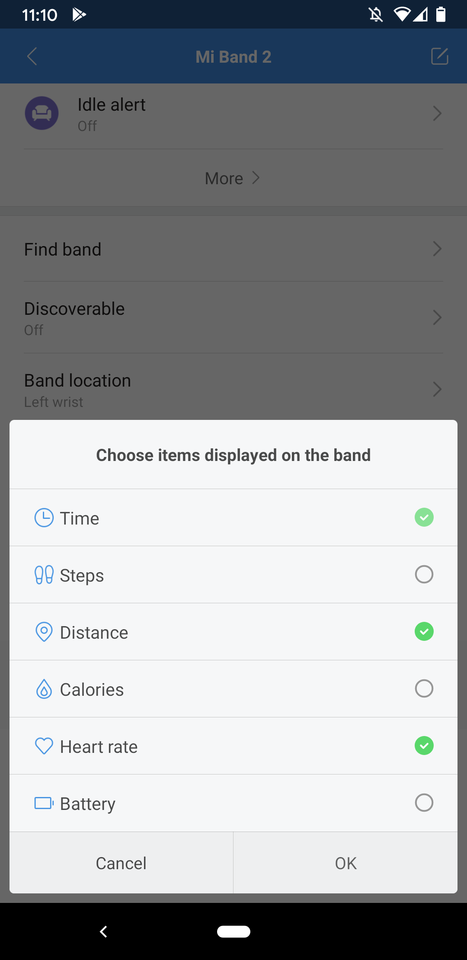
First, lets take a look how you can customize the different Bands from the app. Here, we should note that all bands are still supported by the app.
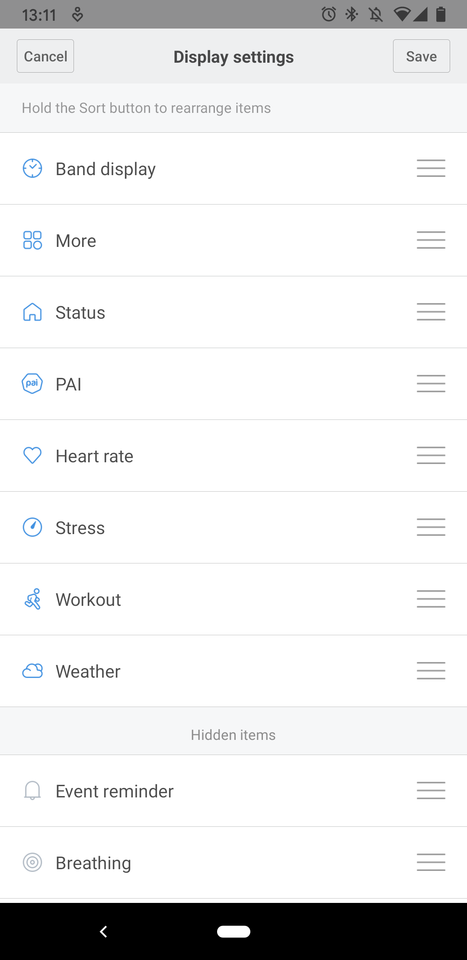
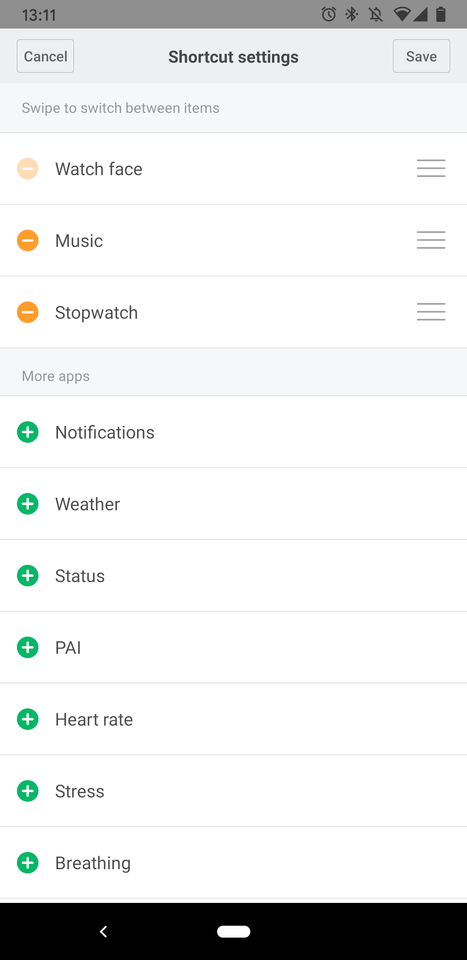
On the Mi Band 2 only the core options were availableThe screens on Mi Band 3 and newer are more customizableWith the Mi Band 5, you can also select the side screens
With the Mi Band, there is only a predefined set of screens/ apps out of which you can pick the ones you want. This is probably the largest difference to a real smart-watch, where you can install additional apps from a store.
With the Mi Band 2, the whole set fits on half a screen and you can only enable/ disable the items. With the other Bands you can additionally re-order the items, which is quite useful as it allows to choose which item appears first when you swipe up or down on the home screen.
On the Mi Band 5, you can additionally configure which app appears when you swipe left/ and right. This is hard-coded to Music Control (and Ali Pay on the CN version) with the Mi Band 4.
So the basic things work. Lets look at some peculiarities of Mi Fit next.
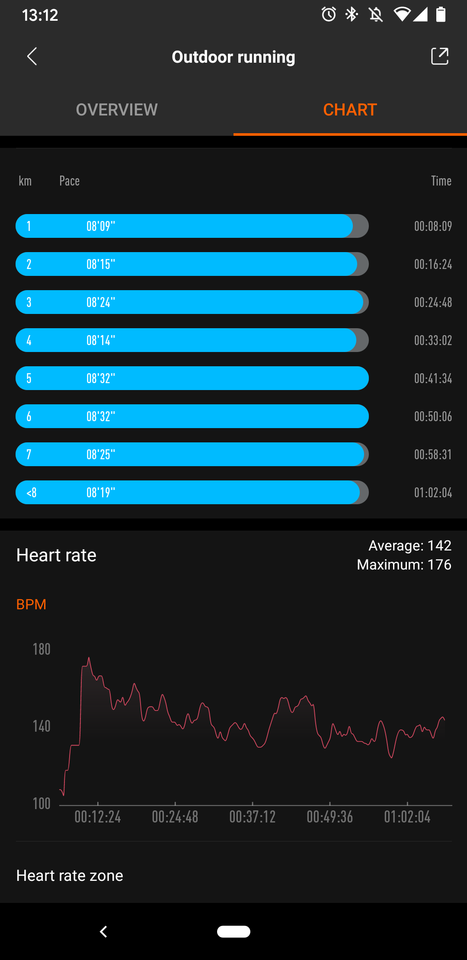
The sports stats are quite useful – if only the measurement was correctBe prepared for in-app ads for Xiaomi products
First you see the workout view for outdoor running, which displays some useful stats like your pace per km and the continuously measured heart-beat rate over time.
What you do not immediately see is that the app only counted ~7.3 km, while my running distance is actually 10 km, which I have verified on google-maps. One might now think that this is due to imprecise measuring of the band – however on the activity overview, where the daily steps are counted, the running activity is correctly accounted as 10.1 km – which is impressively accurate, given that it only counted the steps.
So the error is only present in the workout app, which is still quite annoying as it also provides the live view during a run.
If someone from Xiaomi is reading this: the error factor of ~0.73 is suspiciously close to the km to miles conversion factor of 0.625. The error is present with both the Mi Band 4 and Mi Band 5, so I guess it is actually in the App, where I already reported it several times. If you want happy customers, you better fix this. Many other reviews actually blame this on the band!
Addendum: with the firmware update to v1.0.1.32, the band now measures ~9km which reduces the error factor to 0.9. We are getting there.
So having talked about the bad, lets continue with the ugly. The second screenshot shows you an in-app ad for some obscure Xiaomi product on the home-screen. These do not show up too often and currently only advertise their own products. However, this is definitely the wrong path you are on.
Ultimately, this leaves me with mixed feelings about Mi Fit. In the Mi Band 2 days it started as a slim and functional app. However, at some point they decided to re-write it with the cards-look and animations. This rewrite moved core views one level down in the menu hierarchy and the added animations actually make the app feel sluggish.
Now, with each Band generation new features appear and are integrated in some sub-menu of the app. For instance, you get weather-alerts nowadays. However, they are not controlled in the general Band notification settings, but rather in the weather menu. Therefore, I doubt I would discover them as easily if I would not have watched the app grow.
The good news is that due to the popularity of the Mi Band, there are several alternative apps to try, which I probably will do next.
Mi Band history
In the following, I give a quick outline of how the Mi Band evolved. If you only came here for the Mi Band 5 review, skip forward to the Mi Band 4 section.
The Mi Band 2 was released 2016, about a year after the first Apple Watch launched, which brought the wearable category to the mainstream. At a price of less then 20€ the Mi Band offered most interesting wearable features to me, like heart-beat measurement, sleep monitoring, forwarding of smartphone notifications and ultimately, simply being a wristwatch.
Also it was an ideal way to try this new wearable thing without spending 350€, that Apple called out.
To my surprise the step-based distance estimation was already accurate back then – except for the actual workout mode, that is – as explained in the Mi Fit section.
Mi Band 3
The larger and brighter screen is the obvious advance of the Mi Band 3. However, the significant part is that it also became a touch-screen – whereas the Mi Band 2 only had the single touch-button. This allowed you swiping forth and back of the screens instead of just cycling through them and it also made virtual buttons possible. These are necessary for starting the stopwatch and timer, which are probably the most important additions for me with the Mi Band 3.
You could also start a selection workouts directly from the watch, instead of going though the app. However, this only included a treadmill mode, while I am interested in outdoor running – so I continued using the activity view for that.
More importantly, it added the weather app. If find this to be surprisingly useful. As with the time – even though you find the same info on your phone – having it at hand is better.
Mi Band 4
Again, the colored screen is the most obvious advance. It does not improve usability in any way though. It displays the same data as the monochrome screen of the Mi Band 3, which is probably more power-efficient. It adds a lot of bling though and is brighter and thus better legible in sunlight.
Speaking of bling, you can install third-party watch-faces now and there is a heap of faces to chose from. Take a look here to get an impression.
Turning to something useful, the touch sensor was noticeably improved. With the Mi Band 3 your swipes were sometimes confused with taps, which does not happen with the Mi Band 4 anymore.
The workout app, now finally included outdoor running, which is still broken though (see Mi App section). This makes the music control app the most important addition for me. At least on android, it works with any music player and allows skipping forward/ back and adjusting volume. This is quite useful when you play music from your phone at a party or for controlling your Bluetooth headphones.
One can use the same wrist-bands as for the Mi Band 3. This made upgrading for me back then a no-brainer, but is also a strong reason to choose the Mi Band v4 over v5, today.
Mi Band 5
This time, there are no obvious advances and the update is rather evolutionary. It does not mean it is insignificant though as it improves the usability on many levels. If you are new to the Mi Bands, you should pick this one.
The most important one is probably the new magnetic charger. Previously you had to take the “watch” out of the wrist-band to charge, whereas you can simply attach the magnetic charger now.
Next, the screen is slightly brighter which makes a difference in direct sunlight though (see screen comparison section) and also boasts more information.
Finally, the software was also noticeably improved. The band displays generally became more configurable. E.g. the custom left/ right swipes which now give you 4 quick access screens instead of 2. Then, the built-in watch-faces now allow customizing the additional info they display. And it continues with the small things like the configurable alerts in the workouts (although the workout app itself still needs to be fixed). Also, the selection of predefined watch-faces is vastly better then with the Mi Band 4. On the latter you have a hard time finding a watch-face that is simple and does not feature some animated comic figure screaming at you. These changes could be provided as an update to the Mi Band 4 as well, but are – at the time of writing – exclusive to the Mi Band 5.
Addendum: Mi Band 7
After a while I have upgraded to a Mi Band 7, but then switched to a Garmin Vivoactive 5, abandoning the Mi Band 7 due to its deteriorating battery. This change allowed me to compare both devices.
Using the accurate treadmill mode on the Mi Band 7 and GPS on the Vivoactive 5 for running, the Mi Band measured 9.96 km while the Vivoactive recorded 9.92 km, which is impressive given the Mi Band lacks GPS. For heartbeat measurements, the Mi Band recorded an average of 128 BPM (146 max), while the Vivoactive measured an average of 129 BPM (147 max).
Despite sticking with the Vivoactive for its better user experience, the Mi Band offers impressive value.
Disclaimer
The Mi Band 5 was provided to me free of charge by banggood.com. So if you liked this review and want to support me consider buying using the following affiliate links:
Having never skateboarded before, I saw the Archos SK8 electric skateboard for about 80€ at a sale and thought why not give it a try. This got me into this whole electric skateboarding thing.
Now that I have some more time at home during the summer, I upgraded to the Meepo Mini 2 and after having driven with it more than 100km, I thought I write down my experiences with the two boards and why I should have gotten the Meepo board from the start.
The competitors
The Meepo Mini 2 and the Archos SK8 are not really competing here, which should be clear looking at their price difference. But for completeness, also take a look at the specs of these two boards:
Meepo Mini 2
Archos SK8
Max. speed
46 km/h
15 km/h
Max. range
18 km
7 km
Max. Weight
136 kg
80 kg
Motor
2 x 540 W
1 x 150 W
Battery
144 Wh
50.4 Wh
Weight
7.4 kg
3.9 kg
Specs comparison
Actually, you can swap the Archos SK8 by any of the unbranded “cheap” Chinese boards that share the same design as the ones sold by Oppikle and Hiriyt.
Here, you might wonder how many Watts you actually need. For this I direct you to the Wikpedia article on bicycle performance that contains some sample calculations (and the formulae) which should roughly hold for electric skateboards as well.
Similarities
Before we dig into the differences, lets first note the similarities aka. the choices I made when picking these specific boards in the first place:
First, both boards are hub-motor driven. I made this choice on purpose, as electric skateboards are not road-legal where I live and hub motors are barely noticeable to the non-practiced eye. This reduces my risk of getting fined for riding one. However, I would probably generally recommend hub-motors over belt-driven motors nowadays as they require less maintenance (no moving parts), while offering a larger range and allowing pushing the board (belt driven block due to the gear ratio). The latter is especially nice, when you have run out of battery or if you do not want to draw any attention. When electric skateboards were first introduced by boosted, hub-motors were vastly inferior power-wise but that has changed now.
Next, both boards are of so-called “cruiser-style”. This is a size in between a regular skateboard and a long-board. They share a stiff deck and a kicktail with the former, while the use the wheels of the latter. At this point I should note that I mainly use the boards for leisure instead of a daily commute. This means that I value versatility of the board over comfort of ride. Here, having a kicktail is a must and rules out long-boards. It allows doing sharp turn, “wheelies” and you are more agile with the short board. However, you do notice the quality of the pavement very clearly in your feet and being out of the skating age my ankle did hurt the first couple of rides before it got used to it. So if you want to commute large distances, you should probably get a long-board with a flexi-deck that can cushion away most of the bumps.
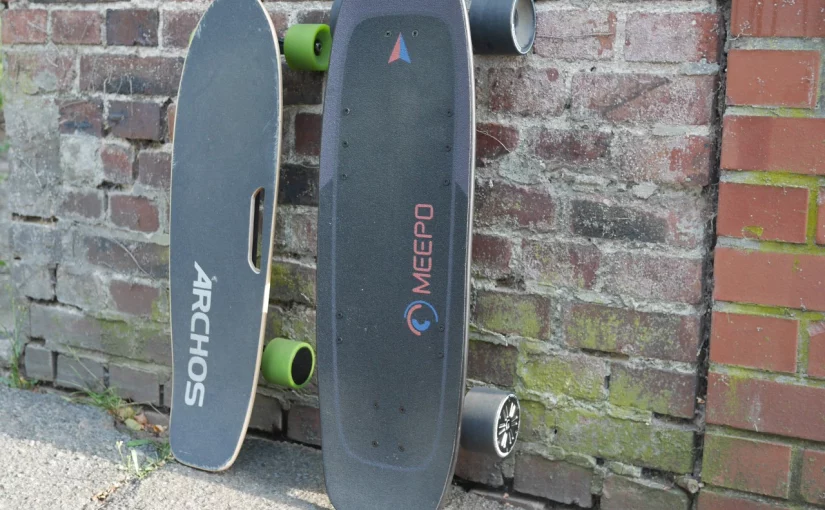
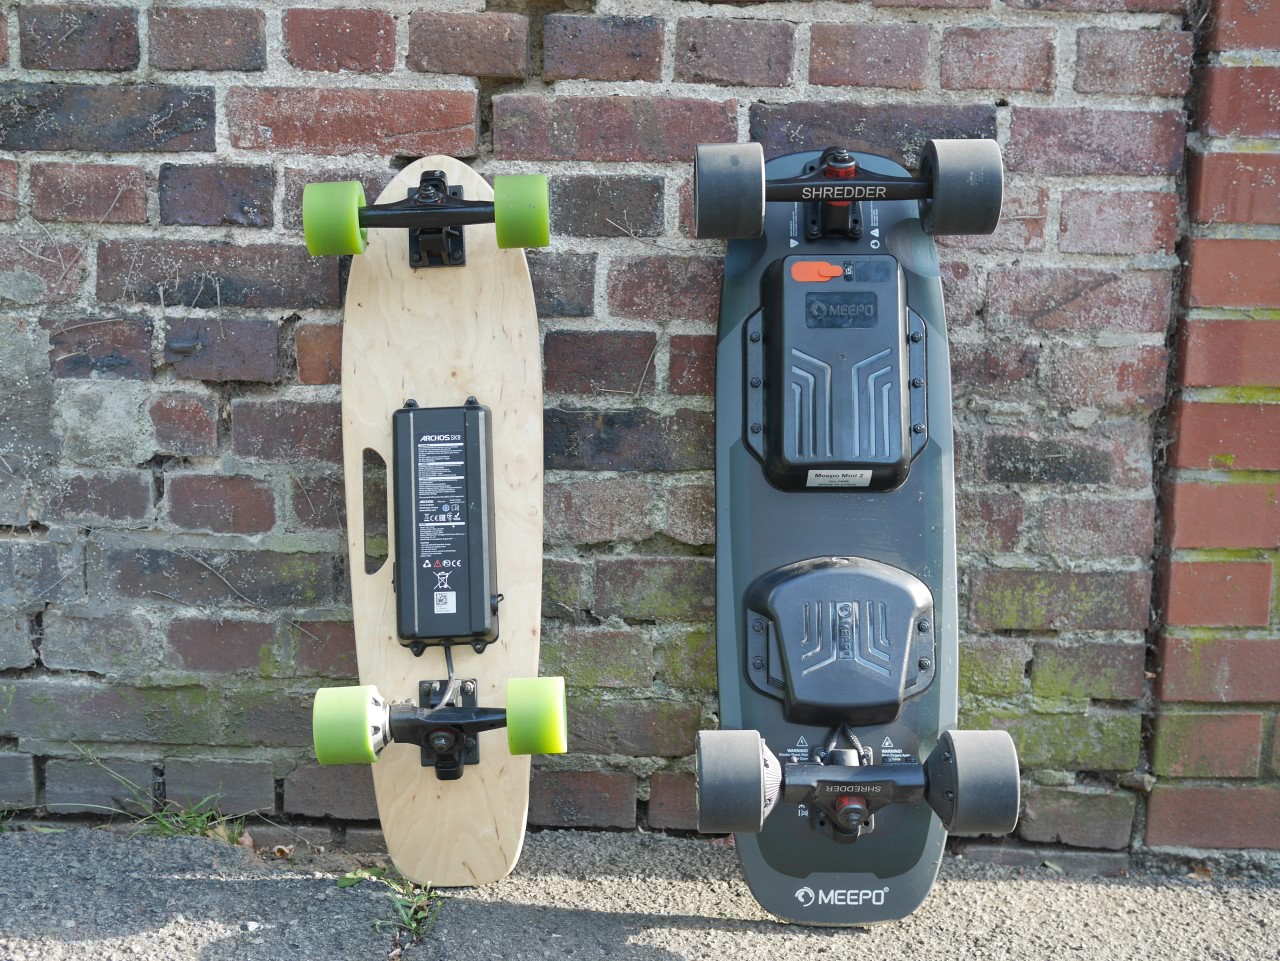
Differences
Both boards are of similar length, however the Meepo Mini 2 is considerable wider and heavier. It also has a larger wheel-base.
This results in a better grip and you also feel much more stable on the board. Flipping the board around, you see that the SK8 only uses a single-hub motor while the Mini 2 has two and each of them offers more than 3x the power.
If you do not expect the power or if you enable the pro-mode without being one, the Mini 2 can easily throw you off the board when accelerating or breaking. You can tame it though by using the beginner riding mode if you need to learn how to skate first. You can set the modes for acceleration and breaking separately and I would recommend always using at least the pro mode for breaking and learning to deal with it. In case of an emergency you want to be able to stop in time.
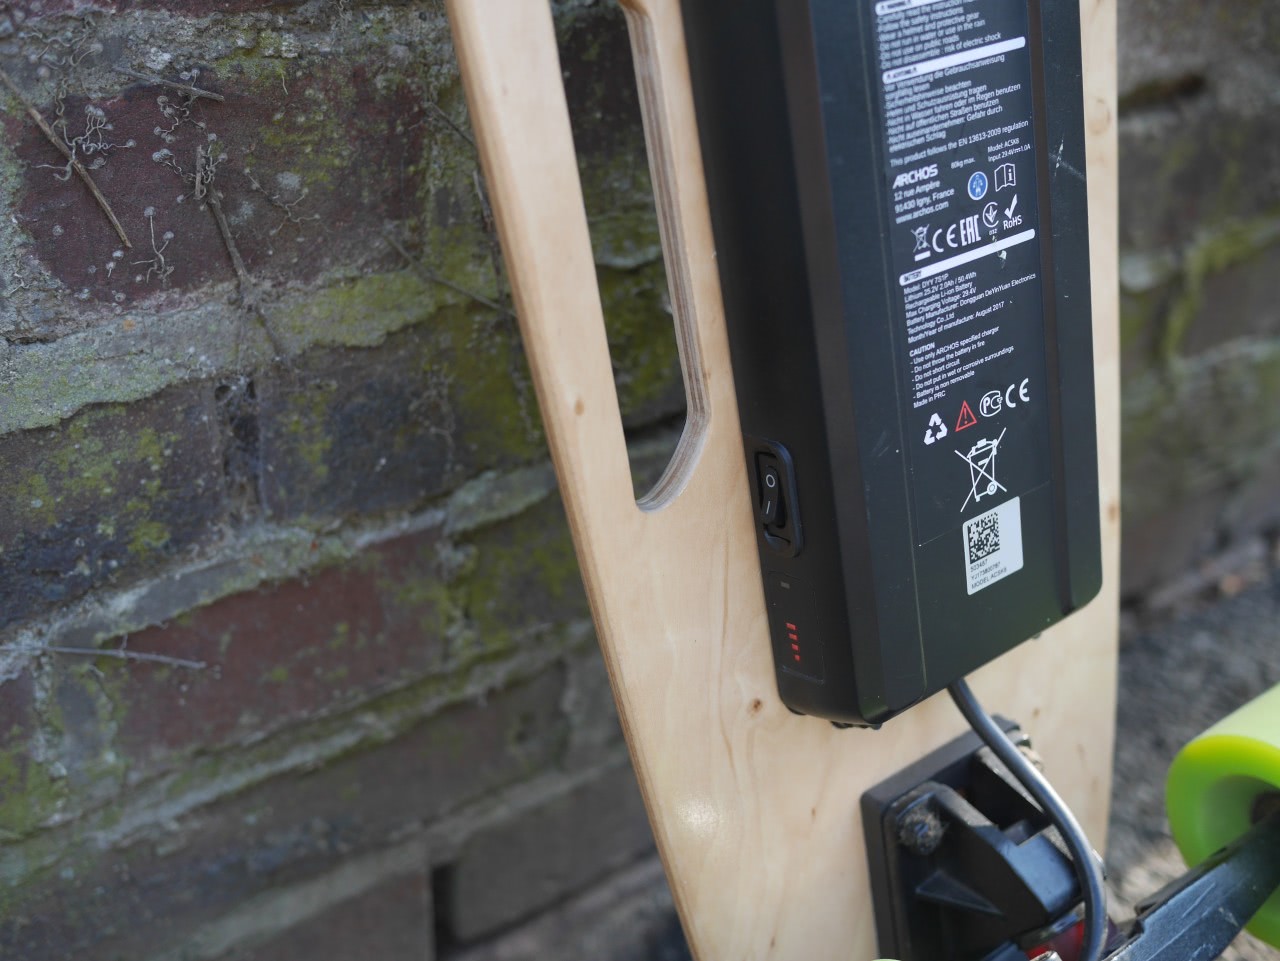
Turning to the SK8, the acceleration is.. meh and so are the breaks – in both of the two riding-modes. The difference between them is merely that the top speed is capped at 10km/h in the low-mode. But I must say that if you are a beginner this is sufficent; if you do not know how to ride being able to get going and to break are your two primary concerns and the SK8 does deliver here. The main drawback of the Archos SK8 is its tiny battery.
Aside: Li-Ion batteries
At this point we should probably briefly discuss Li-Ion battery technology. Mainly, the following two properties:
As you discharge the battery its Voltage drops, which is related to power (the Watts number) as P = V \cdot I, where I is the current in amps. So the more you discharge the battery, the fewer Watts you get out of your motors.
A full discharge (down to 0%) of the battery severely reduces its live-span. For maximal durability, you should always keep its charge between 40%-80%. Typically, the displayed range is clipped by the controller to help here.
So where does this leave us with the SK8? I did about 7 rides, fully-discharging the board (you do not want to stop after 10min, right?). And now the second riding-mode is essentially gone: when I try to accelerate the motors draw so much current, that the voltage drops below a critical level and the board turns off. Depending on what state the controller was in, I have to pair the remote again afterwards. But it also shows in the first mode: while the board initially could get me up a slight slope, it now immediately starts beeping due to critical voltage – again the motors need more voltage then the already worn down battery can give.
Remotes & charging indicators
Having covered the drive train, lets turn to the remotes. Both Archos and Meepo use a similar pistol-grip like design, where you control the motors with the thumb switch.
As one would expect, the Meepo remote is more sophisticated and offers detailed telemetry data on a nicely readable LCD display. There you find your current speed, drive mode and board charging level as well as the max. speed of the current ride.
On the Archos remote you only find 4 LEDs. Those are used quite well though: when you turn on the remote, they show the remote charging level. As soon as the board is connected, they indicate the board charging level, which is actually the most important information you need while riding.
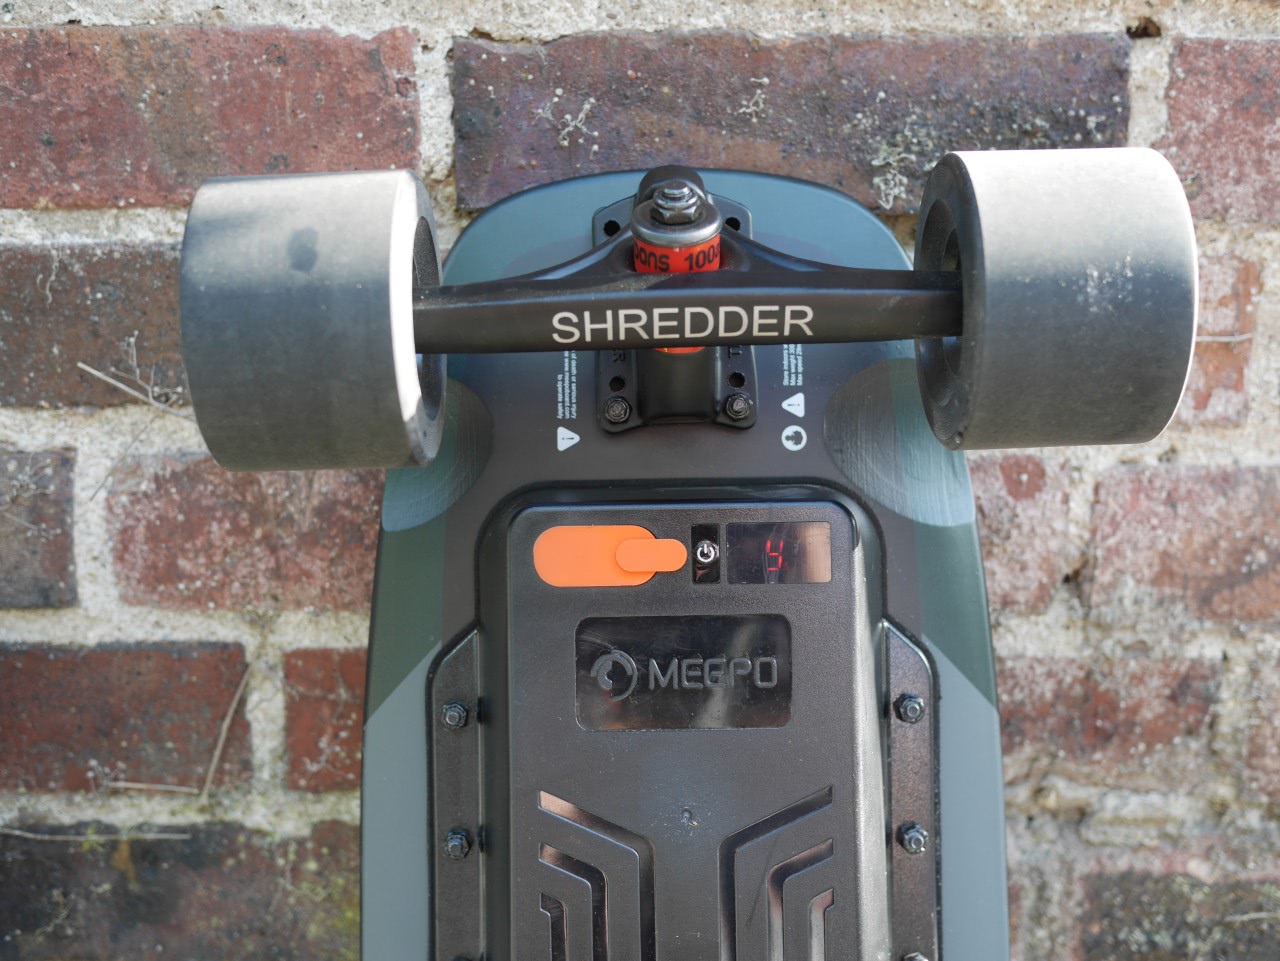
Similarly to the remotes, there are only 4 LEDs on the Archos Battery for the charging level, while you find a numeric LED-display on the Meepo board.
An actually noticeable feature on the Meepo Mini 2 is push-to-start; that is, you only have to push the board to turn it on – no need to bend down for flipping a switch.
Verdict
So why do I say you should go straight with the Meepo Mini 2 even as a beginner? On paper the Archos SK8 has everything it takes to be a nice beginner board. It is really the battery that kills it. With only 5-10 rides it is simply not worth the money, no matter how cheap it is. Looking at the price difference between the Meepo Mini 2 and the ER version that solely differ in the battery, you grasp that the battery is the crucial part in an electric skateboard. And the Archos SK8 is cheap, precisely because of the bad battery.
With the Meepo Mini 2 on the other hand you get a board that can “grow with you”: as you get more confident you can bump up the riding mode to get more power. Even if you decide that skateboarding is not for you, you can sell the Mini 2 as it will retain lots of its value – in contrast to just producing electric waste with the Archos SK8.
Riding the Meepo Mini 2
The Meepo Mini 2 is specified to go up to 46 km/h. Whether you can go that fast depends on your weight, the wind and the slope (see the Wikipedia link, mentioned above). In case you are fat and/ or there are lots of slopes where you live, you might also consider the ER version of the Mini 2, which comes with doubled battery capacity. As mentioned above this not only means that you can get further, but also that you have more power in the mid-range.
How fast can you go?
Having only previous experience on a Snowboard, I am a rather cautious rider. So far my max. speed (according to the remote) was 30 km/ h which I did uphill – in hope that stopping is easier that way. Going downhill (only using the motors for breaking), I feel comfortable until around 22 km/ h. I typically ride for about 30-45 min and the lowest the battery got was 40%, which means it should last for quite some time. Note, that I do not go straight uphill for 30min and that I usually push to get rolling, as this is where most energy is used.
A suitable helmet
When lifting the board, the remote showed that the ESC only limits the speed at 50 km/h. When riding a skateboard at anything above 10 km/h without a cushion-zone and no nothing, I would highly recommend you to at least wear a helmet. However, you should consider that a “normal” skate helmet is only specified (EN1078) up to 19.5 km/h impact speed – if you ride faster it does not guarantee protection.
Fortunately, one does not have to resort to heavy motorcycle helmets (ECE2205) as there is a specification (ASTM F1952) for downhill bike helmets, which was designed with speed in mind. It is specified for an impact speed of 22.3 km/h and typically the helmets provide full-face protection. Recently, even variants for downhill longboarding started to pop-up, which should be even a better fit style-wise.
Addendum: replaced NTA8776 by ASTM F1952 in the last paragraph
So after having made fun of people for “wearing toothbrushes”, I finally came to buy such headphones for myself.
Having used non-true wireless Bluetooth headphones before I was curious what the usability advantage would feel like.
Here I went for the Xiaomi AirDots Pro 2 aka True Wireless Earphones 2S which I could grab for 399 Yuan which is about 51€, which seems like the right price-point for this kind of accessory.
Keep in mind that the built-in battery only survives so many charging cycles and once it dies you can throw them away.
The Airdots (right) compared to the Airpods (middle) and the Oral-B Precision Clean
The initial feeling of using true wireless headphones is surprisingly relieving – there is simply no cord to untangle or to be aware of while wearing. This is especially true during phone calls, where one needs to keep the microphone aligned.
The downside is that the headphones are too small to accommodate any buttons for volume and playback control.
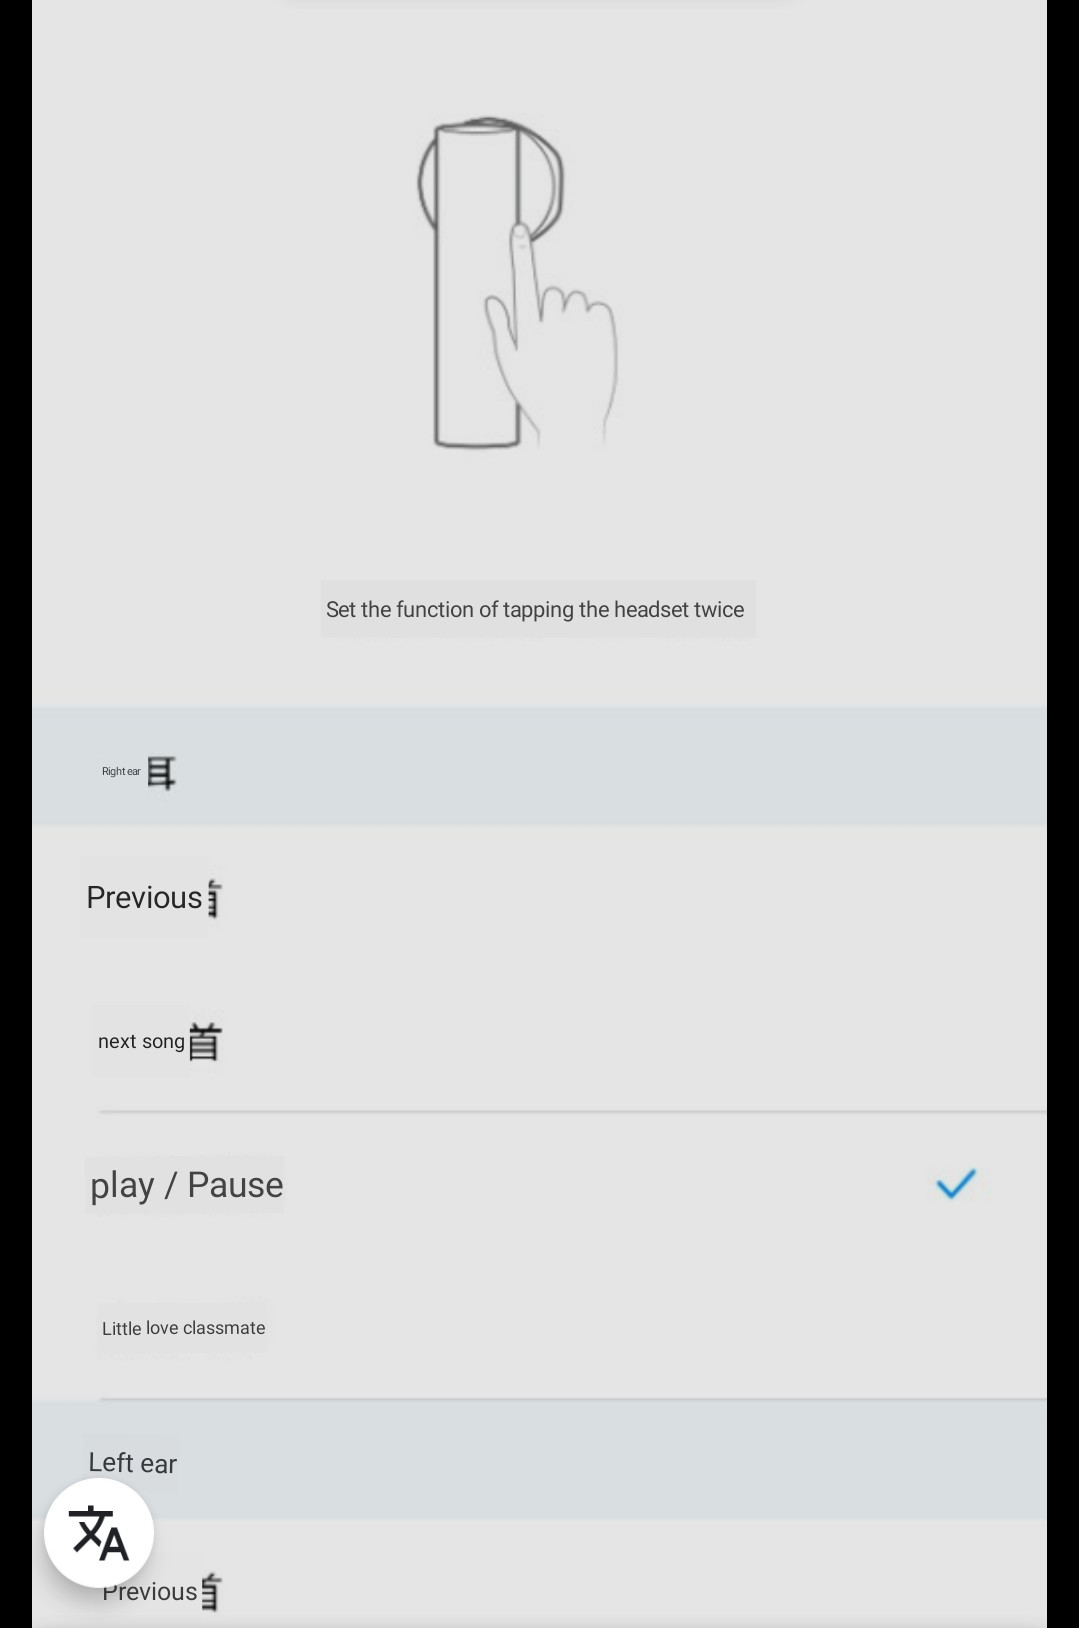
The Air 2 kind of make up for it by automatically connecting to your phone once you put them on and by automatically pausing the music when you put one out of the ear. This is achieved by a built-in brightness sensor.
Furthermore you have double-tap actions, which default to play/ pause on the right headphone and launching the voice assistant (e.g. Google Assistant) on the left headphone.
The battery life is stated with 4 hours per-charge with 2 extra charges in the case. I could confirm those on a long distance flight.
Compared to the Airpods 2
Looking at the feature-list above or simply at the images, the similarity to the Apple Airpods is apparent.
Out of curiosity I borrowed some from friend for comparison. The most important point is probably sound quality. Here we found the two virtually in-distinguishable. But keep in mind that we only did a quick test and did not use them extensively.
The second point is likely the form. Here, both earphones have the same ear-part and only differ by the shaft. So if one fits your ear, so should the other.
The shaft however is considerably wider on the Airdots. This is less apparent when viewed from the side as the thickness is similar.
For me, the more important difference is being able to control the headphones from my Android smartphone. This is currently not possible with the Airpods, while there is some way for the Airdots;
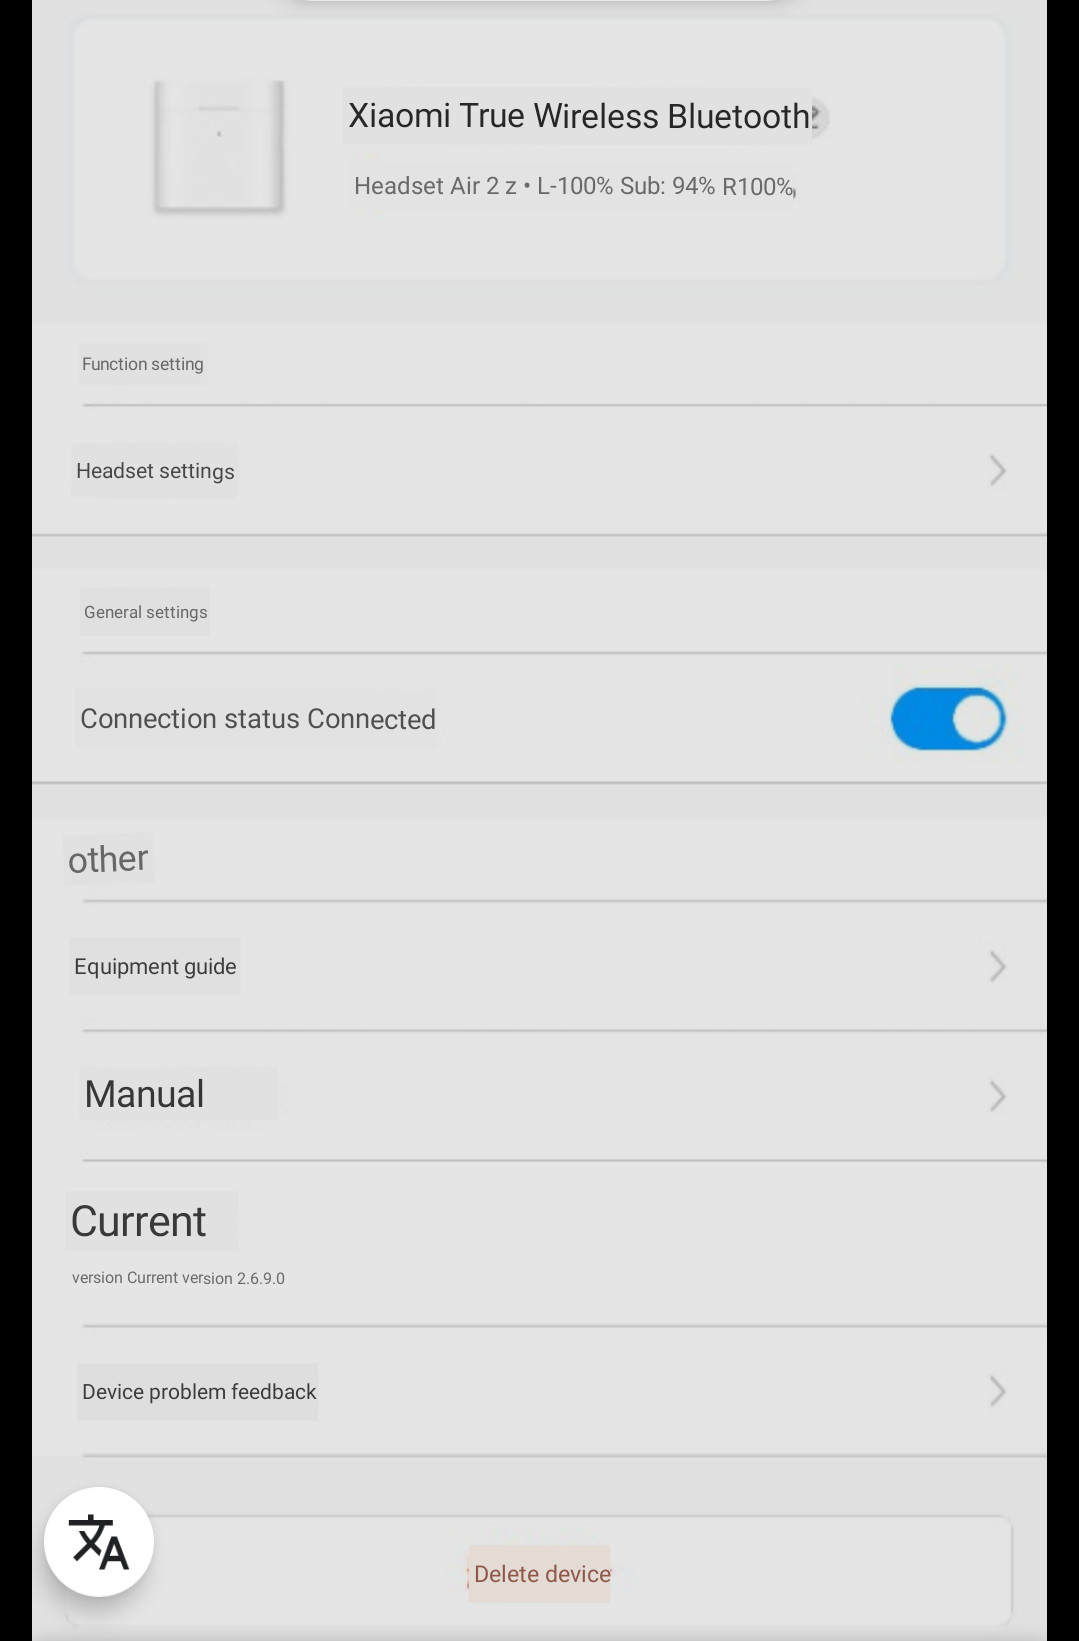
Companion app & Software integration
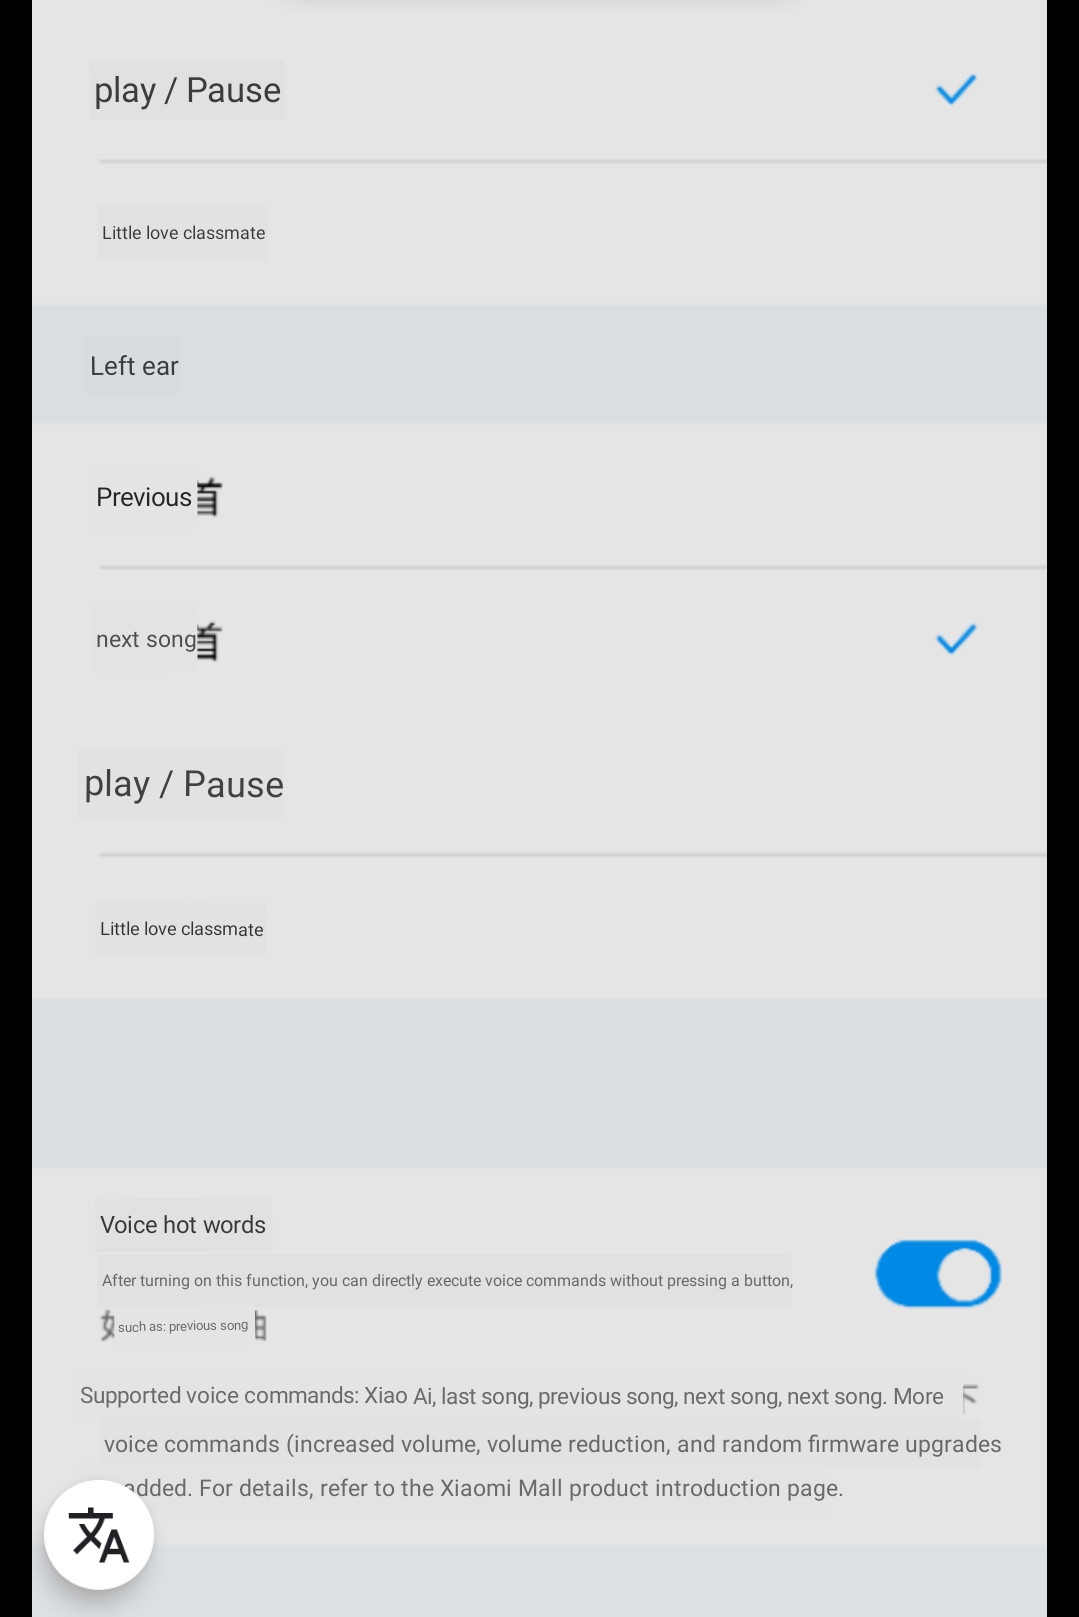
To control the earphones, you have to sideload the Xiao Ai Lite App. The main purpose of it is to provide the Xiaomi voice assistant and the Air2 options likely just ended up there instead of Xiaomi Home as they offer an always-on assistant integration just like the Airpods.
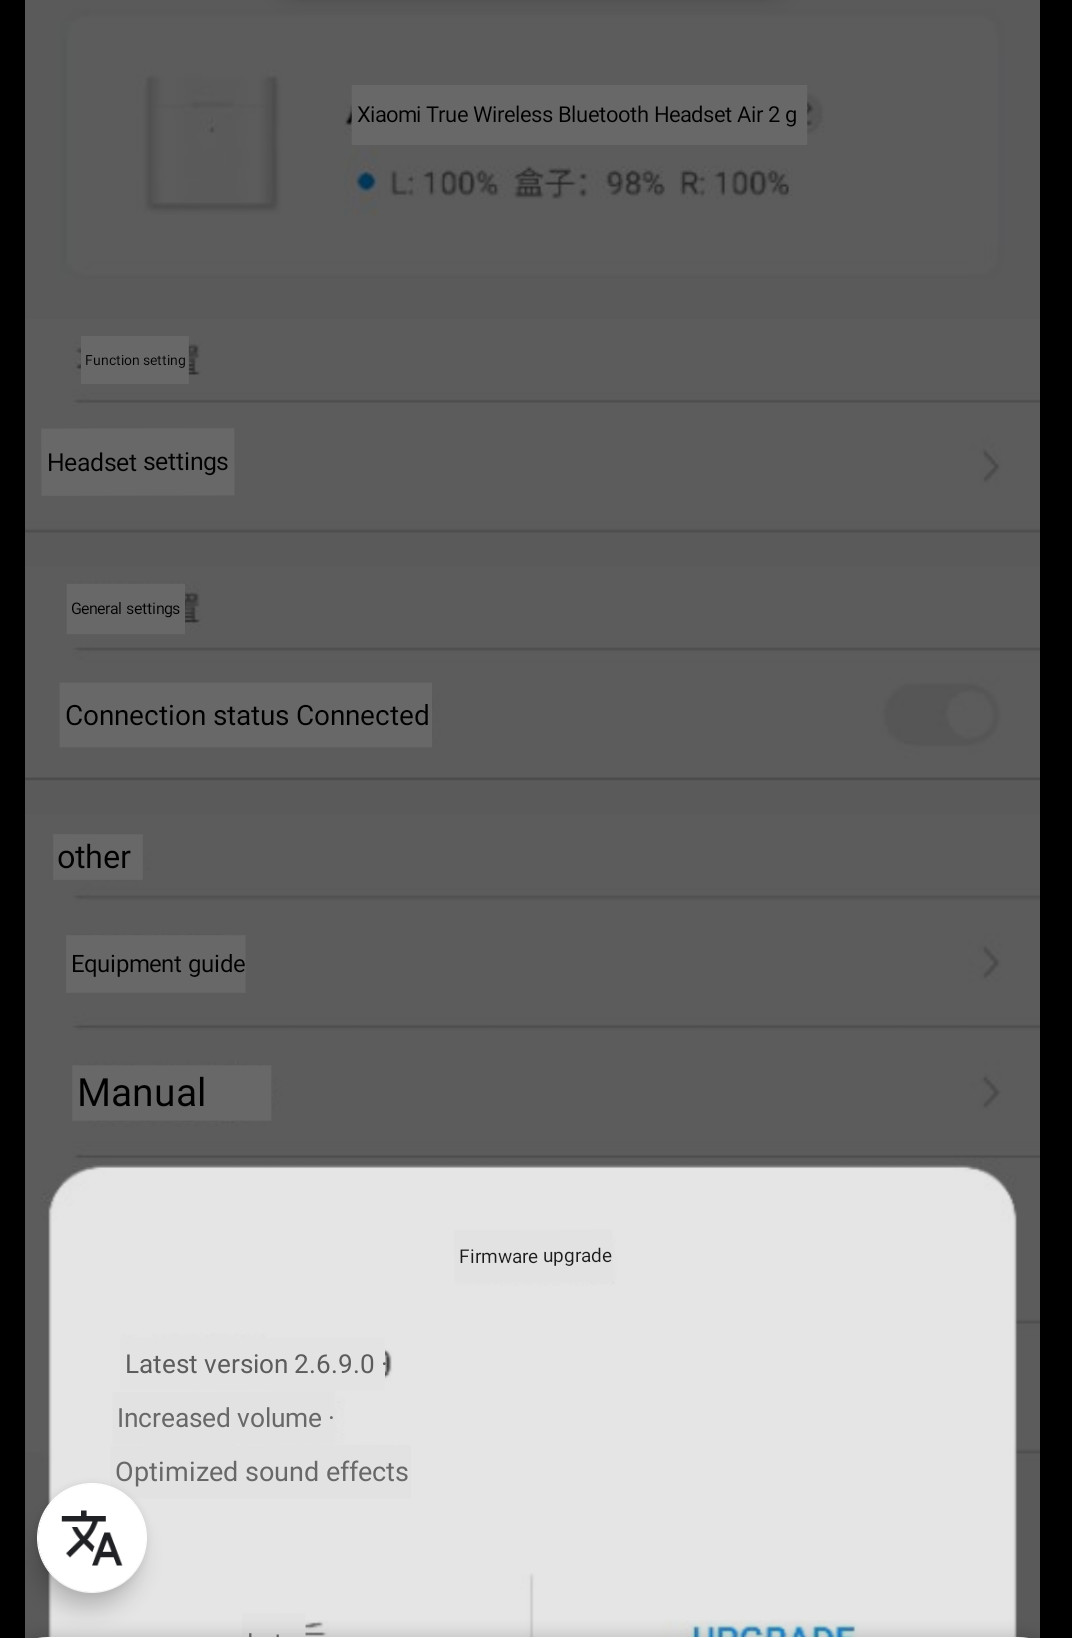
It handles firmware updates and allows you to configure the douple-tap action per earphone as well as displaying the charging status of the earphones and the case. By default android will only display the charging status of the least charged earphone.
Furthermore, you can use the fast-paring if the app is running. Here, it is sufficient to hold the earphone case close to the phone and just open it. The app will ask for confirmation. This is only slightly more convenient then holding the pairing button and using the normal bluetooth pairing procedure.
The downside is that the app is currently only available in Chinese and consequently the voice assistant only works with Chinese.
I tried out some voice commands via google translate and everything works as it should. However if you are not fluent in chinese it is far from practical. Most people should disable the assistant in the settings to avoid accidentally triggering it.
A serious advantage of Xiomi/ Huawei phones is the availability of the LHDC Bluetooth Codec which offers a superior bandwidth and latency. While I am fine with the bandwidth provided by AAC when listening to music, there is still a noticeable and annoying delay when watching videos and playing games.
Noise Shielding
The firmware upgrade to v2.6.9.0 significantly improved the acoustic pattern of the headphones by tuning up the low bands (base) and thus general sound quality.
This results in a very noticeable noise reduction compared to v2.6.2.0 – especially in the lower frequencies; things like your footsteps get filtered out. Higher frequencies like car motor sounds are still perceivable though. This is however a good compromise for me.
Addendum: previously I stated that the headphones provide active noise cancellation. They do not. I was mistaken by the significantly improved noise shielding through the tuned up bases.
Compared to True Wireless Earphones 2 Basic / Air 2 SE (Addendum)
Ultimately my left earphone died (see below) – likely due to a deep discharge. The second pair of the Air 2 still works though. I will update this review when I find out whether I just had bad luck or whether there is a systematic issue.
Anyway.. as a replacement I ordered myself the Air2 SE earphones, given my phone does not support LHDC and other online reviews described them as “the Air2 without LHDC”.
Well, I guess some sites try to sell an unboxing story as a review..
Air2 SE – Air 2
As you can see on the image above the Air 2 SE are considerably longer than the normal Air 2 and also have different vents.
While they are slightly too long now for my taste, my largest complaint is the sound quality. Basically, the bases which improved sound quality and shielding on the Air2 after the firmware update are missing here. So we have no shielding and a noticeably worse sound quality here. Next, the microphones on the Air 2 SE are noticeable less sensitive and I had to raise my voice from normal level so my callees could here me. Finally, the Air2 SE are not supported by the XiaoAI app, so you get no firmware updates and no configurable tap-actions.
Given the small pricing difference between the Air 2 and the Air 2 SE, I therefore recommend to always go for the former.
Also, if you encounter some sites that tell you the Air2 and Air2 SE are the same, please enable your adblocker. Especially if they jabber about different touch zones, even though the marketing material makes it quite clear that up/ middle/ down means you can touch the single zone at any position.
Charging issues
Over time I noticed that the left earphone consistently runs out of battery before the right one. The issue seems to be that it discharges while stored inside the case. Putting it in and out resolves the issue – but only until it is fully charged. This makes keeping the earphones pre-charged and ready quite an issue.
Hopefully this can be addressed with a future firmware update. (reproduced with firmwares up to v2.7.1.0)
Addendum: the replacement pair (see above) do not have any charging issues. Therefore I guess the issue is just a singular manufacturing defect.
When using Nextcloud it makes some sense to host it yourself at home to get the maximum benefit of having your own cloud.
If you would use a virtual private server or shared hosting, your data would still be exposed to a third party and the storage would be limited as you would have to rent it.
When setting up a server at home one is tempted to use a Raspberry Pi or similar ARM based device. Those are quite cheap and only consume little power. Especially the latter property is important as the machine will run 24/7.
I was as well tempted and started my self-hosting experience with an ARM based boards, so here are my experiences.
Do not use a Raspberry Pi for hosting
Actually this is true for any ARM based board. As for the Pi itself, only the most recent Pi 4B has a decent enough CPU and enough RAM to handle multiple PHP request (WebCAL, Contacts, WebDAV) from different clients without slowdown. Also only with the Pi 4B you can properly attach storage over USB3.0 – previously your transfer rates would be limited by the USB2.0 bus.
One might argue that other ARM based computers are better suited. Indeed you could get the decently equipped Odroid U3, long before the Pi 4B was available. However, non-pi boards have their own set of problems. Typically, they are based on an Smartphone design (e.g. the Odroid U3 essentialy is a Galaxy Note 2).
This makes them plagued by the Android update issues, as these boards require a custom kernel, that includes some of the board specific patches which means you cannot just grab an Ubuntu ARM build. Instead you have to wait for a special image from the vendor – and just as with Android, at some point, there will be no more updates.
Furthermore ARM boards are actually not that cheap. While the Pi board itself is indeed not expensive at ~60€, you have to add power-supply housing and storage.
Intel NUC devices are a great choice
While everyone was looking at cheap and efficient ARM based boards, Intel has released some great NUC competitors. Those went largely unnoticed as typically only the high-end NUCs get news coverage. It is more impressive to report how much power one can cram into a small form-factor.
However one can obviously also put only little power in there. More precisely, Intels tablet celeron chips that range around 4-6W TDP and thus compete with ARM boards power-wise. (Still they are an order of magnitude faster then a Raspberry Pi)
Device
Power (Idle)
Power (load)
Odroid U3
3.7 W
9 W
GB-BPCE-3350C
4.5 W
9.6 W
Here, you get the advantages of the mature x86 platform, namely interchangeable RAM, interchangeable WiFi modules, SATA & m2 SSD ports and notably upstream Linux compatibilty (and Windows for that matter).
As you might have guessed by the hardware choice above, I made the switch already some time ago. On the one hand you only get reports for the by now outdated N3350 CPU – but on on the other hand it makes this a long term evaluation.
Regarding the specific NUC model, I went with the Gigabyte GB-BPCE-3350C, which are less expensive (currently priced around 90€) than the Intel models.
Consequently the C probably stands for “cheap” as it lacks a second SO-DIMM slot and a SD-card reader. However it is fan-less and thus perfectly fine for hosting.
So after 2 Years of usage and a successful upgrade between two Ubuntu LTS releases, I can report that switching to the x86 platform was worth it.
If anything I would probably choose a NUC model that also supports M.2/ M-Key in addition to SATA to build a software RAID-1.