After being absent from the RC world for some time, I recently took another look at the advances FPV drones have made. The last time, I was mainly into RC helicopters as FPV flight seemed a fiddly and expensive thing to do.
But progress did not stop and nowadays there are multiple options to get a complete FPV kit for 200-300€. I picked the Tinyhawk III RTF kit and here are some impressions of using it and how it compares to alternatives.
Table of Contents
- Drone: Tinyhawk III
- Goggles: Transporter 2
- Battery and Charger
- Remote: E8 Transmitter
- Alternatives
- Where to go next
- Usage with Ubuntu
- BlueJay ESC firmware
- Youtube Channels to follow
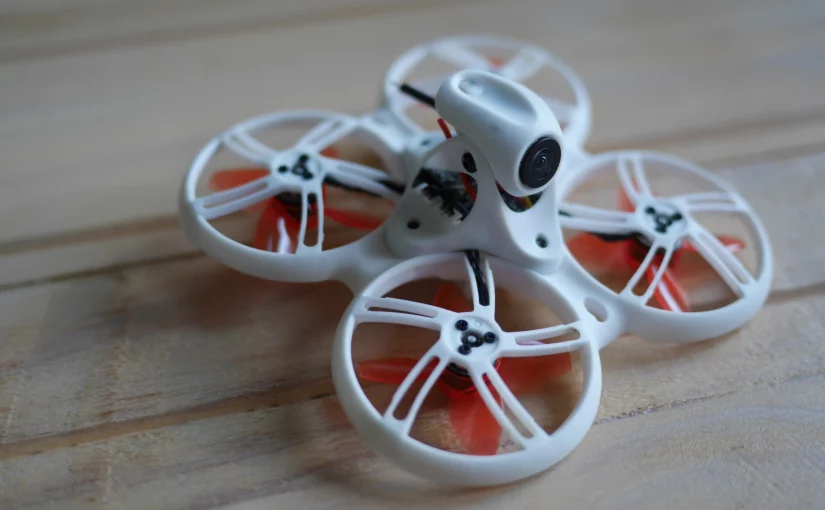
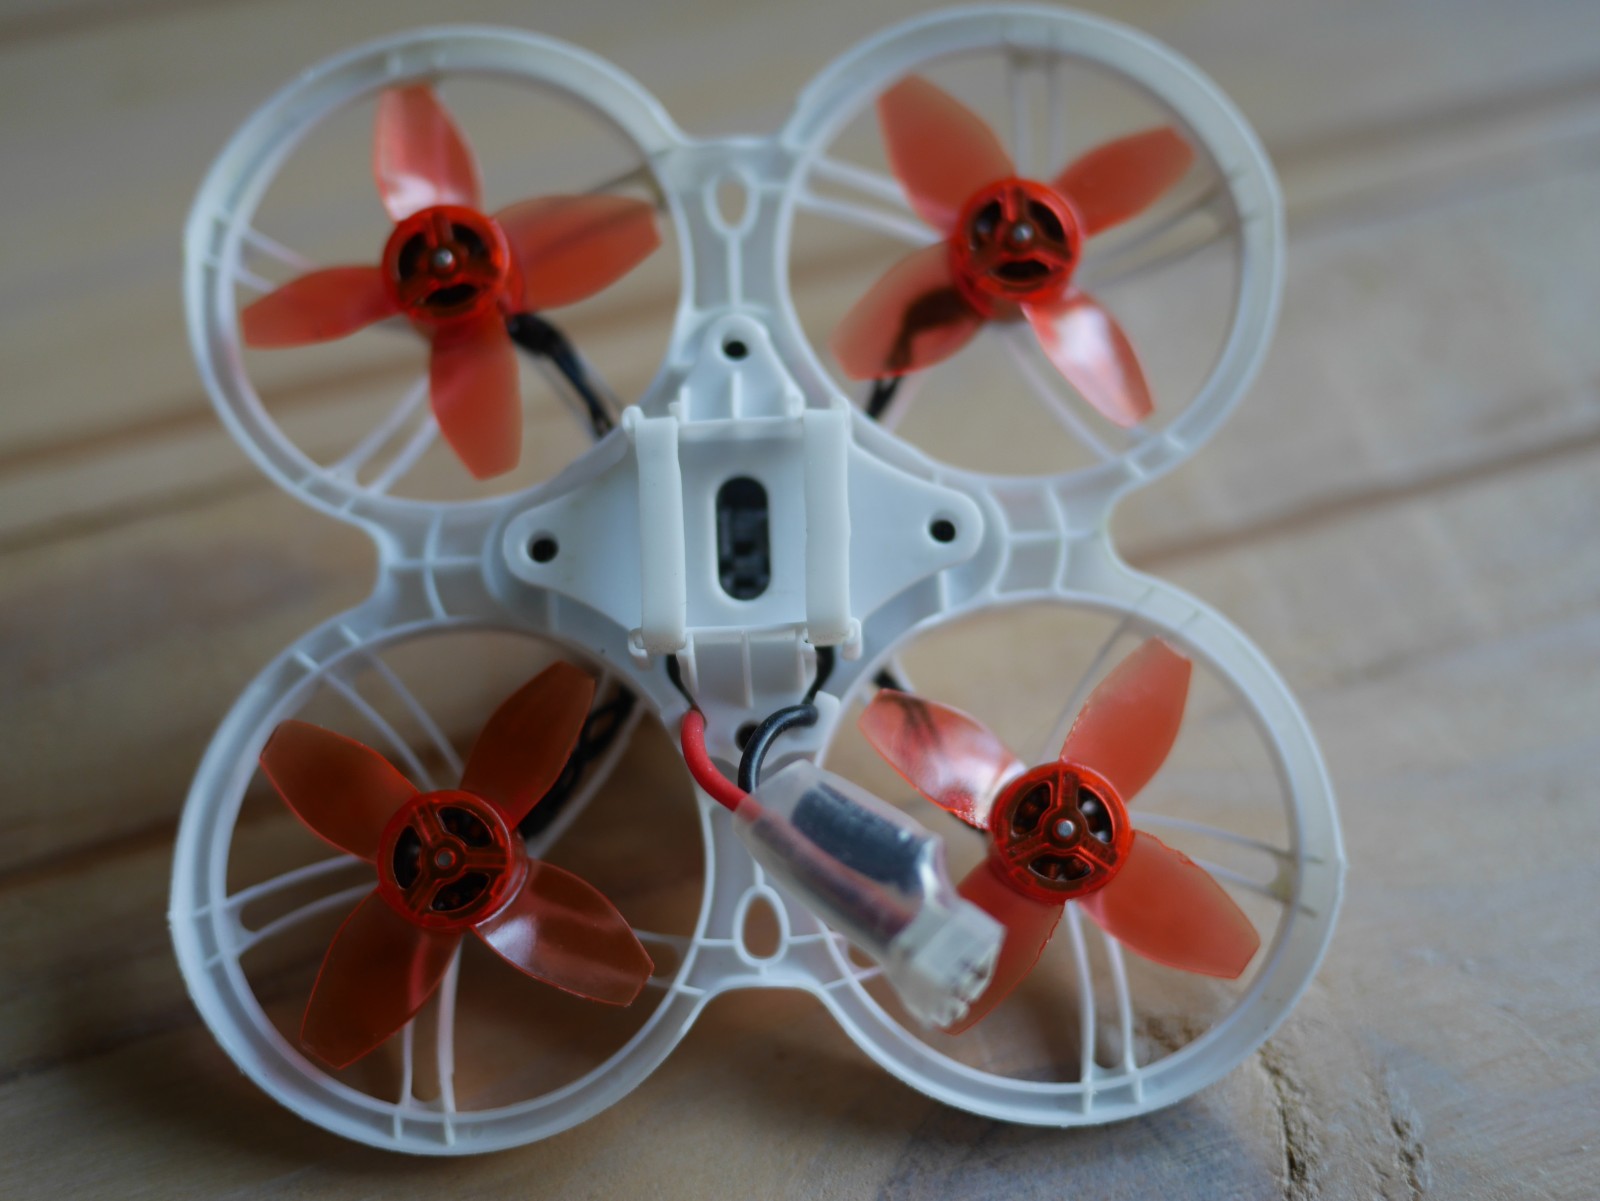
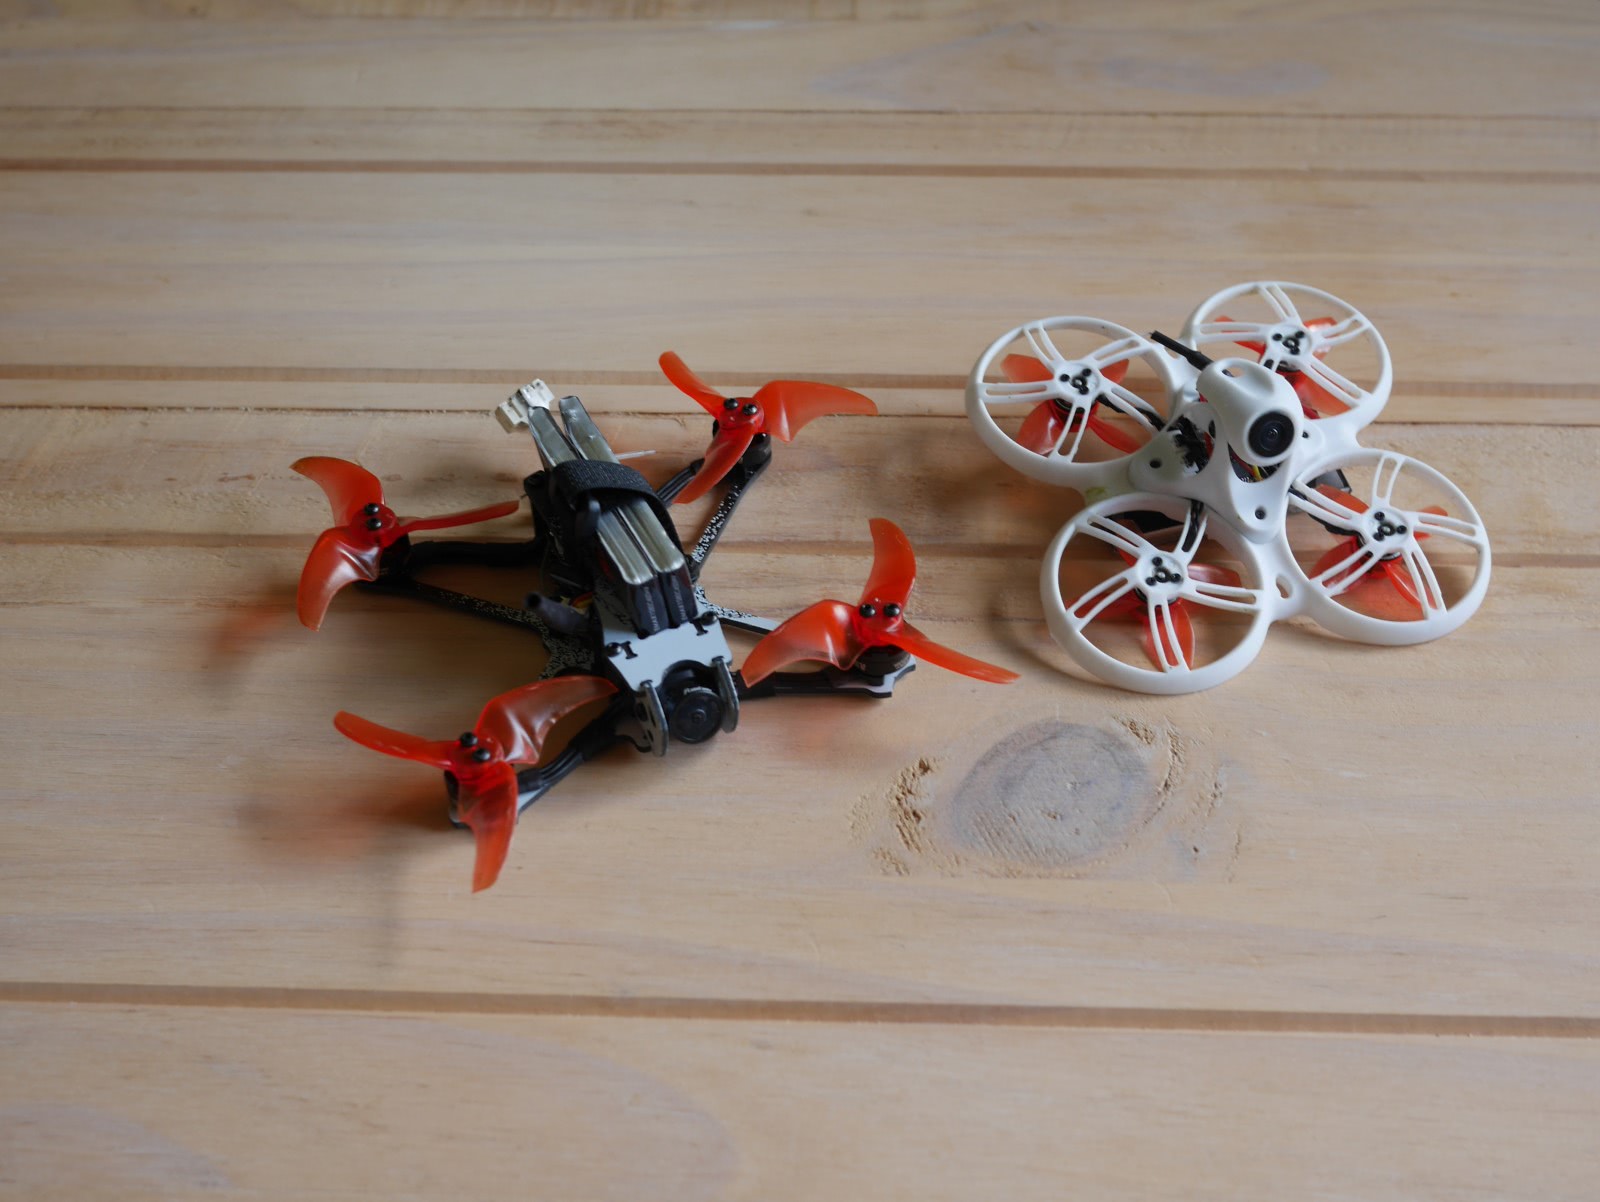
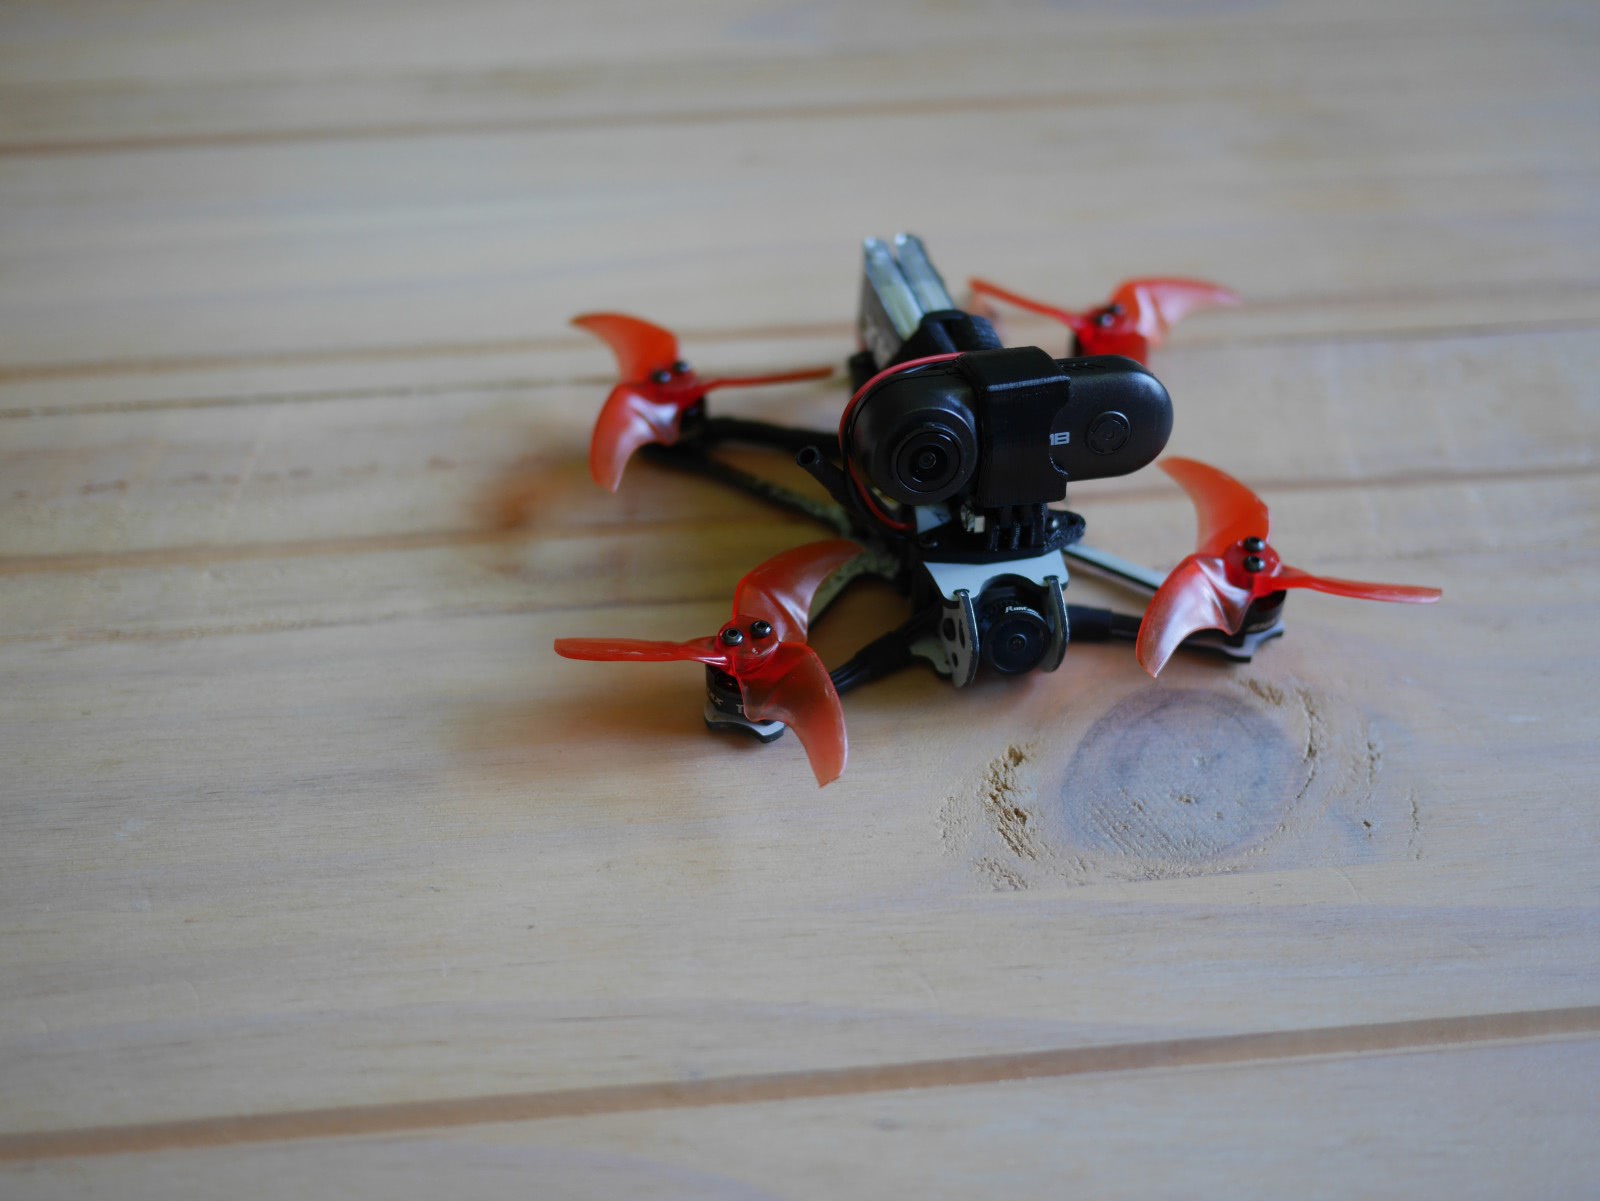
Drone: Tinyhawk III
Coming from RC helicopters it is amazing how durable the drone is. I literally learned flying using stock parts only and keep on flying them as of today.
When getting used to maneuver the drone, I found the default tune in the 3 flight modes Angle, Horizon and Air quite helpful.
In Angle Mode the drone tilt is limited to about 20° so you wont get too fast and you can focus on throttle and momentum control while flying inside.
Switching to Horizon mode is a nice intermediate step. The Angle is no longer limited so you can go fast. This requires you to actively break like in Air mode. However, as the drone still auto levels you can safely fly inside.
After flying Horizon mode inside, going outside and using Air mode was surprisingly easy for me.
In total it took me about 2 Weeks going from bumping into the ceiling and floor on Angle mode to confidently flying Air mode outside.
Goggles: Transporter 2
The part that made me choose this particular RTF Kit are the Googles as they are very well though out.
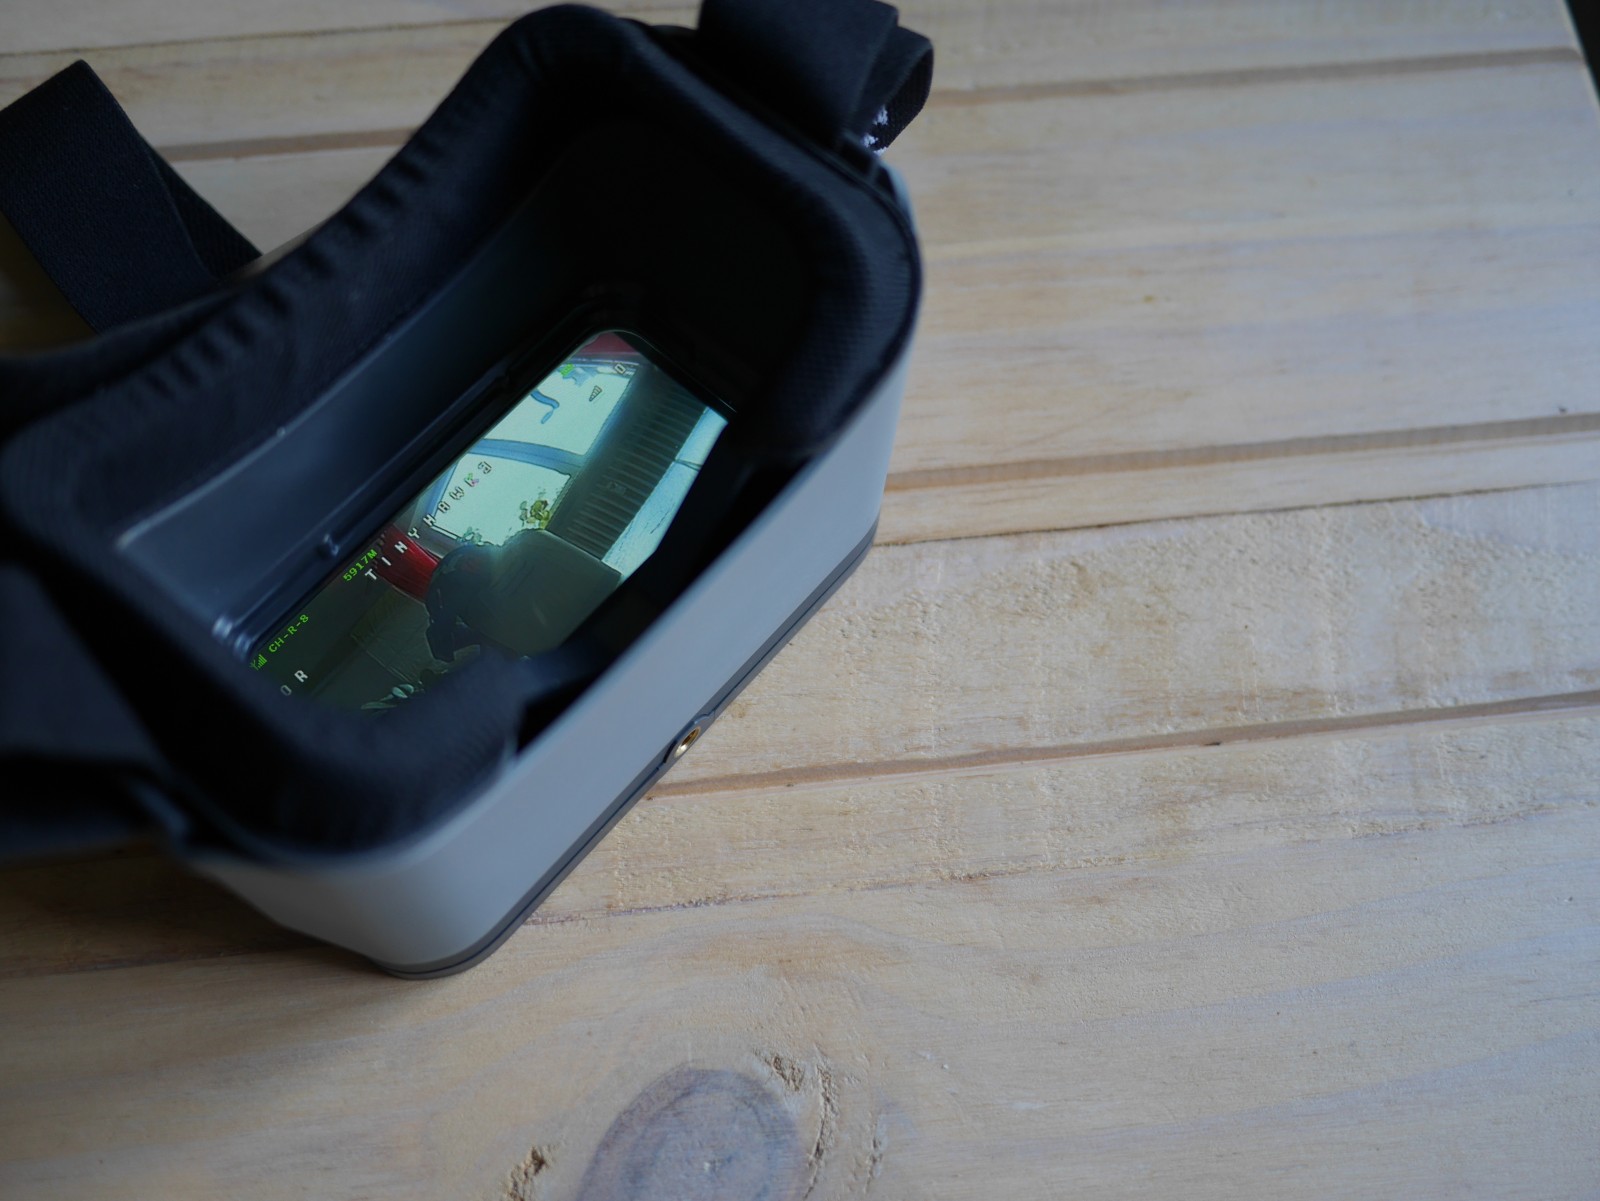
First, you can adjust the focal-length in 3 steps. This is useful if you are near-sighted or if you want to adjust the FOV from immersive to a tunnel view.
Then, the display resolution of 800×480 px is a good fit for analog FPV, where video is transmitted via NTSC (720×480 px). The internal DVR records precisely this resolution when set to D1 mode. There is also a HD mode, but you will not get anything out of it as the incoming image is the bottleneck.
Speaking of which; the RunCam Nano 4 on the Tinyhawk has a resolution of 800 TVL (800×600 px) which again fits in nicely.
Note that the DVR recording is quite bad as it saves white frames as soon as there is some noise in the image, but it gets the job done if you want to review your flight or need to find the drone.
Ultimately, the detachable display unit can be re-purposed once you decide to upgrade to better Goggles – even though I think one can stick with the Transporter 2 Goggles for a while.
One upgrade you can do straight away though, is replacing the linear antennas by a set of polarized ones. This will reduce interference due to reflected signals in closed spaces. A possible choice here are a pair of Foxeer Lollipops that you can get for about 18€.
Battery and Charger
The weakest part is probably the battery & charger. For starters it only comes with one battery which the bundled charger takes about 90 min to charge (likely at 0.3A). Also, you can only charge two batteries at a time.
Fortunately the required 450mAh HV batteries are quite cheap. If you order a pack of 5 from China you can get them for about 4.5€ per piece. You should do that.
As for upgrading to a better charger, the VIFLY WhoopStor for about 33€ is an affordable option. It can charge up to 6 batteries at up to 0.9A. This allows charging the 450mAh batteries at 2C speeding up charging by 3x compared to the bundled charger. On top, it supports checking the battery voltage as well as storage-charging for when you need some days off from flying.
The only thing it lacks compared to a “big” charger is resistance measurement of the batteries.
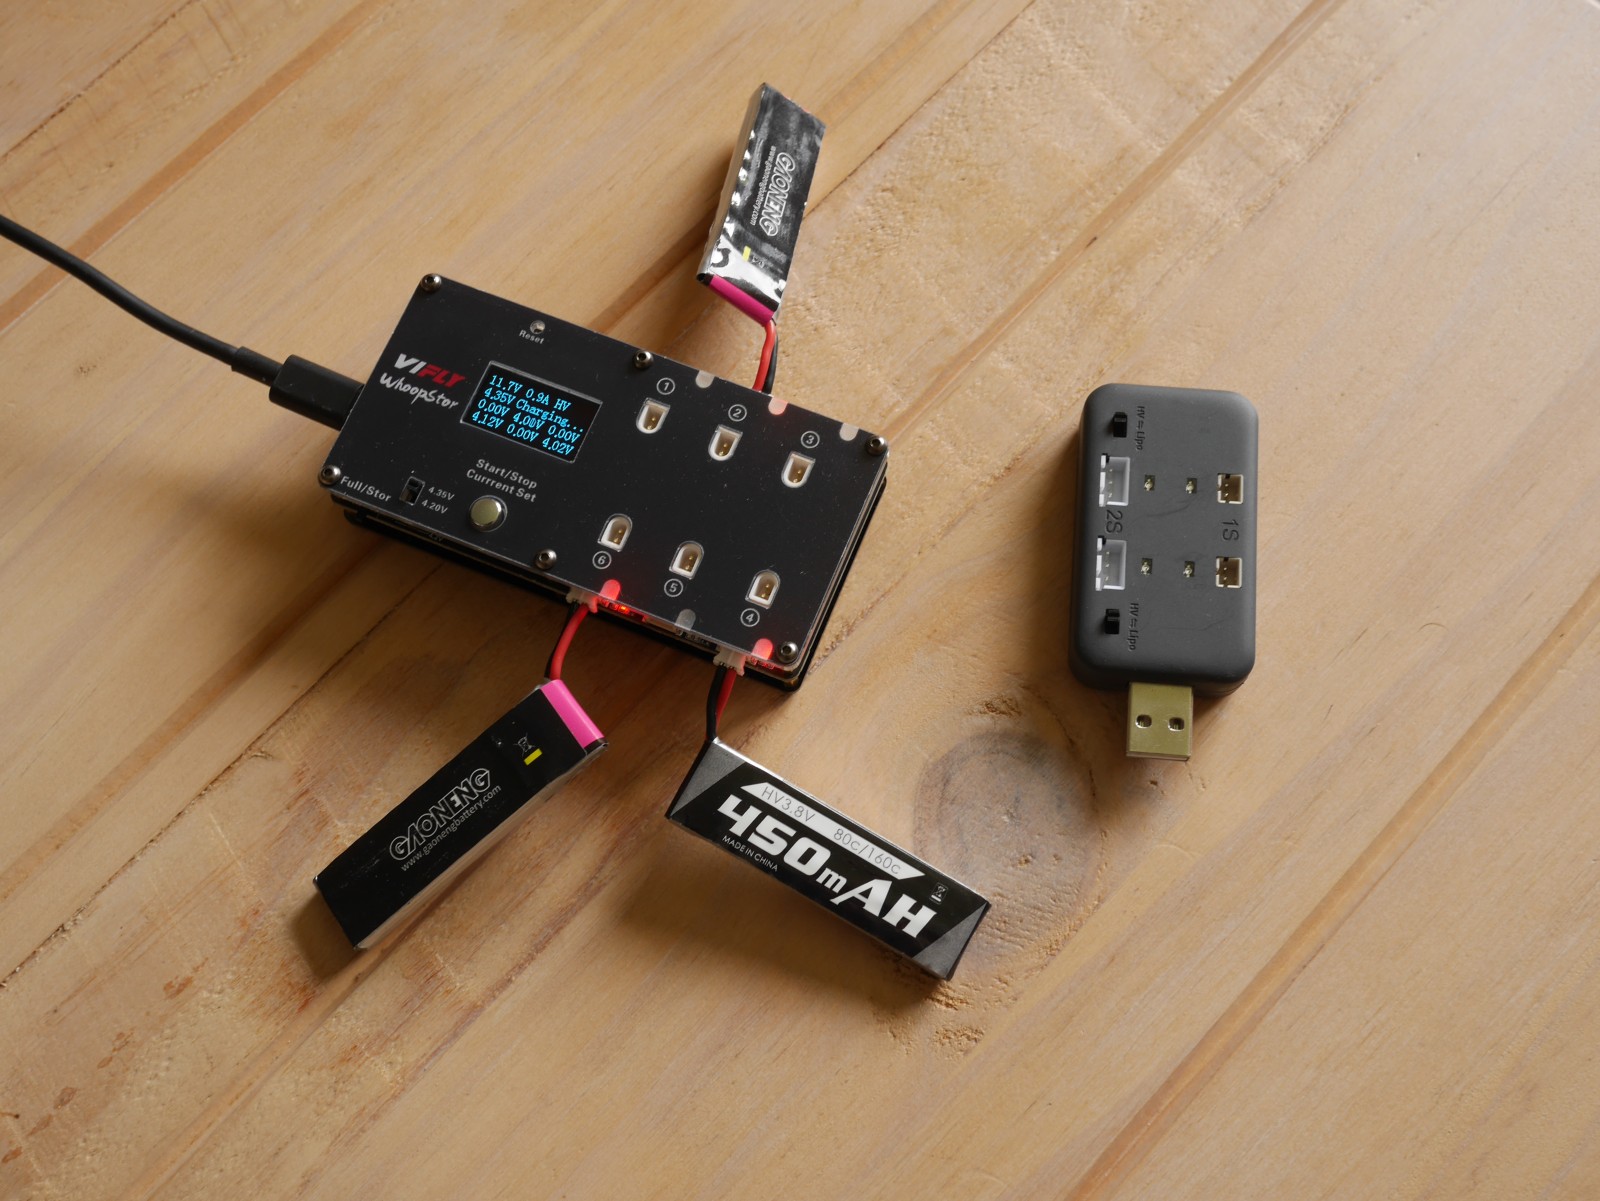
Alternatively, you can get a serious charger, like the ISDT 608AC straight away. But that alone is about 65€ and needs an a serial, balanced charging cable that is about 5€ on top. With this setup you will have to always charge exactly 4 batteries at a time.
Having that charger makes moving to actual 4S in the long run easy though.
Remote: E8 Transmitter
The Transmitter only supports the FrSky D8 and D16 protocols – although there is really no reason to switch it to D16 as there are only 8 channels on the remote and telemetry is shown in your video signal anyway.
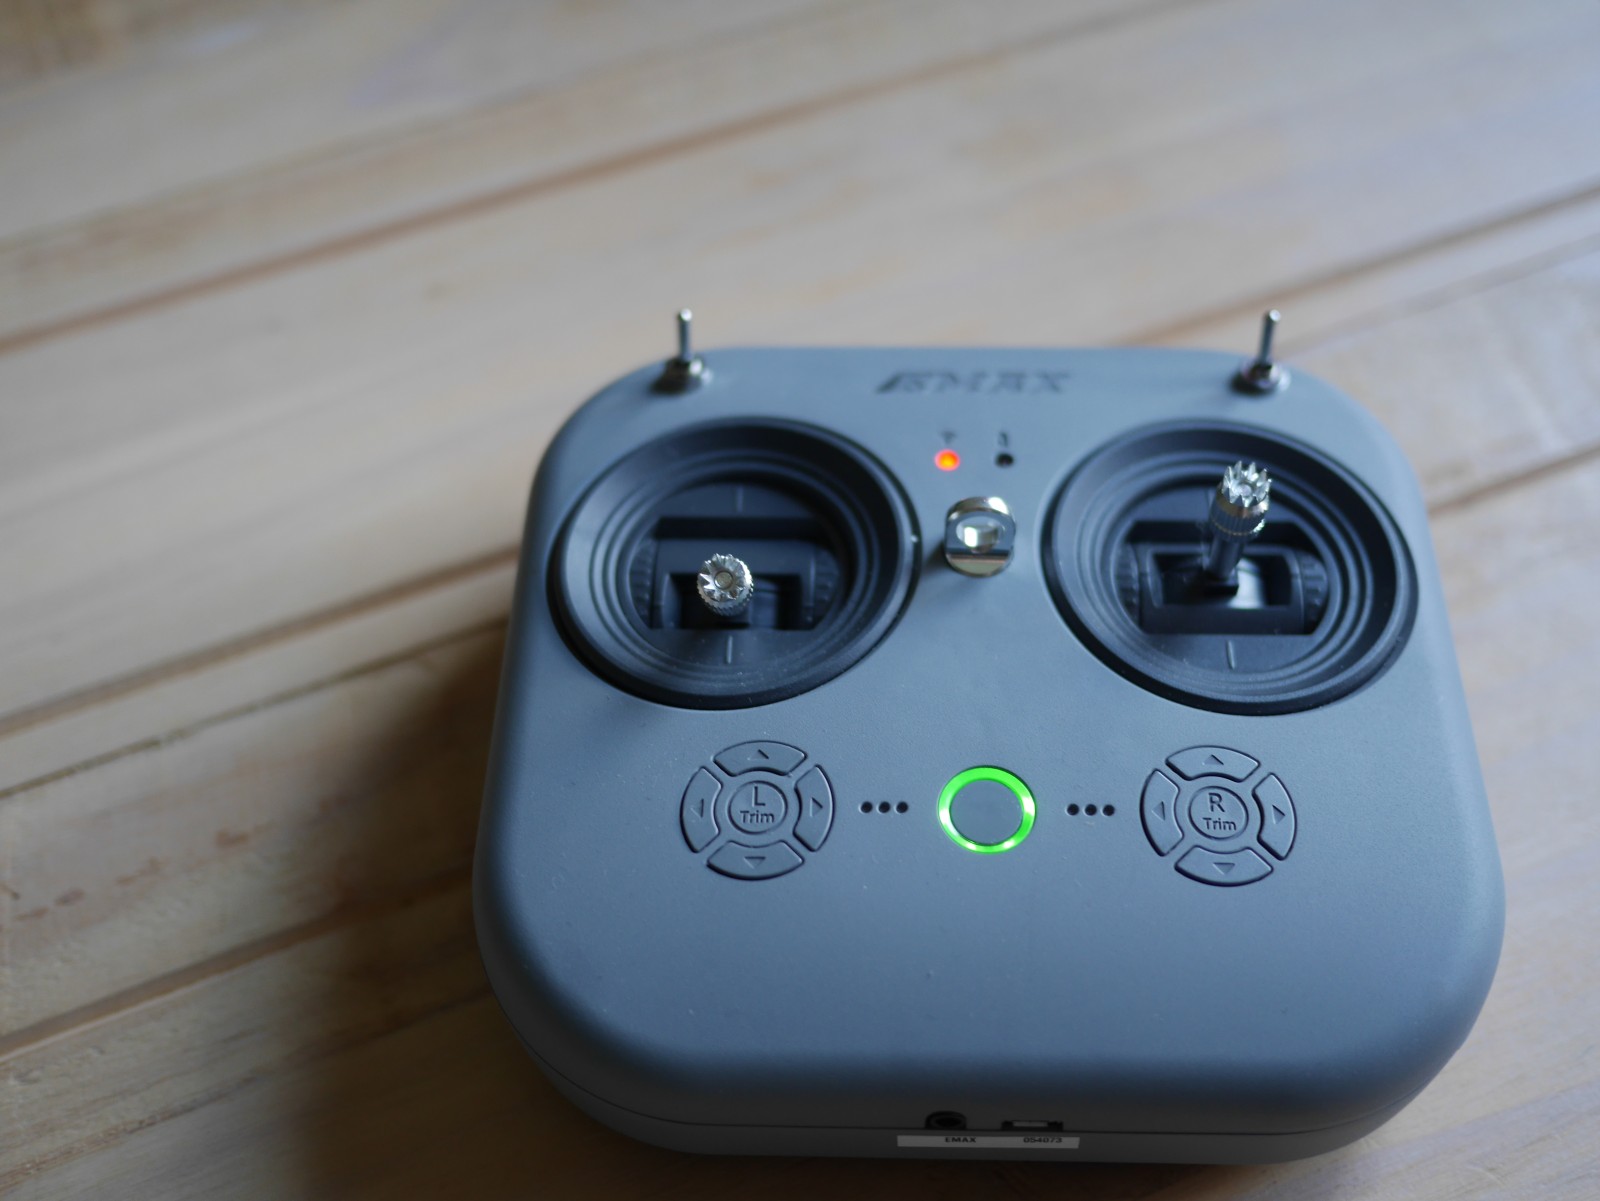
More importantly, it is usable as Joystick when connected to the PC, where each channel is reported as a separate axis – so it will work fine with all FPV Simulators.
Also notable: the radio uses a standard 18650 battery that is compatible with other radios and is worth about 10€.
It would have been nice to have a module bay to be able to attach a ELRS module – however none of the comparable RTF kits in the price range offer this. There cost needs to be cut somewhere I guess.
Speaking of ELRS; you are not really missing out on that with a tinywhoop. D8 still allows you to go for about 1km. The limiting factor will be more likely the tiny RX antenna on the drone and the VTX power. Also, even if you could manage to get that far with the Tinyhawk, retrieving it if it something goes wrong will be a PITA. ELRS really only starts making sense with GPS powered drones, where you got return to home as a failsafe.
I keep hearing that one should go ELRS from the start or you will end up swapping your RX modules on the drones if you only decide to go ELRS later. This is BS as you can just continue using the old remote for the old drones or get a remote that supports both ELRS and D8, like e.g. the Commando 8.
Alternatives
The following alternative Kits that are in a similar price-range and are all brushless, as brushed motors are really not worth the money you save.
EMAX EZ Pilot Pro
This saves you 60$, while you get the same Radio and almost the same Goggles and Drone.
The Goggles have no DVR though and you will not get the nice carrying case.
BETAFPV Cetus Pro
This is also about 60$ cheaper than the Tinyhawk 3. However, the Goggles are way worse: no DVR, fixed focal-length and fixed screen.
What you get here is an easier Angle mode, with altitude-hold and hover-stabilization. The flipside of it is that it is not compatible with the betaflight configurator which is the standard when it comes to tuning the drone – in case you wanted to e.g. configure the OSD content.
Additionally, the drone uses the more modern BT2.0 connector/ batteries. However, the 1S setup does not draw enough Amps for this to make an actual difference. Also, as it is only used on BETAFPV Drones there is less choice of batteries and they are currently more expensive. Then there is the even more modern GNB27 connector at the horizon..
If you prefer Apple products, the above will probably not bother you though.
GEPRC TinyGo
This is a 2S drone, so you get more power, which makes it better outdoors but worse indoors.
Much worse radio; requires 4xAA batteries, has worse gimbals and most importantly does not work as a Joystick when connected to a PC.
Worse Goggles; there is a DVR, but the focal-length is fixed as is the screen.
The deal-breaker is the used FHSS (Futaba) protocol though. This is virtually not used by any other Drone on the market, so you cannot just get another BNF drone to fly with the same radio. And if you upgrade the Radio you will have to go for a multi-protocol version to still be able to fly the drone instead of being able to get the cheaper D8/ D16 only variant.
Where to go next
The following BNF drones are compatible with the Radio and also run on the 450mAh PH2 batteries that you likely piled up while flying.
Happymodel Mobula 7 1S HD
The drone is very similar to the Tinyhawk III, however it comes with the RunCam Split 3 lite. On top of FPV streaming, it can simultaneously record the video as 1080p @ 60fps to a microSD card. The drone provides gyro logging too, so you can further stabilize the results with gyroflow at the PC.
So if you want to produce nicer videos, this is a good upgrade.
Notably, the drone comes with a serial, balanced charging board as discussed in the charger section above.
EMAX Tinyhawk II Freestyle
This is the drone to upgrade to if you prefer to fly outdoors. It is larger and heavier than the Tinyhawk III. Also it is more powerful as it flies on 2S. The latter is realized using the battery connector, so you still can use the 1S batteries.
If you like tinkering, you can also get nicer videos out of it by packing a RunCam Thumb on top. The drone is powerful enough to carry to extra ~12g of weight.
Note, that this requires soldering-on a power connector for the camera to the flight-controller as the cam has no internal power-supply.
Usage with Ubuntu
If you want to use the betaflight-configurator on Ubuntu, make sure that you have permissions to access the USB serial device by being in the dialout group as:
sudo usermod -a -G dialout $USERThe Remote is just plug-and-play (as a USB HID Gamepad) and is correctly recognized by e.g. FPV.SkyDive, which itself nicely runs on Linux through Steam/ Proton.
BlueJay ESC firmware
People online ™ are telling that one can get increased flight-time by replacing the ESC Firmware by BlueJay and enabling the bidirectional DShot protocol.
However, the TH III already comes with the JESC 2.3 48Khz ESC firmware, where the 48Khz part is what matters for flight-time. Therefore, you will not get any benefit here.
Actually, my flight-time decreased by 15% (from 4:44 min to 4:02 min) when switching to bluejay & bidirectional DSHOT300.
Youtube Channels to follow
Unfortunately there are a lot of youtube channels with a wide reach that have no clue what they are talking about. Dudes sitting in a basement that get a commission when something is sold is not a good combination. Here are some channels that are actually good