State of the xpad Xbox Controller Driver

Since my last post regarding the Xbox 360 Wireless Controller on Ubuntu, I have spent quite some time digging through different version of the xpad driver and their issues.

The following issues are those I encountered with xpad upstream at the time I wrote the first post. Some of them are fixed by now,  while for others the fixes are pending – but lets start from the beginning..

However if all you want is a driver where the mentioned bugs are fixed

Continue reading State of the xpad Xbox Controller Driver

IcyBox IB-RD3620SU3: Impressions & Silence Mod

The IcyBox is a good  RAID case with USB3.0 support – however the stock fan is quite loud as it causes some vibrations.

The only bummer about it is the used JMB391 RAID chipset, which does not support RAID operation with drives larger than 8 TB.

Linux hint: if you want to read the SMART attributes of the drives (in single mode), use

sudo smartctl -d jmb39x,<strong>N</strong> -a /dev/sd<strong>X</strong>

Where N can be either 0 or 1, meaning drive in first or second bay.

Silencing the IcyBox

Next we will replace the stock fan with a Noiseblocker PR-1 BlackSilentPro Fan which is not only silent but also has a better cooling performance.

In order to perform the depicted steps you will need the following tools

  • soldering iron
  • shrink-on tube
  • diagonal cutter

Note however that as the height of the Noiseblocker is 25mm instead of the 10mm of the stock fan it will stand out from the case.

Updating Crucial MX100 Firmware with Ubuntu

There has been a Firmware update for the Crucial MX100 to MU02. In case you are running Ubuntu there is an easy way to perform the update without using a CD or USB Stick.

As the firmware comes in form of an iso image containing Tiny Core Linux, we can instruct grub2 to directly boot from it. Here is how:

  1. append the following to /etc/grub.d/40_custom:
    menuentry "MX100 FW Update" {
     set isofile="/home/<USERNAME>/Downloads/MX100_MU02_BOOTABLE_ALL_CAP.iso"
     # assuming your home is on /dev/sda3 ATTENTION: change this so it matches your setup
     loopback loop (hd0,msdos3)$isofile
     linux (loop)/boot/vmlinuz libata.allow_tpm=1 quiet base loglevel=3 waitusb=10 superuser rssd-fw-update rssd-fwdir=/opt/firmware rssd-model=MX100
     initrd (loop)/boot/core.gz
    }

    read this for details of the file format.

  2. run sudo update-grub
  3. reboot and select “MX100 FW Update”
  4. Now you can delete the menuentry created in step1

Note that this actually much “cleaner” than using windows where you have to download 150MB of the Crucial Store Executive Software which actually is a local webserver written in Java (urgh!). But all it can do is display some SMART monitoring information and automatically perform the above steps on windows.

Header Image CC-by MiNe

OpenGL Matrices – the missing bits

While generally the available documentation on how the OpenGL matrices work is quite good, there are some missing bits. Although not necessary for your everyday rendering, they give one some insight on how rasterization in general and OpenGL in special works.

W coordinate after perspective divide

After conversion to normalized device coordinates(ndc) by applying a matrix like

\begin{bmatrix}A & 0 & B & 0\\ 0 & C & D & 0\\ 0 & 0 & E & F\\ 0& 0 & -1 & 0\end{bmatrix} \begin{pmatrix} x \\ y \\ z \\ w \end{pmatrix}

one might think that projection is applied on each vertex looks like

\vec{v}_{ndc} = \frac{1}{w} \begin{pmatrix} x \\ y \\ z \\ w \end{pmatrix} = \begin{pmatrix} \tfrac{x}{w} \\ \tfrac{y}{w} \\ \tfrac{z}{w} \\ 1 \end{pmatrix}

however it actually looks like

\vec{v}_{ndc} = \begin{pmatrix} \tfrac{x}{w} \\ \tfrac{y}{w} \\ \tfrac{z}{w} \\ \tfrac{1}{w} \end{pmatrix}

the w coordinate is not divided by itself, but is inverted instead. This is done because the interpolation between vertices still needs to take place and for perspective correct interpolation one needs the camera space depth z = -w_{cam}.

\begin{aligned} \vec{v}_{\alpha} &= \frac{(1-\alpha) \tfrac{\vec{v}_0}{-z_0} + \alpha \tfrac{\vec{v}_1}{-z_1}}{(1 - \alpha)\tfrac{1}{-z_0} + \alpha \tfrac{1}{-z_1}} \\[1.5em] &= \frac{(1-\alpha)\vec{v}_0 w_{0_{ndc}} + \alpha\vec{v}_1 w_{1_{ndc}}}{(1-\alpha) w_{0_{ndc}} + \alpha w_{1_{ndc}}} \end{aligned}

instead of dividing by -z we can multiply with w_{ndc} as multiplication is faster than division.

Note that for brevity the given formula assumes a scanline based rasterizer as it interpolates only between two vertices. The general approach is to use barycentric coordinates to interpolate between all three vertices simultaneously.

Row major or column major

Even though even Wikipedia says OpenGL is column major, it is actually storage agnostic. However by default it interprets your 16 element array as:

\begin{bmatrix}m_0 & m_4 & m_8 & m_{12}\\ m_1 & m_5& m_9 & m_{13}\\ m_2 & m_6 & m_{10} & m_{14}\\ m_3 & m_7 & m_{11} & m_{15}\end{bmatrix}

Yet most OpenGL functions dealing with matrices offer a transpose parameter which you can use to specify the used order. For a comparison of storage orders see the Eigen documentation.

Notably however, GLSL matrices do neither follow C nor mathematical notation; the mat2x4 M type has 2 columns and 4 rows and thus M \in \mathbb{R}^{4 \times 2} mathematically.
Consequently though – albeit breaking with the C notation – M[0] will return the first column (vec4).

Now, if you use the transpose parameter mentioned before, prepare to think hard about the data you are actually getting in the Shader.

Using the XBox Controller with Ubuntu (the modern way)

If you want to get your Xbox One/ Xbox 360 running on ubuntu you basically have the choice between the in-kernel xpad driver and the userspace xboxdrv driver.

Most of the guides recommend using xboxdrv as xpad has been stagnating. However using xboxdrv has some disadvantages; as it runs as a daemon in userspace you have to manually take care of starting/ stopping it and giving your user access to the virtual devices it creates.
Xpad on the other hand just works as any other linux driver directly inside the kernel which is more  efficient and hassle free.

Fortunately while pushing SteamOS Valve has updated the xpad driver bringing it on par with xboxdrv:

  • they added support for Xbox One Controller
  • they fixed the communication protocol – no more blinking controller light

Update July 22, 2015

Unfortunately there are still several issues with the SteamOS driver. This follow-up post discusses them and the solutions in detail.

The bottom line is that I updated the official linux driver with chunks found in the SteamOS driver, as well as in several patches floating around the internet. Code and install instructions are available at Github.

How to draw a line interpolating 2 colors with opencv

The built-in opencv line() drawing function allows to draw a variety of lines. Unfortunately it does not allow drawing a gradient line interpolating the colors at its start and end.

However implementing this on our own is quite easy:

using namespace cv;

void line2(Mat& img, const Point& start, const Point& end, 
                     const Scalar& c1,   const Scalar& c2) {
    LineIterator iter(img, start, end, LINE_8);

    for (int i = 0; i < iter.count; i++, iter++) {
       double alpha = double(i) / iter.count;
       // note: using img.at<T>(iter.pos()) is faster, but 
       // then you have to deal with mat type and channel number yourself
       img(Rect(iter.pos(), Size(1, 1))) = c1 * (1.0 - alpha) + c2 * alpha;
    }
}

Introducing Sensors Unity

Sensors-Unity is a new lm-sensors GUI for the Unity Desktop. It allows monitoring the output of the sensors CLI utility while integrating with the Unity desktop. This means there is no GPU/ HDD support and no plotting.
If you need those you are probably better suited with psensor. However if you just need a overview of the sensor readings and if you appreciate a clean UI you should give it a shot.

It is written in Python3 / GTK3 and uses sensors.py. You can contribute code or help translating via launchpad.

Overview

In contrast to other applications the interface is designed around being a application. Instead of getting another indicator in the top-right, you get an icon in the launcher:

The user interface
The user interface

The idea is that you do not need the sensor information all the time. Instead you launch the app when you do. If you want to passively monitor some value you can minimize the app while selecting the value to display in the launcher icon.

To get the data libsensors is used which means that you need to get lm-sensors running before you will see anything.

However once the sensors command line utility works you will see the same results in Sensors-Unity as it shares the configuration in /etc/sensors3.conf.

Configuration

Unfortunately configuring lm-sensors via /etc/sensors3.conf is quite poorly documented, so lets quickly recap the usage.

  • /etc/sensors3.conf contains the configuration for all sensors known by lm-sensors
  • however every mainboard can use each chip in a slightly different way
  • therefore you can override /etc/sensors3.conf by placing your specific configuration in /etc/sensors.d/ (see this for details)
  • you can find a list of these board specific configurations in the lm-sensors repository
  • to disable a sensor use the ignore statement
    #ignore everything from this chip
    chip "acpitz-virtual-0"
       ignore temp1
       ignore temp2 
    
  • to change the label use the label statement
    chip "coretemp-*"
       label temp1 "CPU Package"
    

Sensors-Unity Specific Configuration

Sensors-Unity allows using the Pango Markup Language for sensor labels. For instance if you want “VAXG” instead of “CPU Graphics” to be displayed, you would write:

label in4 "V<sub>AXG</sub>"

In order not to interfere with other utilities and to allow per-user configuration of the labels/ sensors Sensors-Unity first tries to read ~/.config/sensors3.conf before continuing with the lm-sensors config lookup described above.

introducing sensors.py

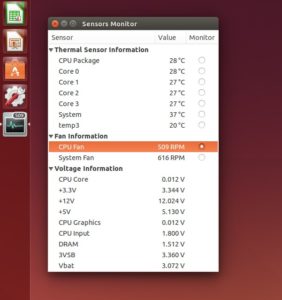
sensors.py is a new python wrapper for libsensors of the lm-sensors project. libsensors is what you want to use to programmatically read the sensor values of your PC with Linux instead of parsing the output of the sensors utility.

sensors.py is not the first wrapper – there are two alternatives, confusingly both named PySensors.

PySensors (ctypes) follows a similar approach to sensors.py by using ctypes. However instead of exposing the C API it tries to be a object-oriented(OO) abstraction, which unfortunately lacks many features and makes the mapping to the underlying API hard. Furthermore it does not support Python3.

PySensors (extension module)  does not use ctypes and thus is more efficient, but if you write a python script probably compiling a extension module is worse than losing some performance when reading the values.
Additionally there is python3 support and also some OO abstraction. The latter is somewhere in between the C API and proper OO: sensors_get_label(chip_name, feature) is ChipName.get_label(feature) instead of feature.get_label().

So what makes sensors.py immediately different is that it does not try to do any OO abstraction but instead gives you access to the raw C API. It only adds minor pythonification: you dont need to mess with pointers, errors are converted to exceptions and strings are correctly converted from/ to utf-8 for you.

However working with the C API directly is tiresome at times – therefore there is also an optional iterator API, which is best shown by a demo:

import sensors

sensors.init()

for chip in sensors.ChipIterator("coretemp-*"):
    print(sensors.chip_snprintf_name(chip)+" ("+sensors.get_adapter_name(chip.bus)+")")
    
    for feature in sensors.FeatureIterator(chip):
        sfi = sensors.SubFeatureIterator(chip, feature)
        vals = [sensors.get_value(chip, sf.number) for sf in sfi]
        label = sensors.get_label(chip, feature)
        
        print("\t"+label+": "+str(vals))

sensors.cleanup()

result:

coretemp-isa-0000 (ISA adapter)
 Physical id 0: [38.0, 80.0, 100.0, 0.0]
 Core 0: [37.0, 80.0, 100.0, 0.0]
 Core 1: [35.0, 80.0, 100.0, 0.0]
 Core 2: [38.0, 80.0, 100.0, 0.0]
 Core 3: [36.0, 80.0, 100.0, 0.0]

for a more sophisticated example see the example.py in the repository.

Replacing your desktop laptop with a ITX workstation

If you use your laptop as a desktop replacement, you will at some point get an external display and a mouse/ keyboard for more convenient usage.
At this point the laptop becomes only a small case of non-upgradable components.

Now you could as well replace your laptop by a real case of comparable size.  This will make your PC not only easily upgradable, but allow higher-end components while being more silent at the same time.

Continue reading Replacing your desktop laptop with a ITX workstation

Streaming the Screen on Android

In this post I want to discuss way of getting the screen content of your Android device to the TV or monitor. If you wonder why one might want to do such a thing – just think about playing some Android games with a bluetooth gamepad or watching a movie where your PC is not available.

Specifically I want to introduce SlimPort. SlimPort is a feature of Nexus devices which is unfortunately not covered much in reviews.
Basically SlimPort is DisplayPort over the Micro-USB connection of your device allowing you to mirror its display.

But the future has arrived: we got Miracast!

One might wonder why one should go through the hassle of using a old-school HDMI cable.
You can get a Chromecast Stick for 35$ and nowadays it also supports Miracast so you can simply stream the images over WiFi.

Well Miracast is all nice if all you need to do is to put up some slides without carrying all possible adapters with you. But as soon as you try to stream a movie or a game you will reach its limitations.

Remember that Miracast works by grabbing the Framebuffer and compressing it with H.264. While encoding happens in hardware it still takes some time and it inevitably introduces compression artifacts. This means:

  • in games you get a noticeable lag – especially in FullHD
  • in movies you get noticeable artifacts – especially in FullHD
  • in both cases your battery will get drained for heavy WiFi and Encoder usage

Going old-school

Going with the old-school cable on the other hand you get HDMI 1.4 transfer rates for up to 1080p at 60Hz while saving the battery.

Configuring the second screen is quite straightforward in android. As Mirroring is your only option, there is actually nothing to configure. Once you connect the adapter android will set up your monitor based on its EDID information and transfer image and audio over HDMI.
In case you only want to have the image over HDMI, simply attach your speakers to the phone and android will re-route the audio.
The days where you had to manually set up everything are over.

Furthermore most adapters have an micro-USB port allowing to still charge your phone while using SlimPort.

Device Support

The downside is that most of the devices do not support SlimPort. The device list more or less boils down to

  • Google Nexus 4/ 5
  • Google Nexus 7 (2013)
  • LG G2/ G3

Samsung devices go with the alternative MHL. Comparing these two SlimPort has the bandwidth advantage of 5Gb/s vs. 3Gb/s of MHL so it does not have to compress that much. However both are clearly better than going wireless.