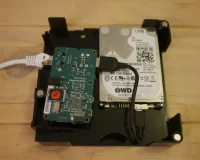
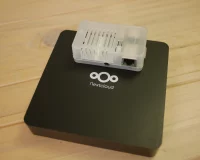
Odroid U3 in the Nextcloud Box

Until now I used a microSD card for storage of my Owncloud setup. The drawback of doing so is that microSD cards only allow for so many writes until they die and go in a read-only mode.

Therefore the Nextcloud box is an attractive upgrade allowing to use a more failure proof HDD while still keeping everything inside the same housing.

The housing

The first thing to note is that the housing is much larger than one might think from the photos. See the comparison photo with the Odroid housing. Actually this should not be a surprise as the 2.5″ HDD alone is larger than the Odroid board.

Continue reading Odroid U3 in the Nextcloud Box

WordPress, AMP and Ads

Delivering your content not only as HTML, but also using the AMP-HTML subset not only reduces the loading times for your readers, but also improves the score of your site in the Google results. On top of that your site will be proxied by the Google AMP Cache, lowering your server load.

If you are using WordPress, adding AMP support is as easy as installing the AMP-Plugin which is developed by Automattic, the company behind WordPress.

Doing so will likely get you more visitors, but unfortunately there is a drawback: the plugin does not support advertisements out of the box.

So if you – like me – rely on advertisements to cover the server costs, you have to apply some tweaks to get ads on AMP pages as well. This is what this post will be about.

Extending the AMP Plugin

Basically you have to modify your current theme. If you are using an off-the shelf theme, you should create a child-theme – otherwise just extend the functions.php of your custom theme.

AMP uses the amp-ad tag for displaying ads which requires a additional script to work. Currently it also works without adding a script, but it already generates a warning. Lets be safe here and add the required script to the list:


add_action( 'amp_post_template_data', 'xyz_amp_post_template_add_ad_script' );
function xyz_amp_post_template_add_ad_script( $data ) {
	$data['amp_component_scripts']['amp-ad'] = 'https://cdn.ampproject.org/v0/amp-ad-0.1.js';
	return $data;
}

Next we create a filter that injects the actual amp-ad tags into out content:


add_action( 'pre_amp_render_post', 'xyz_amp_add_custom_actions' );
function xyz_amp_add_custom_actions() {
    add_filter( 'the_content', 'xyz_amp_add_ad' );
}

function xyz_amp_add_ad( $content ) {
    // hack for skipping featured-image
    if ( false !== strpos( $content, 'wp-post-image')) {
        // as it unfortunately uses get_post too
        // fixed in AMP 0.4.1
        return $content;
    }

    return
    '<amp-ad width=300 height=250
         type="adsense"
         data-ad-client="$YOUR_ID"
         data-ad-slot="$YOUR_TOP_SLOT">
     </amp-ad>'
    .$content.
    '<amp-ad width=300 height=250
         type="adsense"
         data-ad-client="$YOUR_ID"
         data-ad-slot="$YOUR_BOTTOM_SLOT">
     </amp-ad>';
}

The snippet above assumes you are using google adsense. If you want to integrate a different Ad Network, look here for the specific syntax.

On OGRE versions

Currently one can choose between the following OGRE versions
1.9, 1.10, 2.0 and 2.1

However the versioning scheme has become completely arbitrary while still resembling semantic versioning.
As a consequence somebody even had to put a “What version to choose?” guide on the OGRE homepage.

Unfortunately the guide confuses more than it helps:

Continue reading On OGRE versions

Introducing the OGRE fork on GitHub

in this post I want to introduce the OGRE fork on github. The goal of the fork is to provide a stable and reliable OGRE 1.x series while at the same time modernizing parts under the hood updates.

The idea behind this is that there are many existing 1.x codebases, actually a whole 1.x ecosystem, that can be modernized that way.
The last release of the 1.x series was over 2 years ago, so using the current 1.10 branch already gives a lot of improvements.

Continue reading Introducing the OGRE fork on GitHub

Learning Modern 3D Graphics Programming

one of the best resources to learn modern OpenGL and the one which helped me quite a lot is the Book at www.arcsynthesis.org/gltut/ – or lets better say was. Unfortunately the domain expired so the content is no longer reachable.

Luckily the Book was designed as an open source project and the code to generate the website is still available at Bitbucket. Unfortunately this repository does not seem to be actively maintained any more.

Therefore I set out to make the Book to be available again using Github Pages. You can find the results here:

https://paroj.github.io/gltut/

However I did not simply mirror the pages, but also improved it at several places. So what has changed so far?

Continue reading Learning Modern 3D Graphics Programming

meCoffee PID controller Review for the Rancilio Silvia

The Rancilio Silvia Espresso Machine has one major weakness: the high fluctuation of the default thermostat.
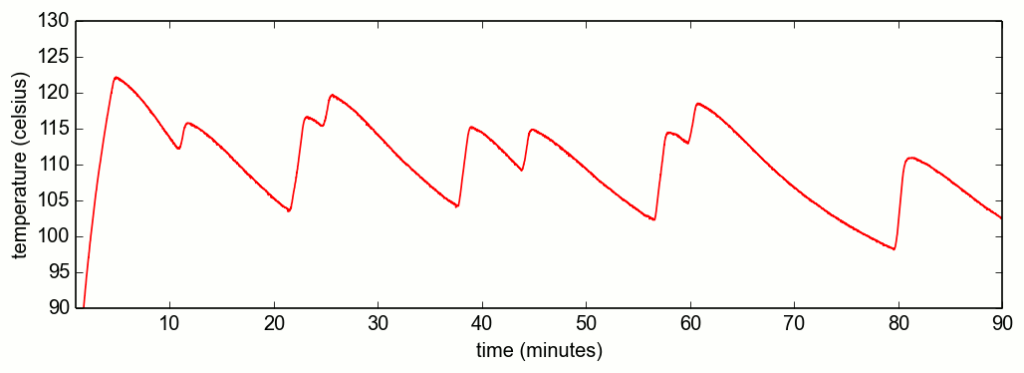
The taste of the espresso already varies with temperature deviations as small as 1°C, but the thermostat of the Silvia V3, V4 has a range of ~20°C (~30°C for Silvia V1, V2).

a thermostat having a hard time keeping the target temperature of 110°C

So to get a decent tasting espresso one need to predict the heating phase of the boiler, which is called temperature surfing. However this involves wasting water and one also needs the right timing which is especially difficult for beginners.

PID Controlled Temperature

A better solution to is to replace the default thermostat with a digital one. This means adding microcontroller that will monitor the temperature using the PID algorithm. This way you always have the right temperature – without surfing. Furthermore the microcontroller can be used to add some fancy features to the machine like preinfusion or a shot timer.

Continue reading meCoffee PID controller Review for the Rancilio Silvia

Rust prevention on Rancilio Silvia

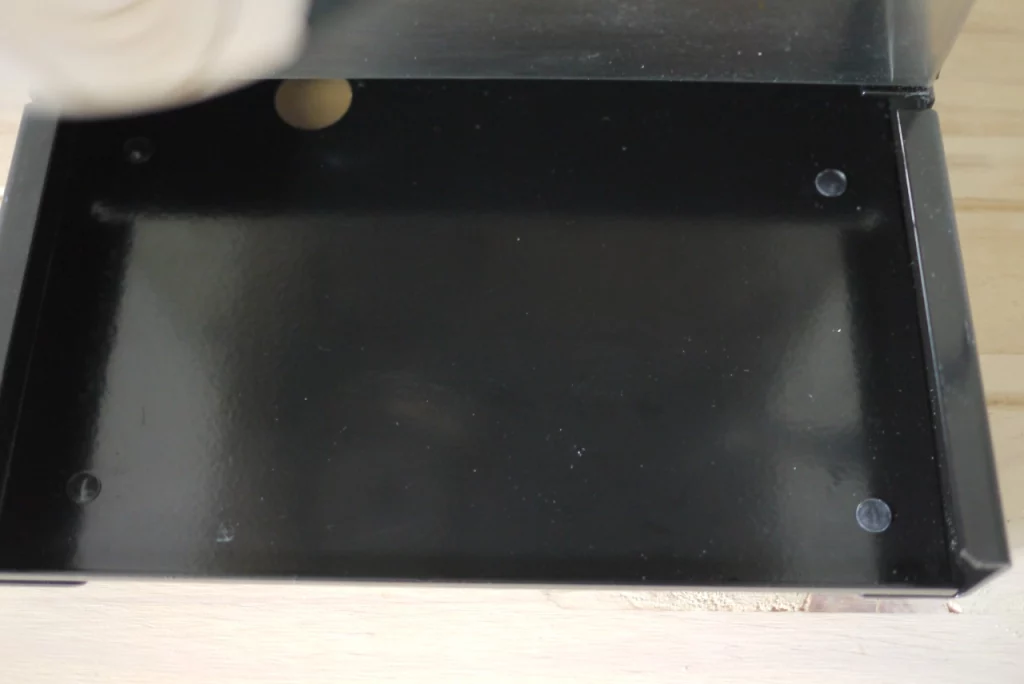
The main point one can criticise about the build of the Rancilio Silvia is that it is not all stainless steel. While many important parts like the drip tray and the cup holder are, the main frame (black) is just powder coated steel. This means it can rust and according to reports on the internet it actually does.
However one can do some small and cheap modifications to drastically reduce the risk.

Rust is the product of the reaction of steel and oxygen in the presence of water, so to prevent rust one either has to remove oxygen or water.
The powder coating of the frame typically removes both, but over time scratches penetrate the coating and the frame can rust.

Prevent Scratches

The first step to prevent rust is therefore to prevent scratches on the steel frame. To this end one can add small rubber knobs (8mm diameter) at places where movable parts come in contact with the frame

Prevent Water Splashes

The other thing one can do is to ensure that less water come in contact with the frame. Unfortunately the drain on the Silvia is quite short, so water splashes in all directions and can run behind the drip tray – especially if it is not moved all the way back. See the following video:

An easy fix to improve the situation is to extend the drain with a silicon pipe (19mm inner diameter) for about 4cm. After the modification, the water hardly splashes any more. (again this is the worst-case scenario with the drip tray all the way in the front)

Header Image CC-sa-by Darkone

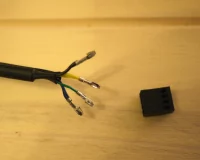
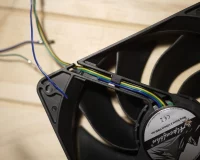
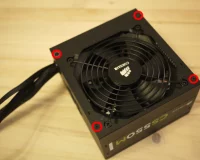
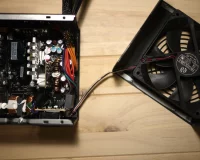
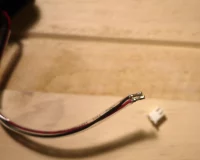
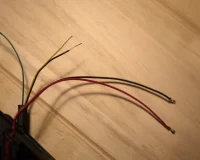
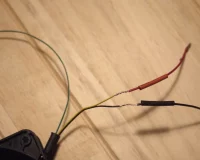
Changing the Fan on the Corsair CS550M

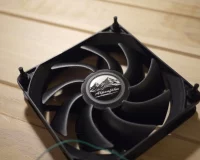
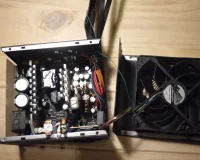
While the Corasair CS550M is a good power supply unit (PSU), the fan or more specifically the fan bearing is quite poor. Even though the fan is temperature controlled, this results in a annoying clickering noise. Therefore one might want to replace it with a better quality, more quite fan.

In order to do so, you will need the following tools:

  • soldering iron
  • shrink-on tube
  • diagonal cutter
  • flat nose pliers
  • convenience: cable stripper

However note that the used high power capacitors store enough charge to shock you even several minutes after disconnecting the PSU. So you should wait for about 10minutes after disconnecting the PSU and even then watch out not to touch the pins of the capacitors.

If you set-up everything correctly, follow these steps to silence your corsair:

now you can re-asseble the PSU housing and optionally attach the tacho cable to a free plug on your mainboard to monitor the PSU fan.

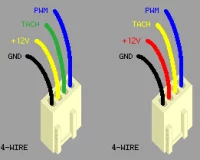
This post was inspired by this youtube video. The pc fan connector diagram was made by pavouk.org.

Converting a Ubuntu and Windows dual-boot installation to UEFI

UEFI is the successor to BIOS for communicating with the Firmware on your Mainboard.
While the first BIOS was released with the IBM-PC in 1981, the first UEFI version (EFI 2.0) was released 25 years later in 2006 building upon the lessons learned in that timespan. So UEFI is without any doubt the more modern solution.

The user-visible advantages of using UEFI instead of BIOS are

You could reinstall both Windows and Ubuntu to get UEFI. However it is also possible to convert existing installations of both on the fly – without the backup/ restore cycle. You should still do a backup in case something goes wrong though.

Prerequisites

Only the 64bit Versions of Windows support UEFI. Therefore this guide assumes that you run the 64bit versions of both Windows and Ubuntu.

Furthermore verify the following items before you continue – otherwise you will not be able to finish the conversion. Use GParted in case you have not enough space before the first or after the last partition.

  • 250MB space in front of first partition
    Typically Windows 8 creates a 350MB System Partition upon installation. This space can be reclaimed for a 100MB EFI partiton and a new 100MB Windows System partition.
  • 1-2MB behind last partiton (for the GPT backup)
  • UEFI bootable Ubuntu USB drive.
    You can use the startup disk creator on ubuntu with an Ubuntu 14.04+ ISO.
  • UEFI bootable Windows USB drive.
    You can use the Microsoft Media Creation tool for Windows 10 to get one.

to test that the sticks are indeed UEFI compatible, try booting them with CSM Mode disabled in your BIOS.

Convert the drive to GPT

UEFI requires a GUID Partition Table (GPT), so first we need to convert from MBR to GPT.

After this step you will not be able to boot your system any more. So make sure you have the Ubuntu USB drive ready.

We will use gdisk to perform the conversion as following:

sudo gdisk /dev/sdX
Command (? for help): w

where sdX is your system drive (e.g. sda)

Convert Windows to UEFI

Now boot your Windows USB drive and enter the command prompt as described in this Microsoft Technet article at step 6.

Continue with the following steps from the Article. Note that we have skipped steps 1-4 as we used Ubuntu to convert the disk to GPT.

We have now created a EFI partition, a new EFI compatible Windows System Partition and we have installed the Windows Bootloader to the EFI partition. Your Windows installation should now start again.
At this point you could also perform an upgrade to Windows 10, as the upgrade would erase grub from the EFI partition anyway.

Next we are going to install grub to the EFI partition and make it manage the boot.

Enter a Ubuntu chroot

As we can not directly boot our Ubuntu installation, we will instead boot from the Ubuntu USB drive and the switch to the installed Ubuntu.
To do the switch we have to setup and enter a chroot as following

sudo mount /dev/sdXY /mnt 
sudo mount /dev/sdX1 /mnt/boot/efi 
sudo mount -o bind /dev /mnt/dev
sudo mount -o bind /sys /mnt/sys
sudo mount -t proc /proc /mnt/proc
sudo cp /proc/mounts /mnt/etc/mtab
sudo cp /etc/resolv.conf /mnt/etc/resolv.conf
sudo chroot /mnt

where sdXY is the partition where your Ubuntu system is installed (e.g. sda5)

Convert Ubuntu to UEFI

Inside your Ubuntu Installation we have to replace grub for BIOS (aka grub-pc) with grub for UEFI (aka grub-efi) as:

sudo apt-get --reinstall install grub-common grub-efi-amd64 os-prober

this would be enough to get the system booting again, however we also aim for secure boot so we also need to install the following:

sudo apt-get install shim-signed grub-efi-amd64-signed linux-signed-generic

This installs signatures for grub and the kernel which are used to verify the integrity of these at boot. Furthermore we install shim, which is a passthrough bootloader that translates from the Microsoft signatures on you mainboard to the signatures by Canonical used to sign grub and the kernel (see this for details).

Next we finally install grub to the EFI partition by:

sudo grub-install --uefi-secure-boot /dev/sdX
sudo update-grub

where sdX is again your system drive (e.g. sda).

Now you can enable secure boot in your BIOS and benefit. Note that some BIOS implementations additionaly require you to select the trusted signatures. Look out for an option called “Install Default Secure Boot keys” or similar to select the Microsoft signatures.
State of the xpad Xbox Controller Driver

Since my last post regarding the Xbox 360 Wireless Controller on Ubuntu, I have spent quite some time digging through different version of the xpad driver and their issues.

The following issues are those I encountered with xpad upstream at the time I wrote the first post. Some of them are fixed by now,  while for others the fixes are pending – but lets start from the beginning..

However if all you want is a driver where the mentioned bugs are fixed

Continue reading State of the xpad Xbox Controller Driver